Attribute Quality Check
Steps
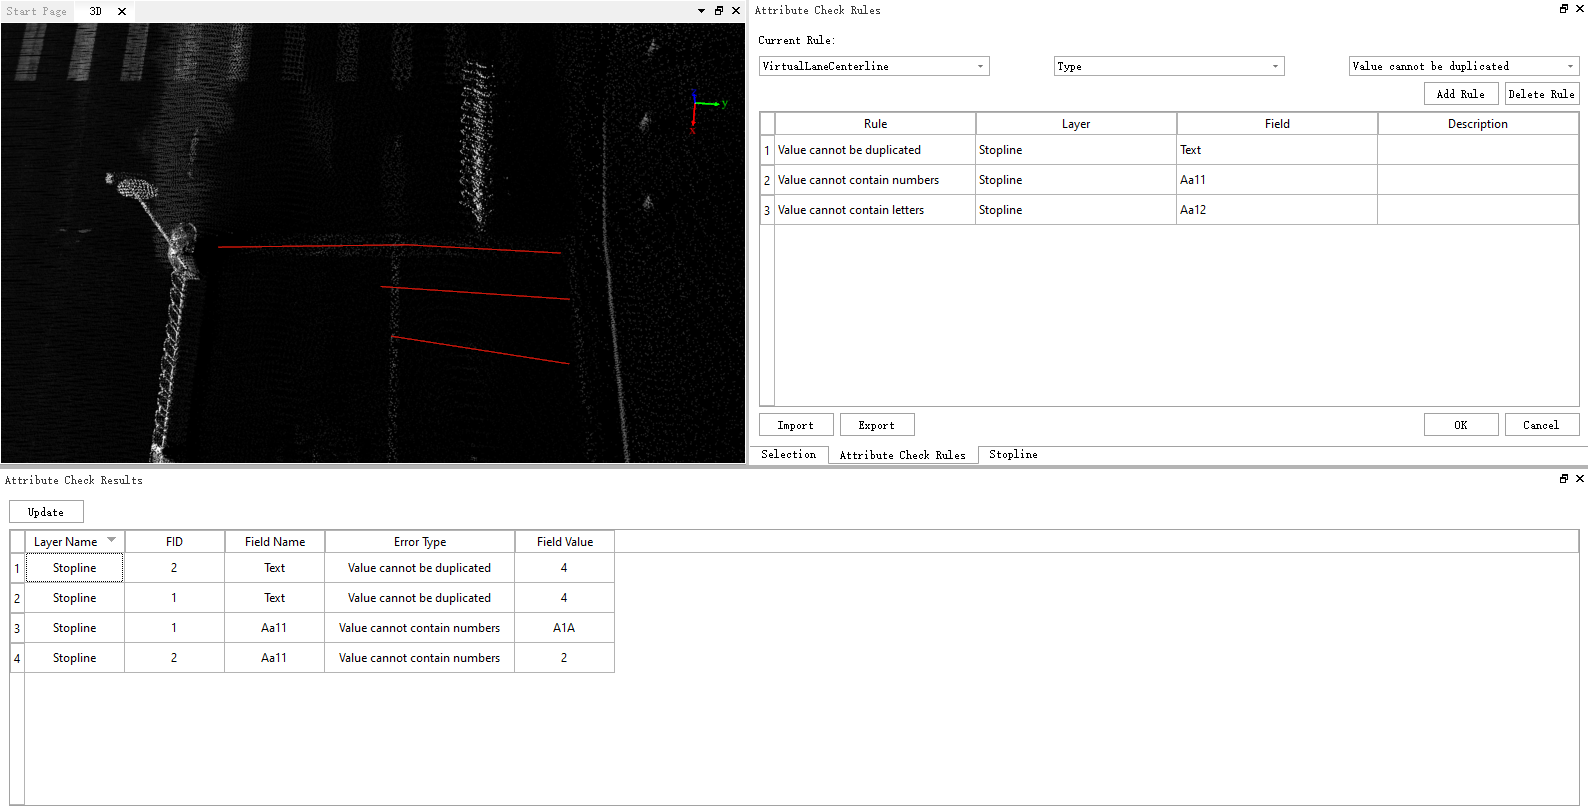
1.Click the "Attribute Quality Control" ![]() button in the toolbar to open the Attribute Quality Control dialog box, as shown in the following image:
button in the toolbar to open the Attribute Quality Control dialog box, as shown in the following image:

2.In the rules window, you can establish a series of inspection rules.

(1)In the current rule set, the first dropdown list represents selecting a layer that you want to check.
(2)Once the layer is selected, the second dropdown list will automatically display the fields associated with the chosen layer. You can then select a field based on your quality control requirements.
(3)The third dropdown list represents quality control rules, and it will provide recommendations based on the field type. These rules may include the following:
a. Value Should Not Start with 0: This condition is only displayed when you select a text-type field. It is used to check if the content in the field starts with the digit 0.
b. Value Should Not Be Duplicated: This rule applies to fields of any data type and checks if there are duplicate values in the field.
c. Value Should Not Exceed Range: This rule is displayed when you select a numeric field, such as integer or float. It checks if the content in the field falls within the specified range. You can input a maximum and minimum value as the corresponding range.
d. Value Should Not Be Empty: This rule applies to fields of any data type and checks if there are any empty or null values.
e. Value Should Not Contain Numbers: This rule is for text-type fields and checks if the content contains Arabic numerals.
f. Value Should Not Contain Letters: This rule is for text-type fields and checks if the content contains English letters.
g. Custom Rule: Custom rules allow you to perform quality control checks on the relationship between the values filled in two fields of any layer. Currently, you can check conditions like "When Field A = XX, Field B = XX."
After the rule is set, click the Add Rule button to add the rule to the list below, and you can set multiple rules to add
3.If a rule is not needed or set incorrectly, you can delete the rule after adding it by selecting the rule and clicking the "Delete Rule" button.
4.After setting all the rules, clicking the "OK" button will initiate the automatic inspection process. The results of items that do not meet the specified conditions will be listed in the "Attribute Quality Check Results" section below for your review.

a. In the Attribute Quality Check Results table, double-clicking any row will allow you to navigate to the current geometric object associated with that row.
b. In the table, for the field values that do not meet the specified conditions, you can directly edit the values. After making changes, the font will turn purple. You can then synchronize these changes to the attribute table by clicking the "Update" button.
5.The quality control conditions can be exported using the "Export" button. After exporting, you can send the file to others, and they can import it using the "Import" button to directly use the conditions. The exported file will typically be in an encrypted format to maintain security and preserve the integrity of the conditions during transfer.
- Note: Quality control rule import will match with the current project layers based on their IDs. If the project template used to define the quality control rules is different from the project template used to import the quality control rules, the IDs of the layers with the same name may not necessarily match. This could result in import failures. Therefore, the sharing of quality control rules is limited to projects with the same template.