Object Editor
Steps
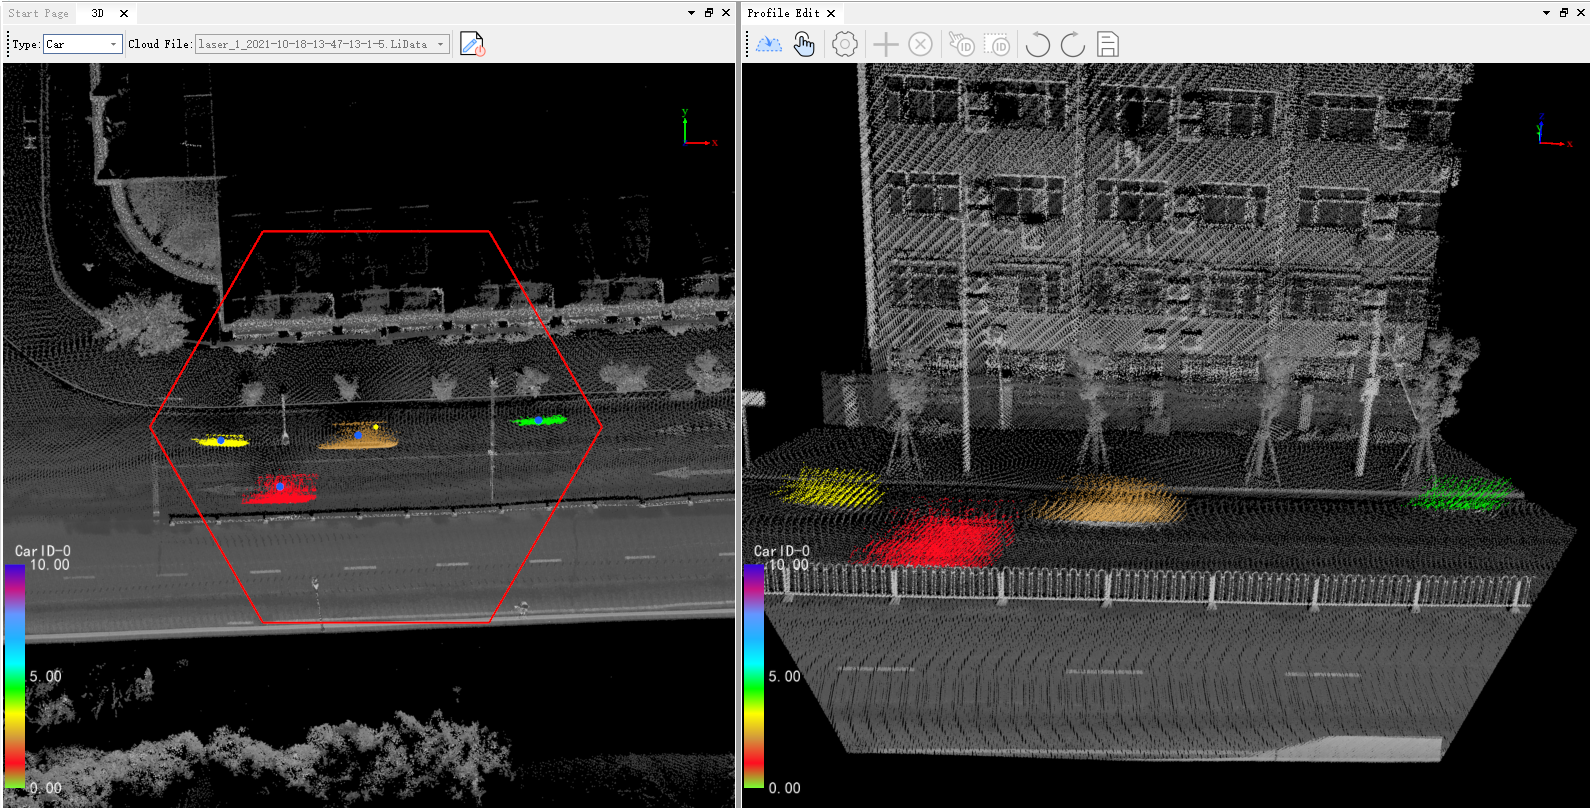
1.Click the Editor ![]() button, select the category and point cloud file to be edited, then click the Start Editing
button, select the category and point cloud file to be edited, then click the Start Editing![]() button. The point cloud in the 3D window will then be displayed according to the selected entity type ID.
button. The point cloud in the 3D window will then be displayed according to the selected entity type ID.

2.After starting editing, the individual editing window will automatically pop up. Within this window, you can perform operations to add, delete, and reduce entities.
3.In the 3D window, click the left mouse button to draw a hexagonal editing area. At this point, the points in this area will be displayed in the individual editing window. Area Editor settings allow you to switch the shape of the area, and support translation (WASD shortcut keys), rotation (QE shortcut keys), expansion, and scaling operations.
4.Click the Load Edit Region ![]() button in the object editing window to add the points of the editing area to the memory for editing. Without loading, editing is not supported.
button in the object editing window to add the points of the editing area to the memory for editing. Without loading, editing is not supported.
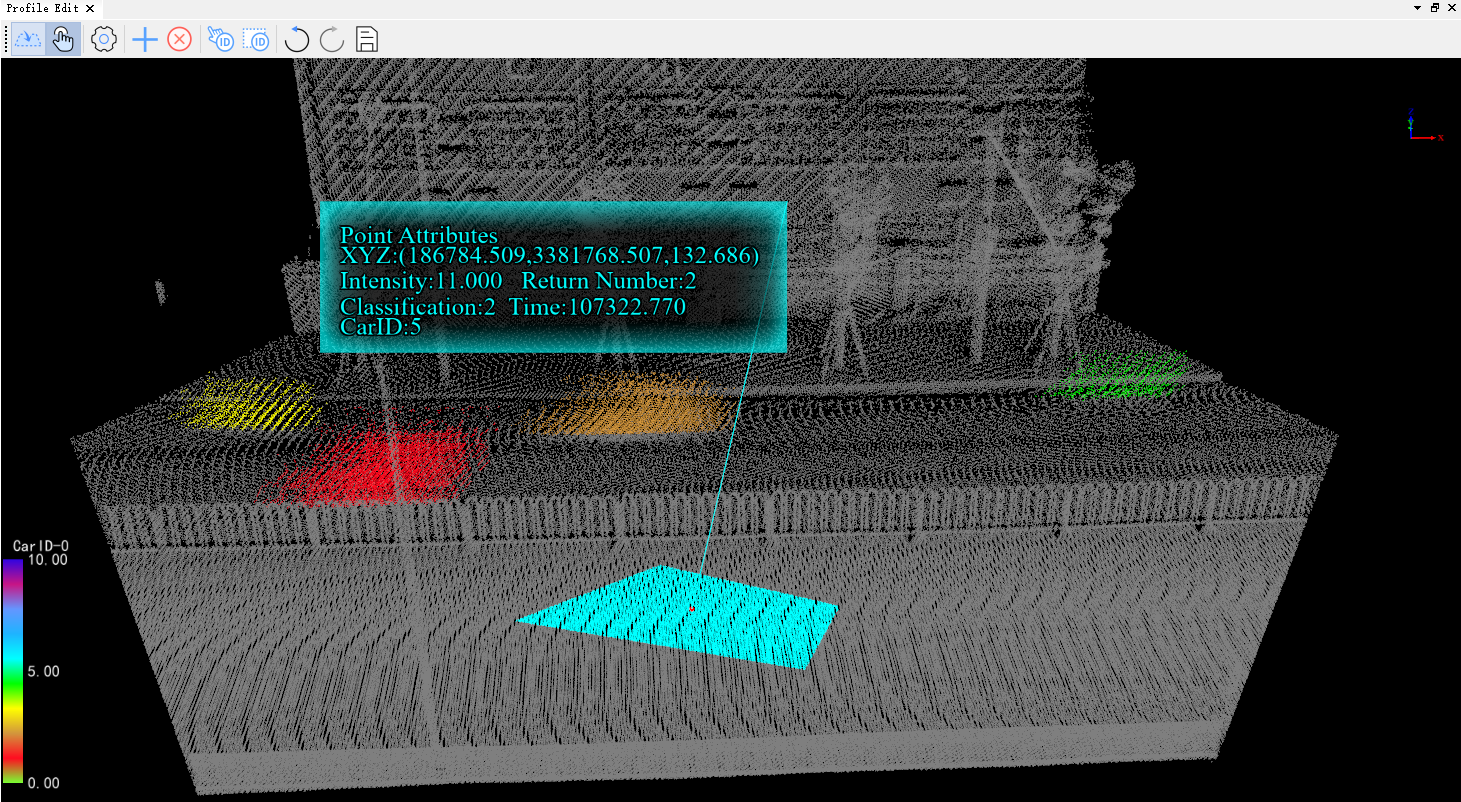
5.Click the Selection ![]() button in the object editing window to view the attribute information of the selected points, including 3D coordinates, GPS time, intensity, RGB, object ID, etc.
button in the object editing window to view the attribute information of the selected points, including 3D coordinates, GPS time, intensity, RGB, object ID, etc.

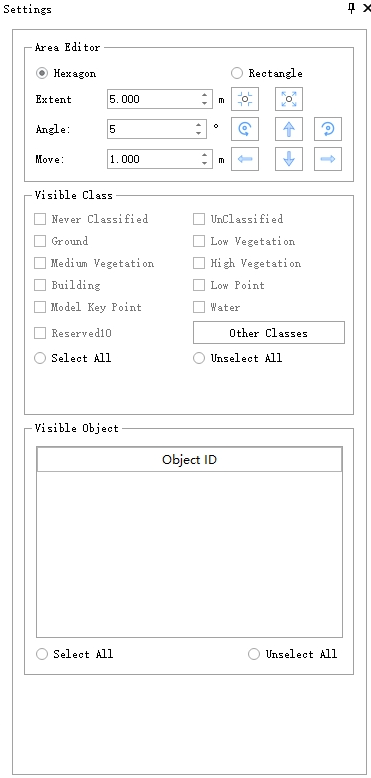
6.Setting: In the individual editing window, click the Setting button. In the setting window, by checking the box, you can display the points that need to be edited from two dimensions: category and entity ID, reduce the interference of the background point cloud on the editing process, and enhance operational convenience.
7.Zoom: If the point cloud is moved out of the current window display range and cannot be zoomed back during editing in the Single-Object window, you can use the zoom![]() button to scale the selected area of the point cloud back into the current window view.
button to scale the selected area of the point cloud back into the current window view.
8.Hide Object: In the editing window, you can use the "Hide Object" function to selectively hide objects that do not need editing. ![]() The hidden objects are linked to the visible objects in the settings window. To cancel the hiding, you can recheck the corresponding checkbox.
The hidden objects are linked to the visible objects in the settings window. To cancel the hiding, you can recheck the corresponding checkbox.
9.Create Object: In the object editing window, click the Create Object ![]() button, and create an object by selecting the point cloud of the object. At this point, the object ID of the points in the selected area will be set to the new object ID, and an object record will be automatically added to the attribute table. If you want to finely edit the point cloud of the object, you can use the [Merge By Pick] and [Merge By Polygon] operations.
button, and create an object by selecting the point cloud of the object. At this point, the object ID of the points in the selected area will be set to the new object ID, and an object record will be automatically added to the attribute table. If you want to finely edit the point cloud of the object, you can use the [Merge By Pick] and [Merge By Polygon] operations.
Creating New Object
10.Delete Object: In the object editing window, click the Delete Object ![]() button. In the setting window, by checking the box, you can display the points that need to be edited from two dimensions: category and object ID, reduce the interference of the background point cloud on the editing process, and enhance operational convenience.
button. In the setting window, by checking the box, you can display the points that need to be edited from two dimensions: category and object ID, reduce the interference of the background point cloud on the editing process, and enhance operational convenience.
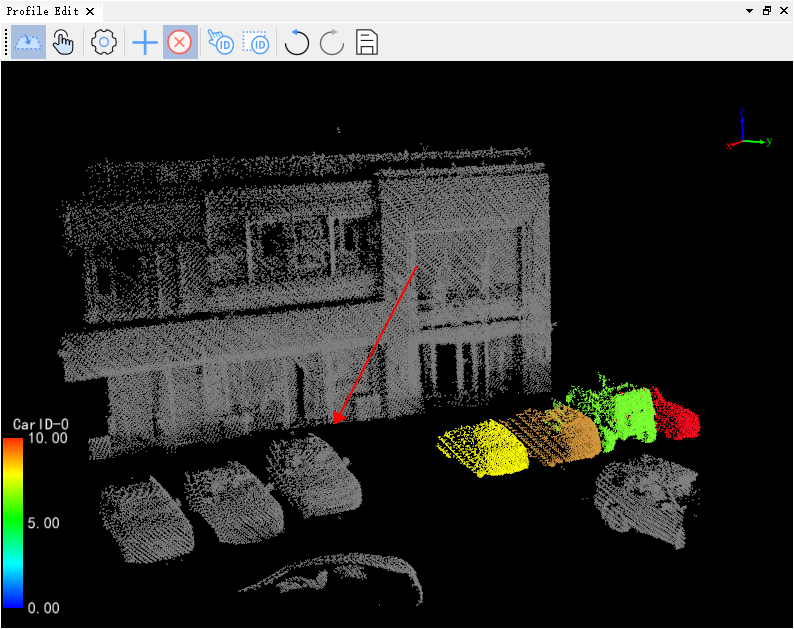
Deleting Object
11.Merge By Pick: In the object editing window, click the Merge By Pick ![]() button, select two points in succession by clicking. The ID of the object clicked first will be set to the ID of the object clicked second. It can be used to merge two point clouds in the editing area or delete a certain point cloud.
button, select two points in succession by clicking. The ID of the object clicked first will be set to the ID of the object clicked second. It can be used to merge two point clouds in the editing area or delete a certain point cloud.
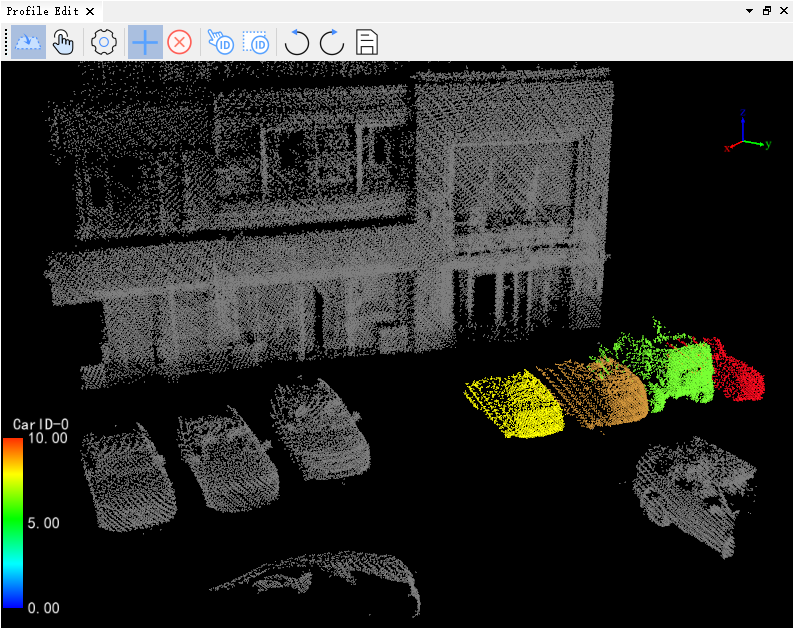
Before Merging By Pick
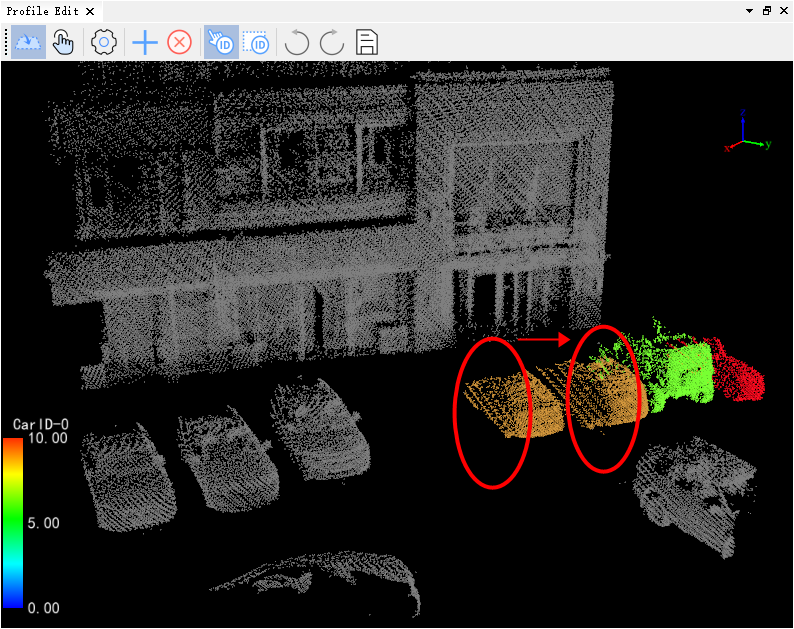
After Merging By Pick
12.Merge By Polygon: In the object editing window, click the Merge By Polygon ![]() button, first select a part of the points by framing, then click an object (or non-object point), and the object ID of the points in the frame will be set to the clicked object ID. It can be used for point refinement and point deletion by framing.
button, first select a part of the points by framing, then click an object (or non-object point), and the object ID of the points in the frame will be set to the clicked object ID. It can be used for point refinement and point deletion by framing.
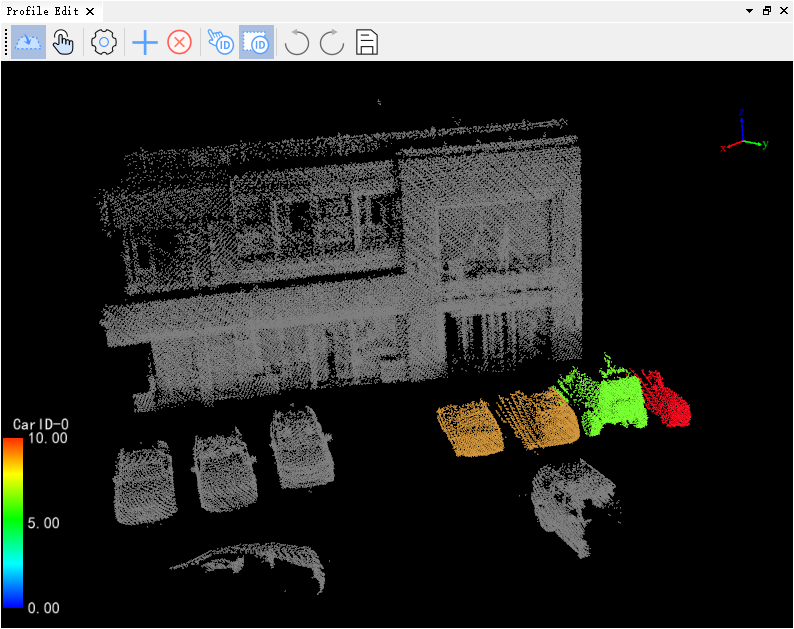
Before Merging By Polygon
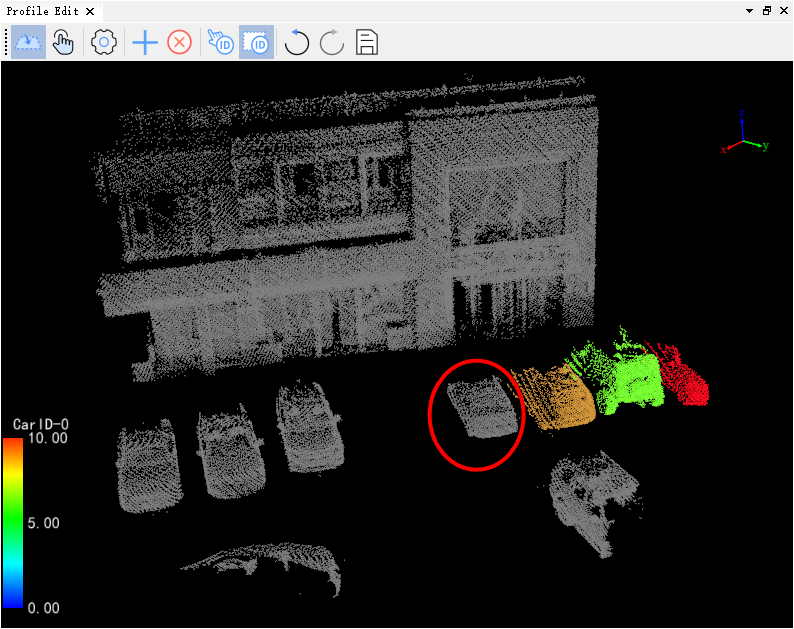
After Merging By Polygon
13.Undo: In the object editing window, click the Undo ![]() button to revert to the previous step, supports "Ctrl+Z" shortcut key.
button to revert to the previous step, supports "Ctrl+Z" shortcut key.
14.Redo: In the object editing window, click the Redo ![]() button to restore to the next step, supports "Ctrl+Y" shortcut key.
button to restore to the next step, supports "Ctrl+Y" shortcut key.
15.Save: In the object editing window, click the Save ![]() button to save the editing to a file, the 3D view on the left will refresh the result, supports "Ctrl+Shift+S" shortcut key.
button to save the editing to a file, the 3D view on the left will refresh the result, supports "Ctrl+Shift+S" shortcut key.