Coarse registration-Point Cloud Rotation and Translation
Data Preparation
1. Double-click the Registration button in the Toolbox -> Data Management -> Point Cloud Tools -> Registration Toolbox, as shown in the following figure:
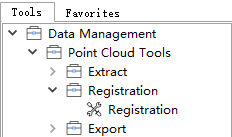
Registration Toolbox Entry
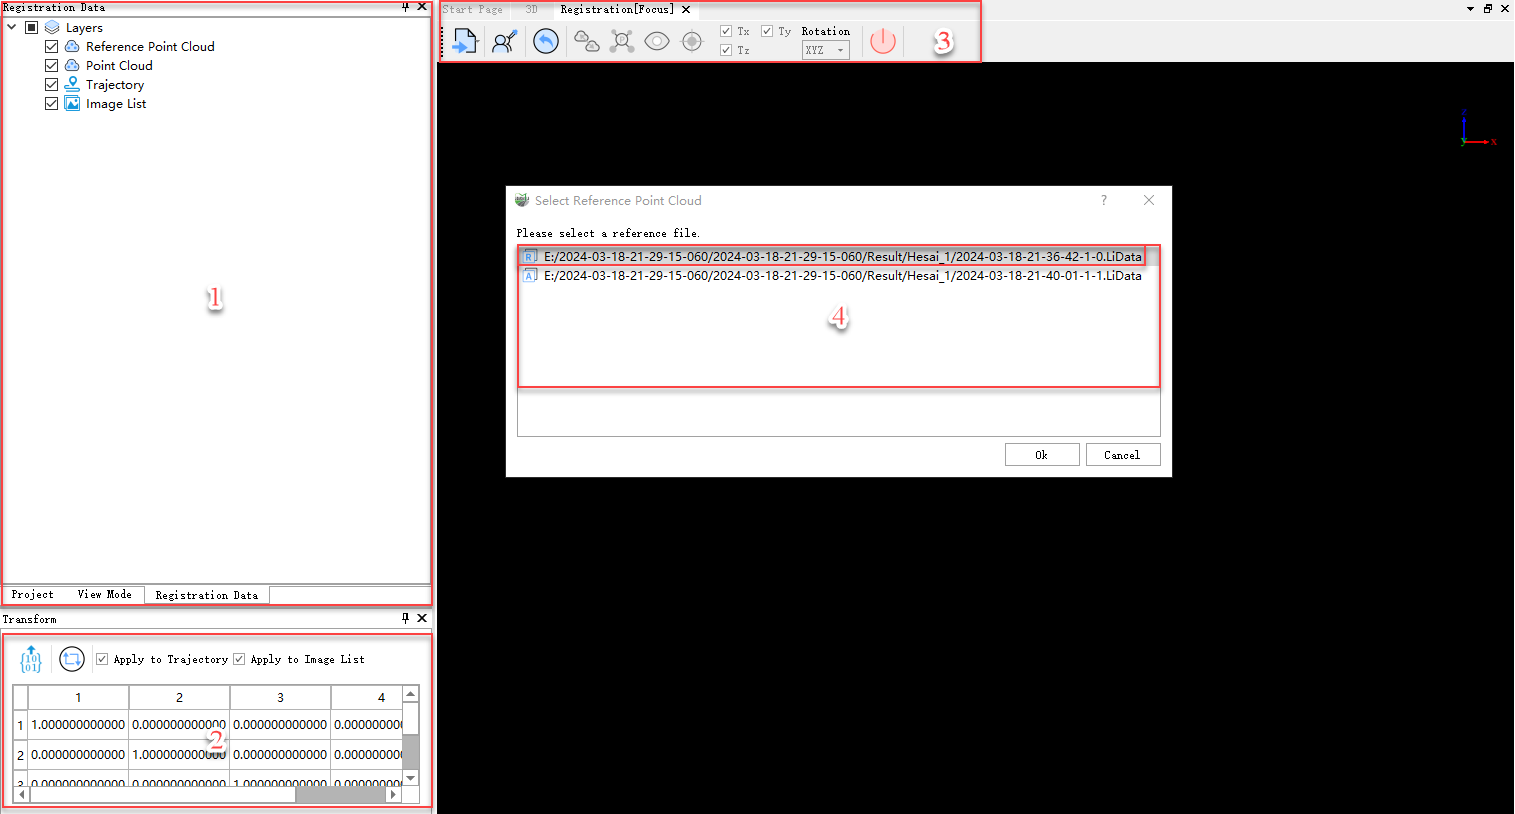
Data Preparation for Registration
- After entering the registration function, the program automatically creates a registration window with a toolbar for loading registration data and performing related operations, as marked by 3 in the above figure.
- The loaded data in the registration window is displayed in a newly created directory tree, as marked by 1 in the above figure. Similar to the main directory tree, it also supports zooming to layers, deletion, and other right-click tools.
- A point cloud transformation matrix window appears at the lower left of the interface, which displays the transformation matrix of the transformed point cloud relative to its initial position in real time, as marked by 2 in the above figure.
- A window for selecting the point cloud to be registered and the reference point cloud is also displayed, as marked by 4 in the above figure. All point clouds visible in the 3D window are available for selection, and all are selected as point clouds to be registered by default. If you want to set one of the point clouds as the reference point cloud, click on its tag. After clicking, the icon before the point cloud tag changes from A to R. Similarly, if you want to set the reference point cloud as a point cloud to be registered, click on its tag.
After selecting the reference point cloud and the point cloud to be registered, click OK. The point cloud to be registered and the reference point cloud will be loaded into the registration window, and the default will include loading the trajectory and exposure point images from the 3D window into the registration window for display, as shown in the following figure:
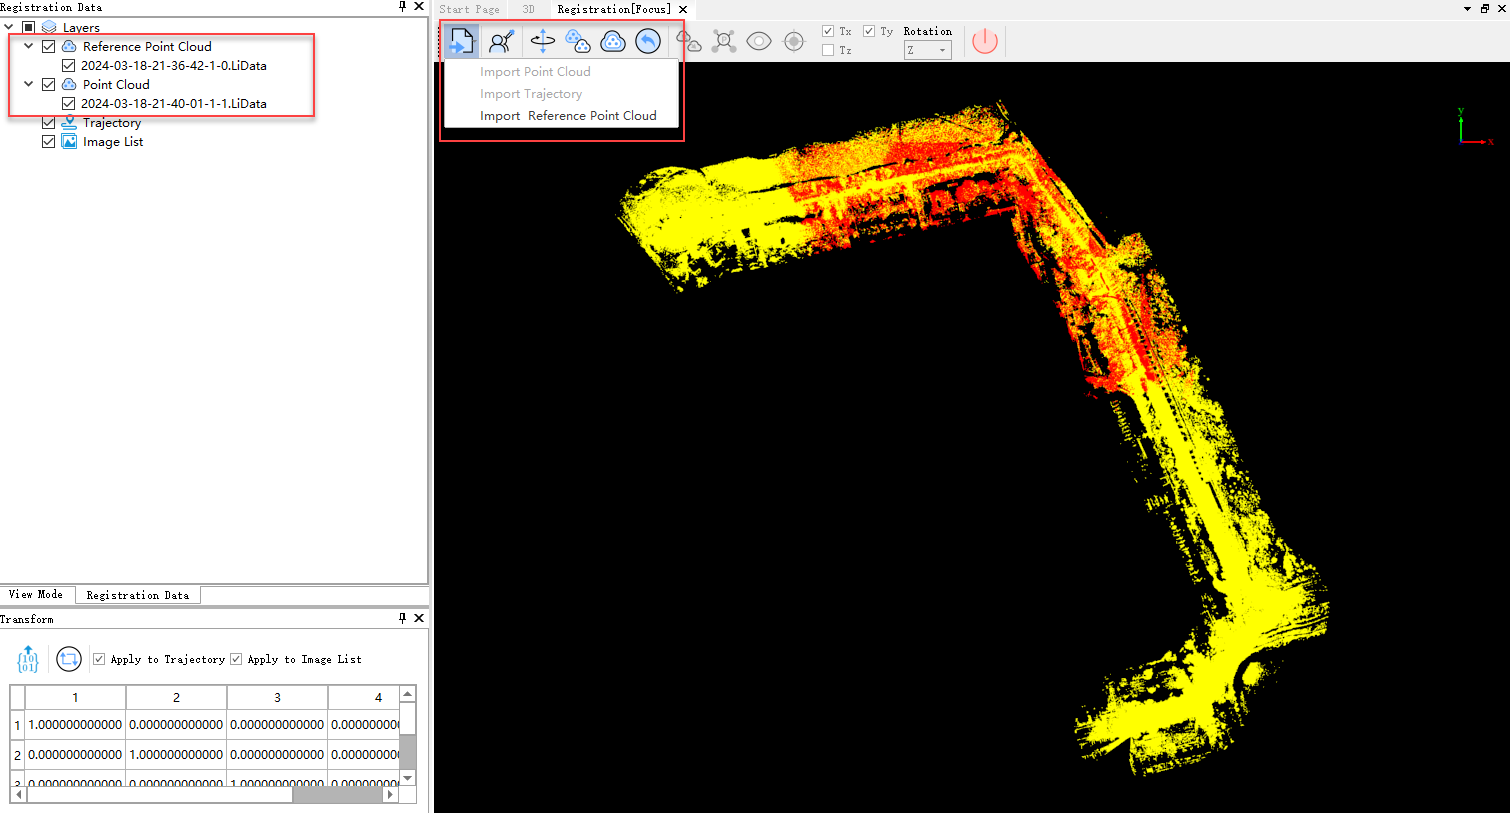
Display of Registration Data
The point cloud to be registered is shown in red by default, and the reference point cloud is shown in yellow. You can use the Import Reference Point Cloud tool in the toolbar to load new reference point clouds.
If you want to change the default color display, click the Display by Role button and select the colors for displaying the reference point cloud and the point cloud to be registered, as shown in the following figure:
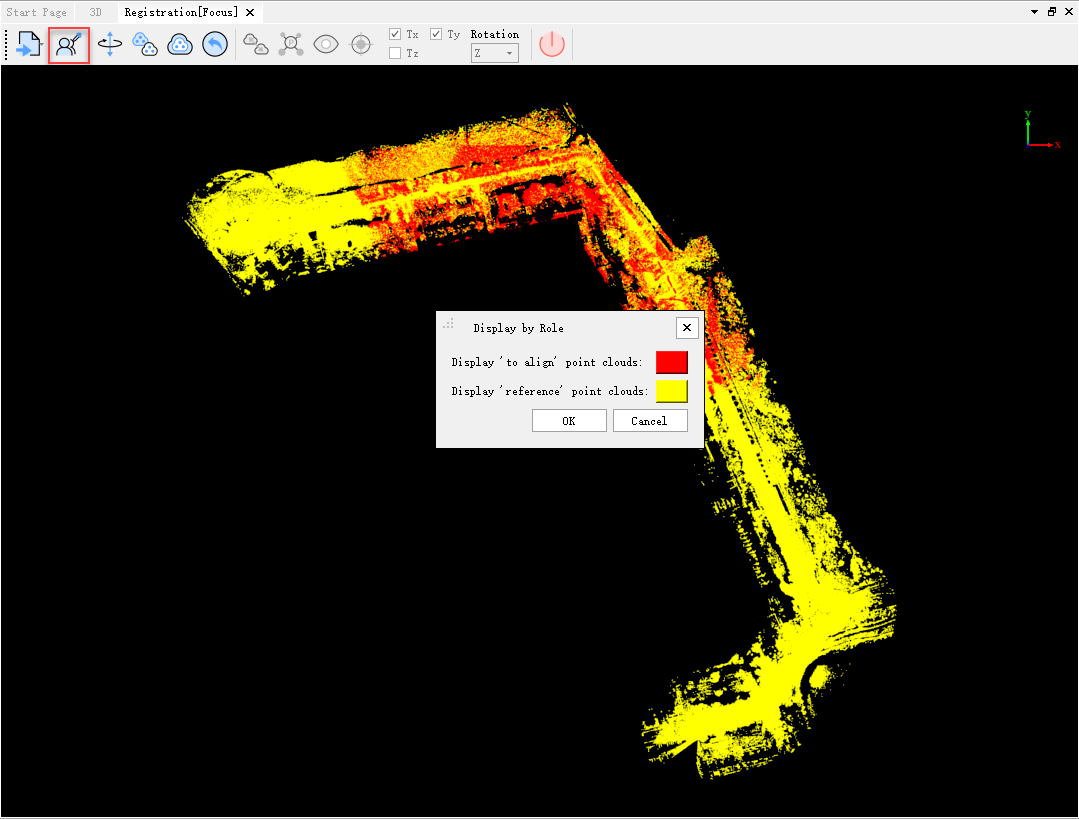
Display by Role
Rotation and Translation
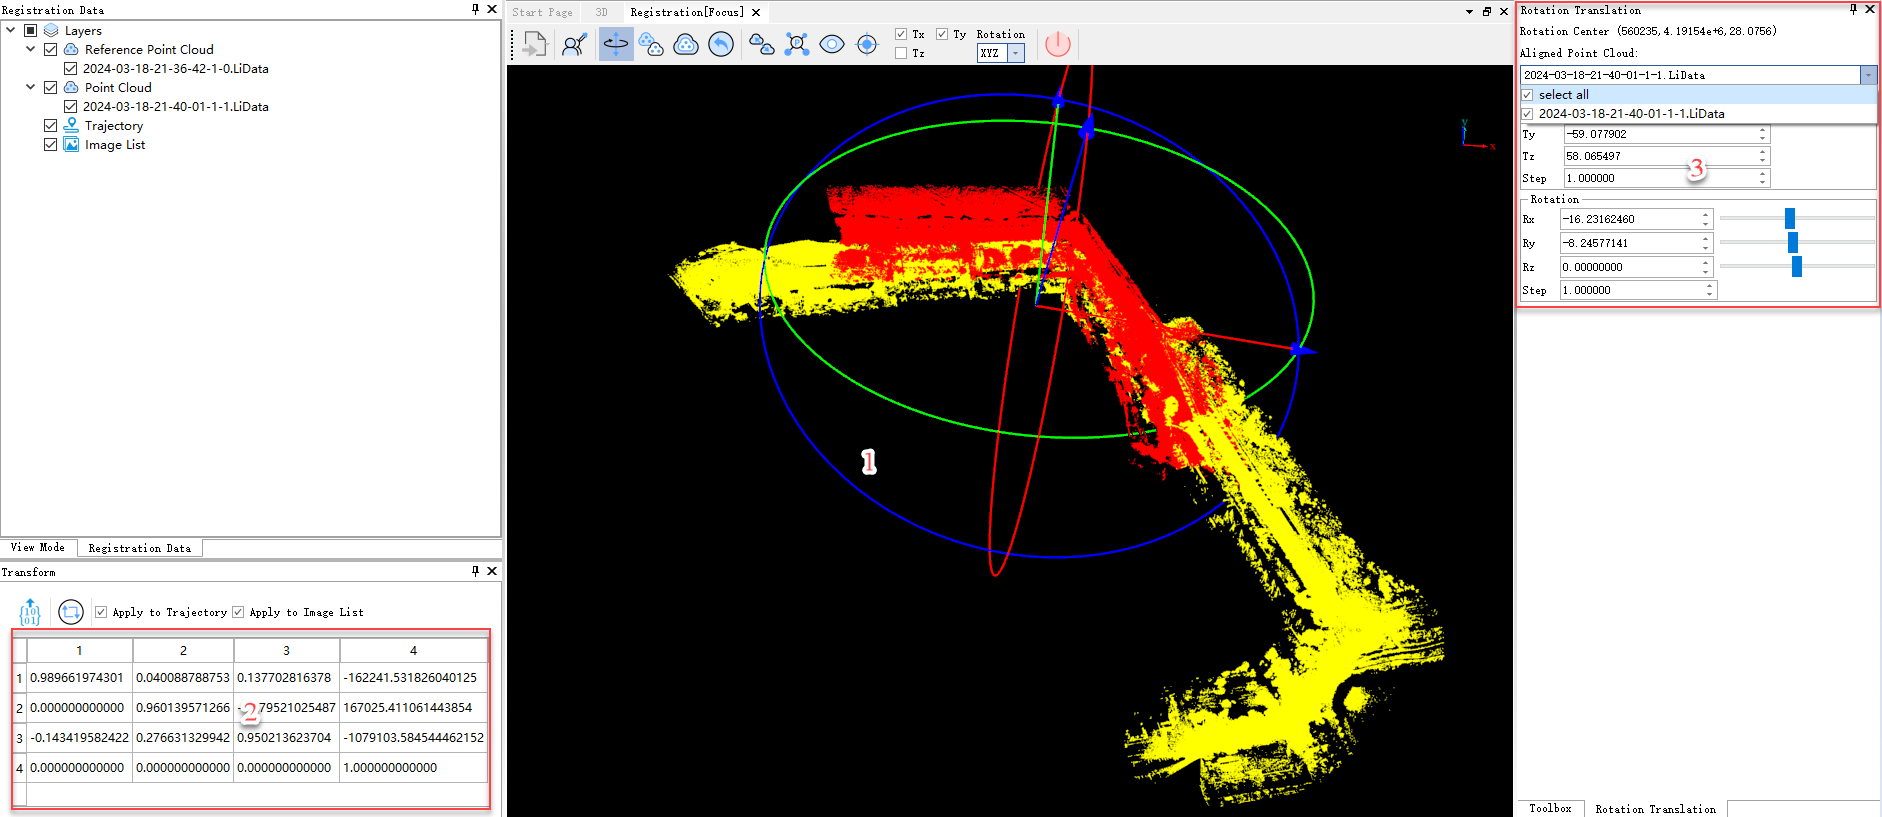
1. Click the point cloud rotation and translation button in the registration window toolbar. The point cloud to be registered will display an auxiliary interaction coordinate axis and an auxiliary interaction ring for moving, as marked by 1 in the following figure. At the same time, a docking window showing detailed information about point cloud rotation and translation will appear docked to the right side of the interface, as shown in the following figure:
Point Cloud Rotation and Translation
- Dragging with the left mouse button rotates the point cloud to be registered.
- Dragging with the right mouse button moves the point cloud to be registered.
- Capturing the X, Y, or Z axis in the auxiliary coordinate system highlights the corresponding axis in yellow. Dragging with the left mouse button moves the point cloud to be registered along that axis.
- Capturing the auxiliary ring highlights the corresponding ring in yellow. Dragging with the left mouse button rotates the point cloud to be registered around the X, Y, or Z axis.
During interactive rotation and translation in the registration window, the window on the right side displays the movement lengths in the XYZ axis direction and the rotation angles around the XYZ axis in real time, as marked by 3 in the above figure. You can select the point cloud in the Point Cloud to Be Registered dropdown menu in this window, supporting rotation and translation of one or multiple point clouds to be registered simultaneously. The transformation matrix is displayed in real time at the lower left corner, as indicated by 2 in the above figure.
2. To restore the point cloud to its original state after rotation and translation, click the Restore button in the toolbar.

Restore
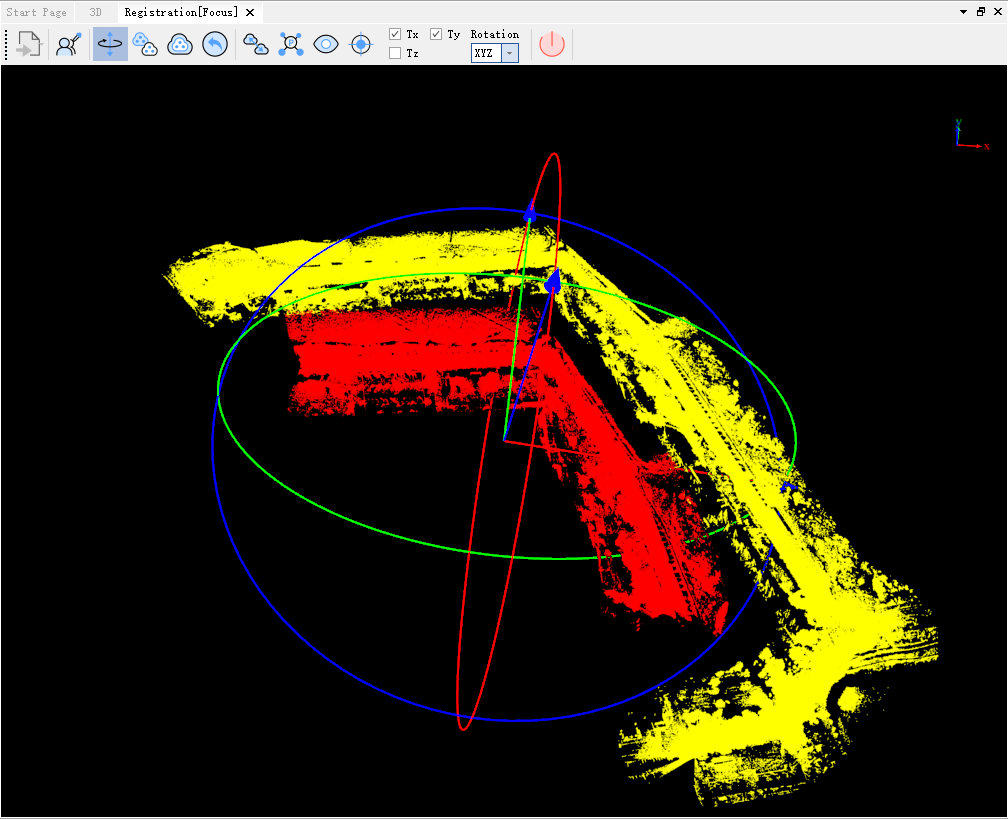
3. If the reference point cloud and the point cloud to be registered are far apart, you can click the Match Centers button in the toolbar to move the bounding box center of the point cloud to be registered to the bounding box center of the reference point cloud, as shown in the following figure:

Match Centers
Match Centers Result
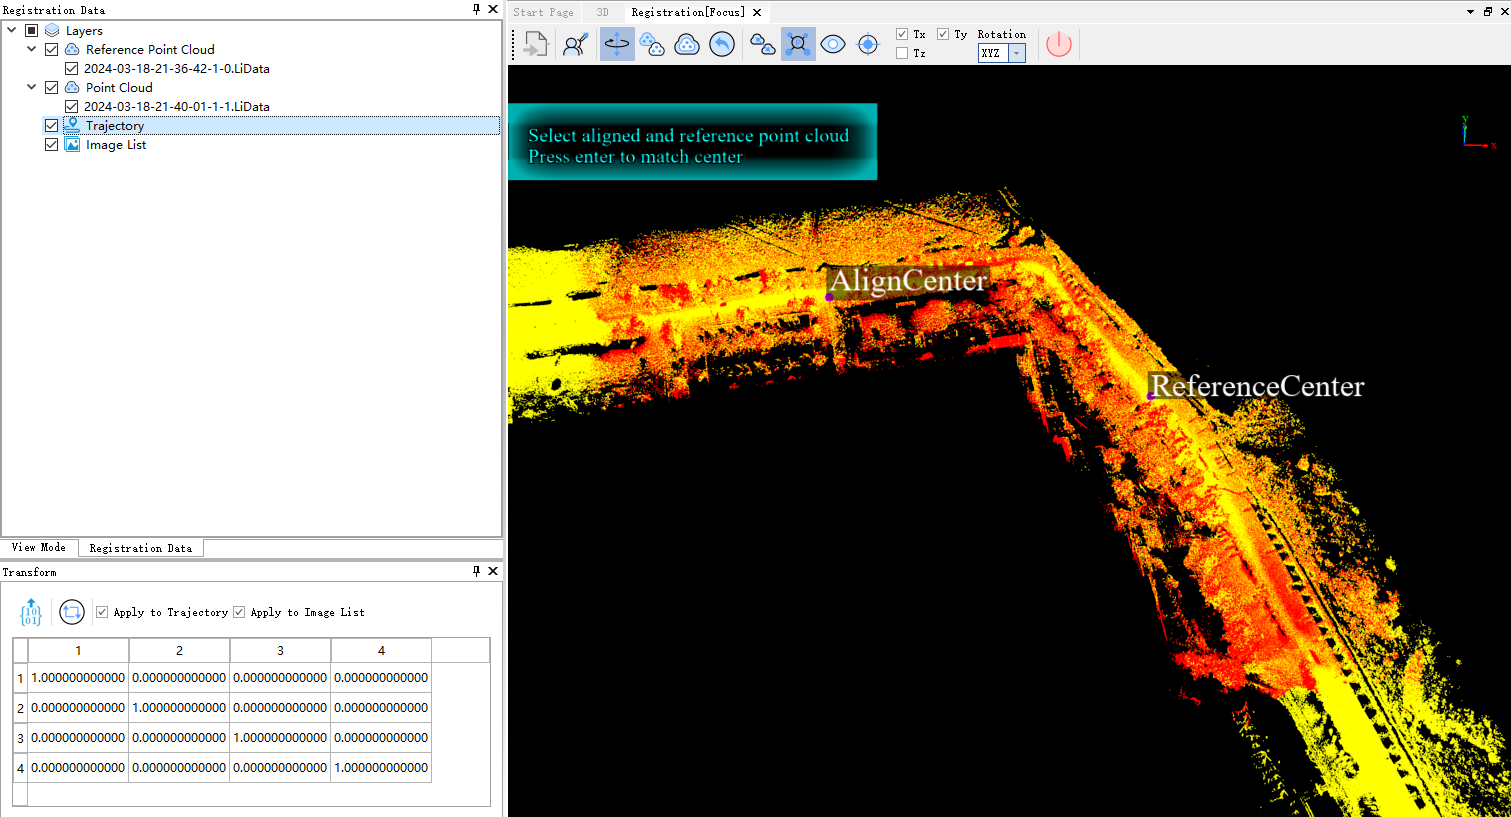
4. If the bounding box center matching between the point cloud to be registered and the reference point cloud is not accurate enough, you can click the Select Matching Center Points function in the toolbar, as shown in the following figure:

Select Matching Center Points
Select the matching center on both the reference point cloud and the point cloud to be registered, as shown in the following figure:
Select Matching Center Points
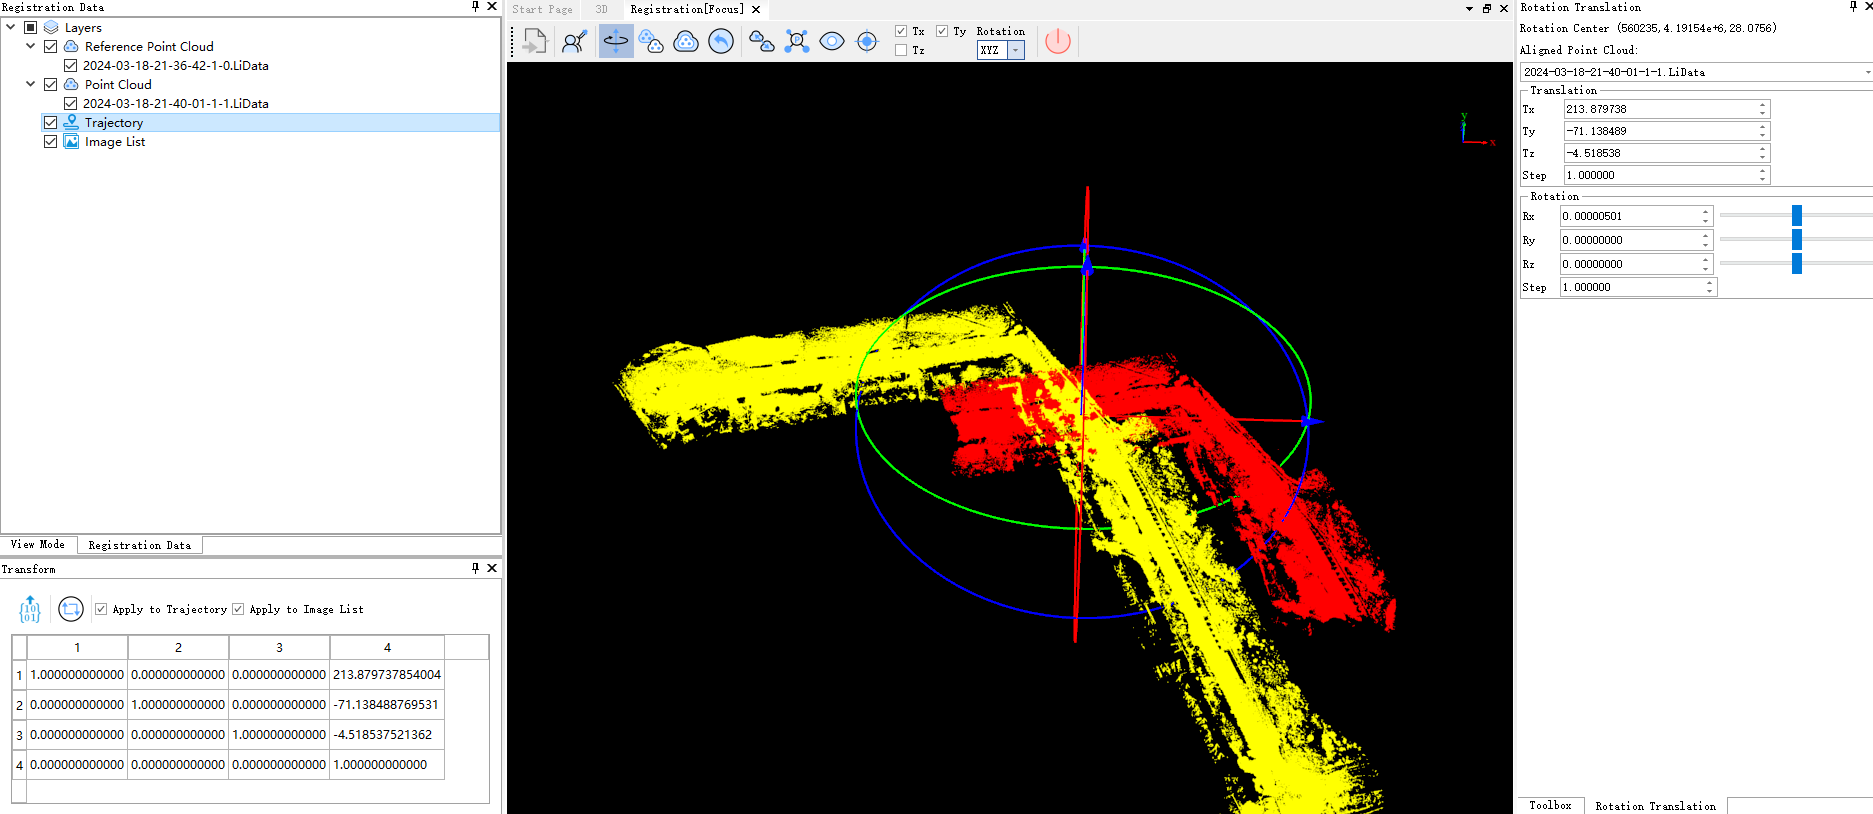
After selecting the center points, press the Enter key, and the point cloud to be registered will move to the center of the selected reference point cloud with the selected point as its own center. As shown in the following figure:
Select Matching Center Points Result
5. If you want to switch perspectives to observe the alignment of the reference point cloud and the point cloud to be registered during rotation and translation, click the Viewport button. At this point, the circular rings and coordinate system for auxiliary rotation and translation will be hidden, and the left and right mouse buttons will no longer respond to rotation and translation operations but will instead control the scene. As shown in the following figure:

Viewport
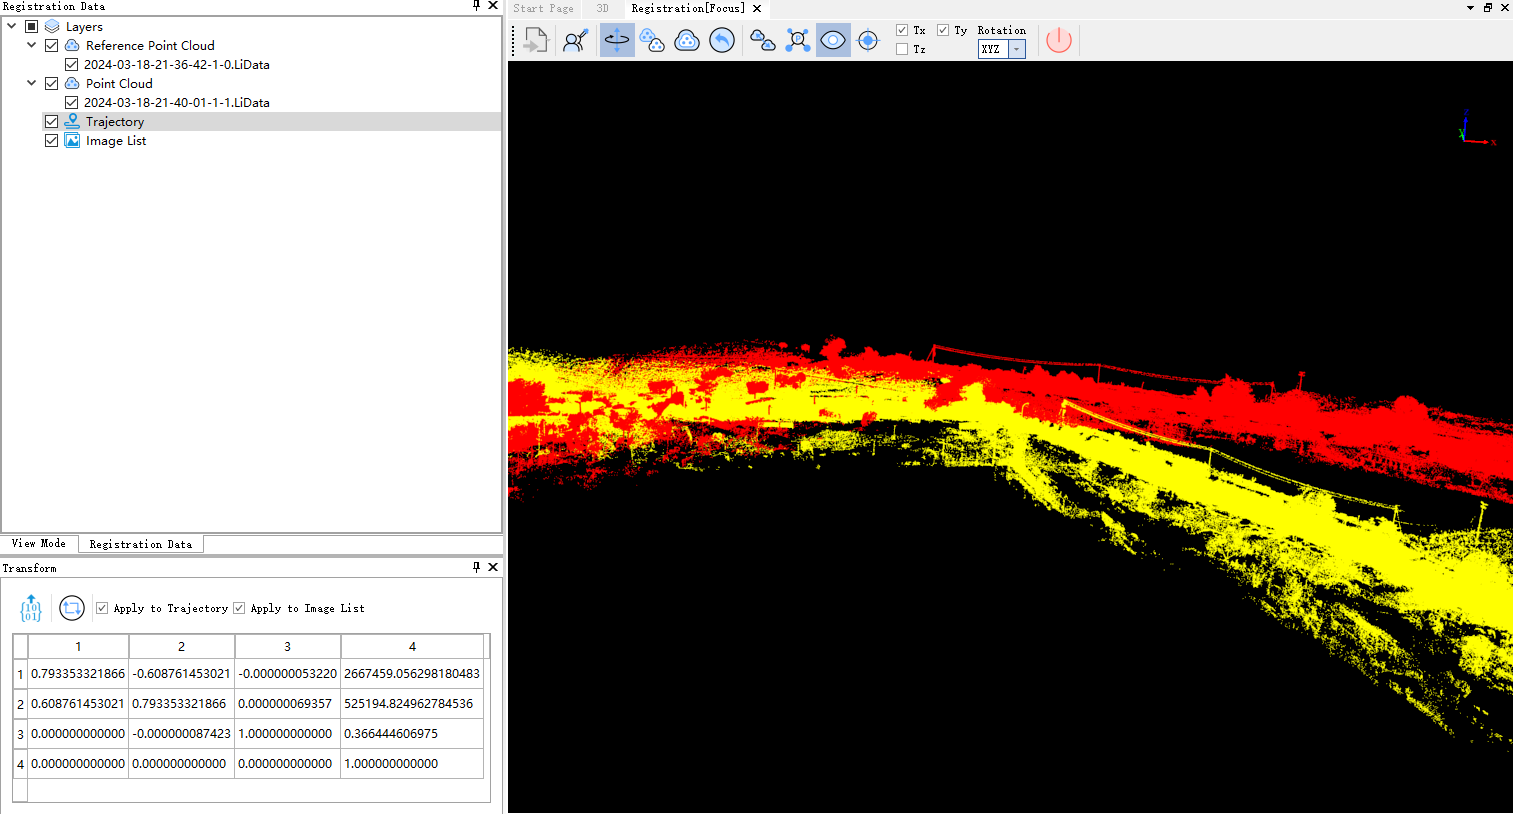
Viewport Result
6. If the automatically calculated rotation center of the point cloud to be registered is not convenient or accurate, you can click the Rotation Center function, as shown in the following figure:

Rotation Center
At this point, the rotation center selection window will appear, as shown in the following figure:
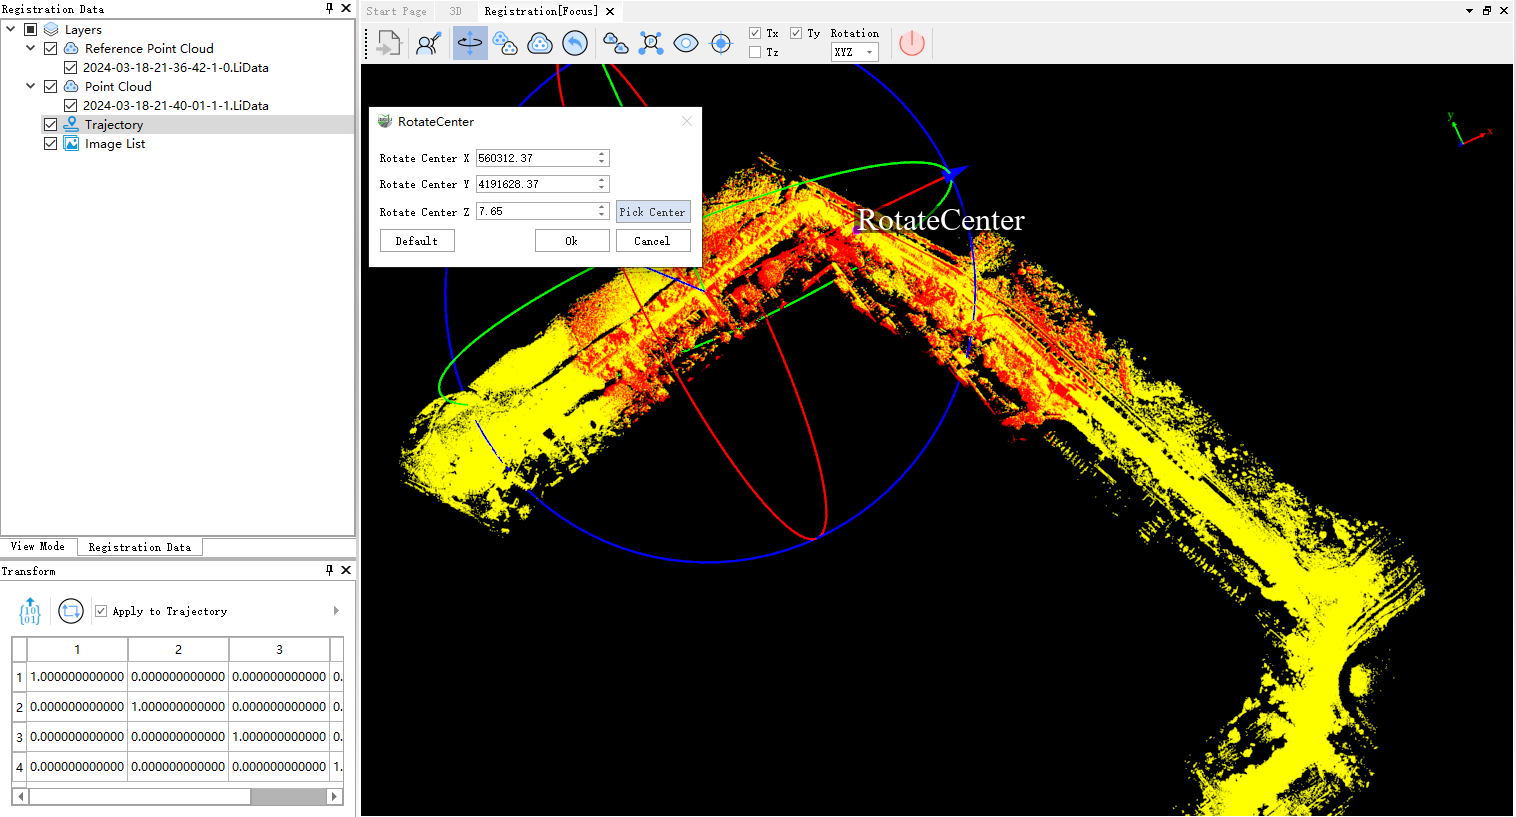
Select Rotation Center
In the rotation center selection window shown above, you can directly input or adjust the rotation center coordinates to set the rotation center, or you can click the Select Rotation Center button to select the rotation center on the reference point cloud. After setting or selecting the rotation center, click the OK button, and the point cloud to be registered will rotate around the new rotation center. As shown in the following figure:
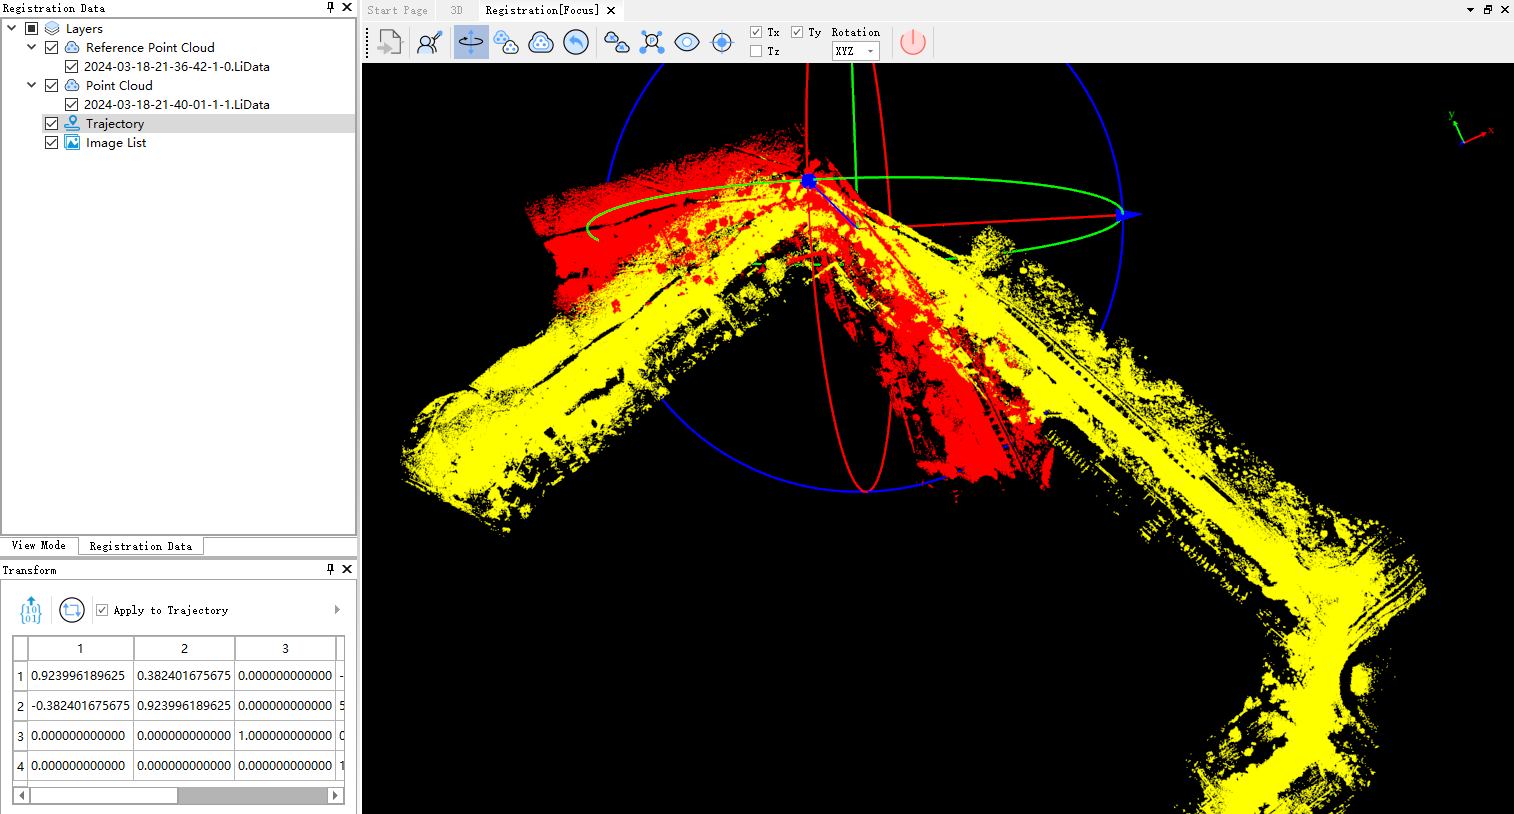
Select Rotation Center
To restore the initial rotation center, click the Reset button in the rotation center setting window and then click the OK button, and the rotation center of the point cloud to be registered will return to its initial state.
7. If you want the point cloud to be registered to move only in a specified direction or rotate only around a specified coordinate axis, you can specify this in the move coordinate axis and rotate coordinate axis setting area in the toolbar, as shown in the following figure:

Specify Movement Direction and Rotation Axis
8. After completing the rotation and translation, you can export the current rotation and translation matrix, and you can also set whether to apply the current matrix to the trajectory and images, as shown in the following figure:
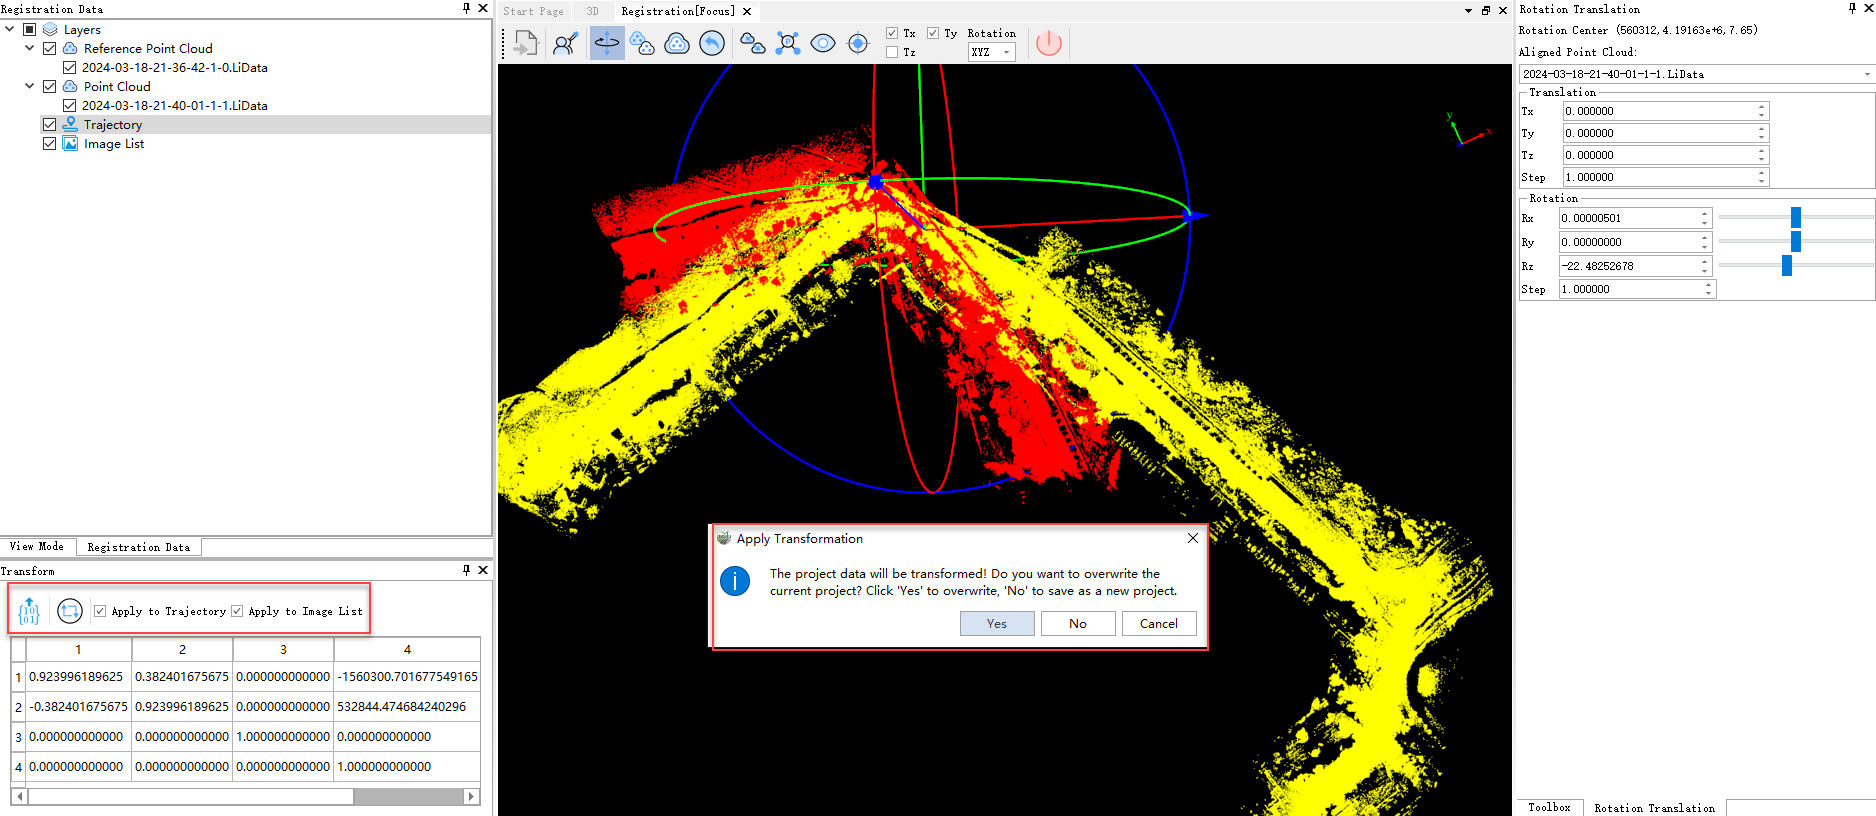
Apply Matrix
Clicking the Apply Transformation button in the image above will bring up a pop-up window asking whether to apply it to the project. Choosing Yes will rewrite the project, and choosing No will create a new project with this matrix applied.