Add Box
Function Description: Add box objects using four key points method.
Steps
- Select a line layer (e.g., lane line)
Click the Add Box
 button in the Vector Editor:
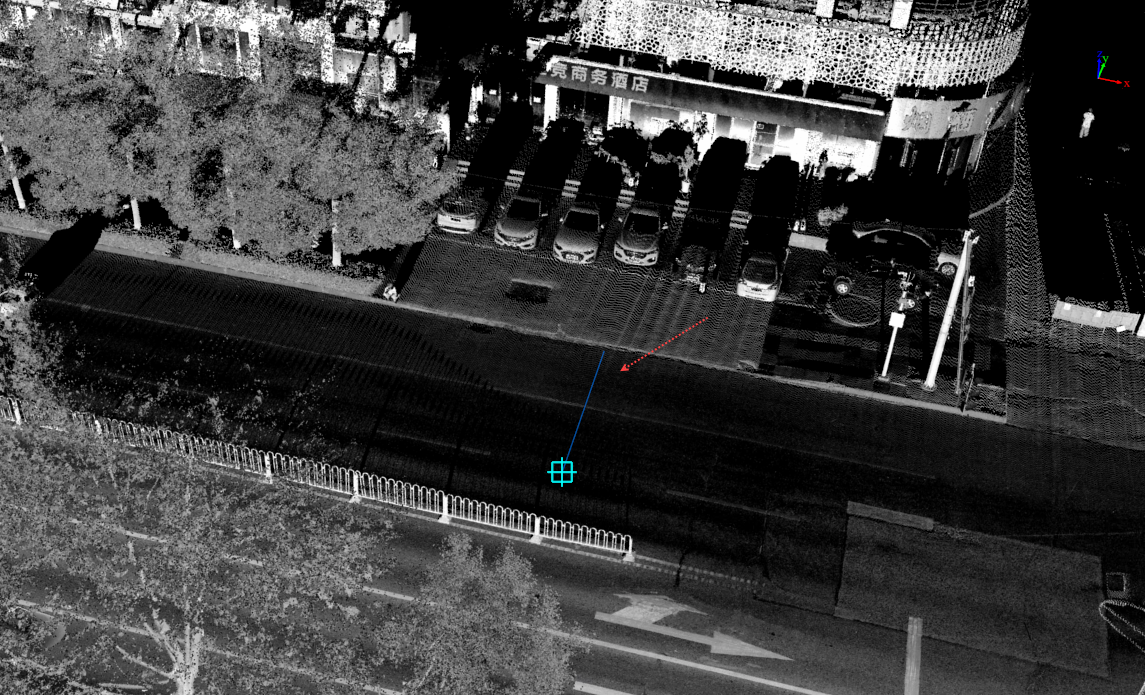
 Left-click on the point cloud to select the first key point as the starting point of the box's base rectangle.
- Left-click to select the second key point, determining the width of the base rectangle. The second point selection snaps to the horizontal plane of the first point and no longer relies on the point cloud. Example:
Determine Box Base Width
- Left-click on the point cloud to select the third key point, defining the length of the base rectangle to complete the base drawing. Example:
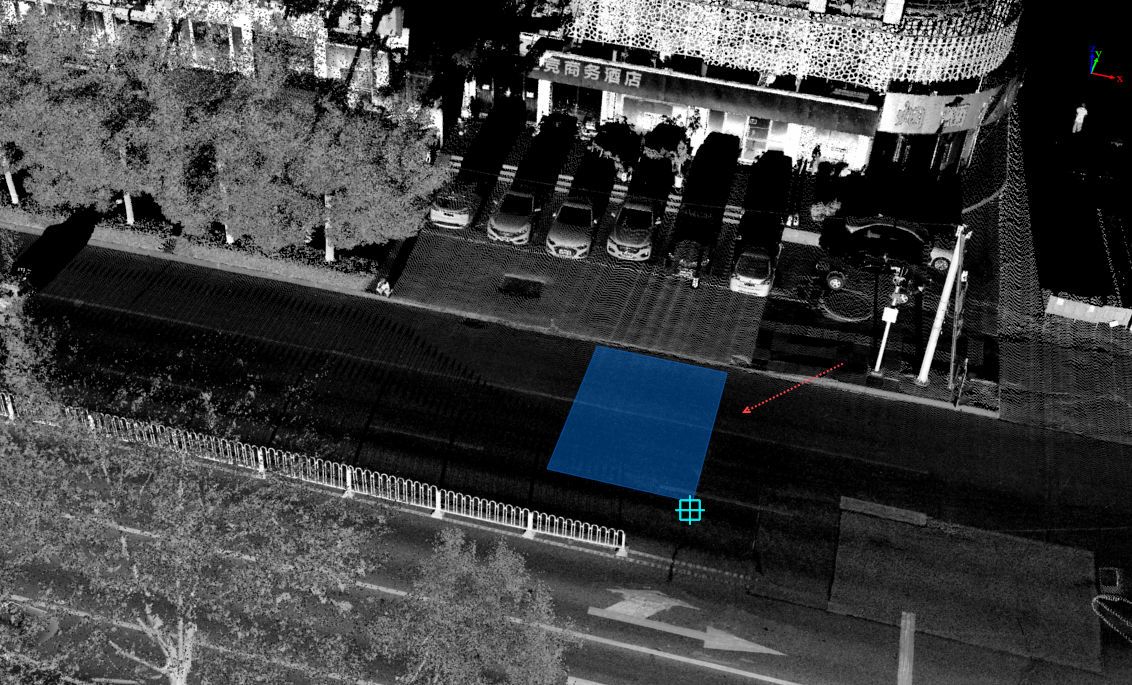
Box Base Drawing
- Hold and drag the left mouse button to rotate the view and move the mouse to draw the box height in real-time. Example:
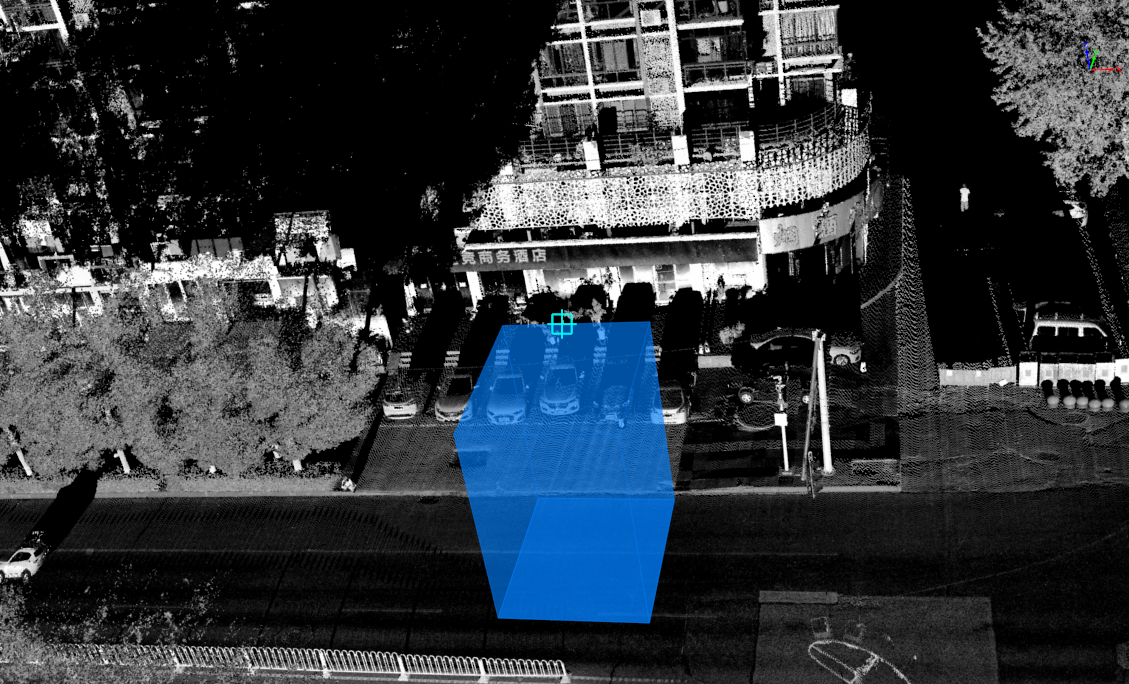
Draw Box Height
- After confirming the initial shape, left-click again to activate the geometric adjustment handles. Example:
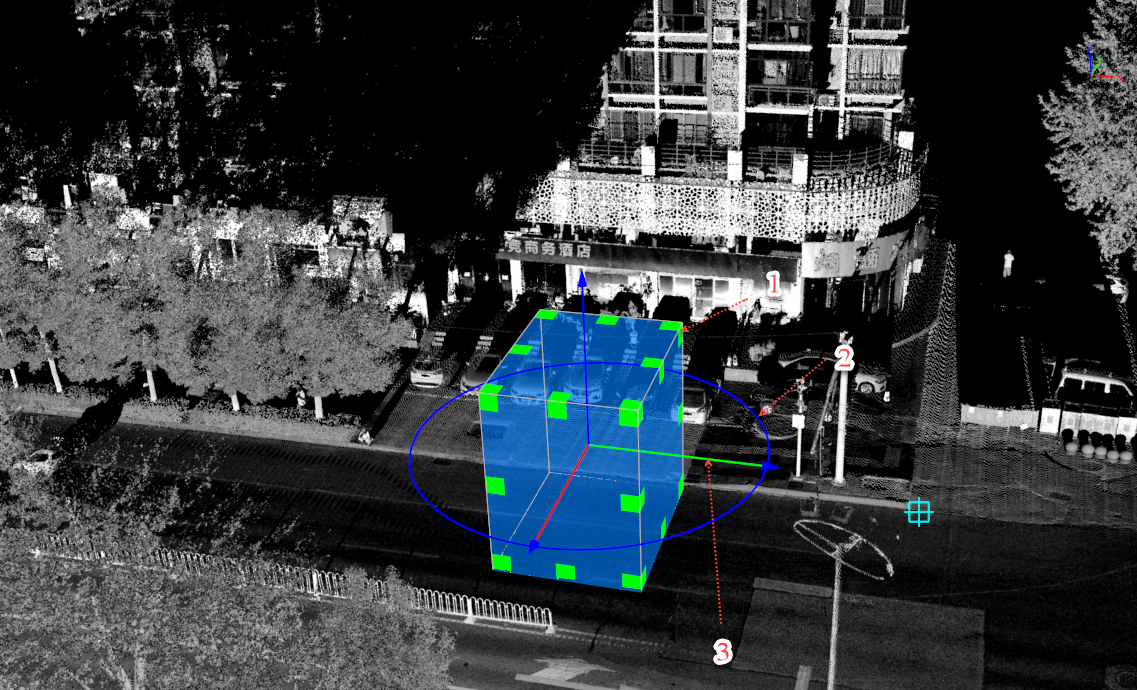
Adjust Box Shape
- Drag the green cube (Label 1) to scale the box.
- Drag the circular ring (Label 2) to rotate the box.
Drag the coordinate axes (Label 3) to move the box.
Double-click the left mouse button to finalize the vector box object. The box is saved as a polyline type with length, width, and height stored in its attributes. Example:
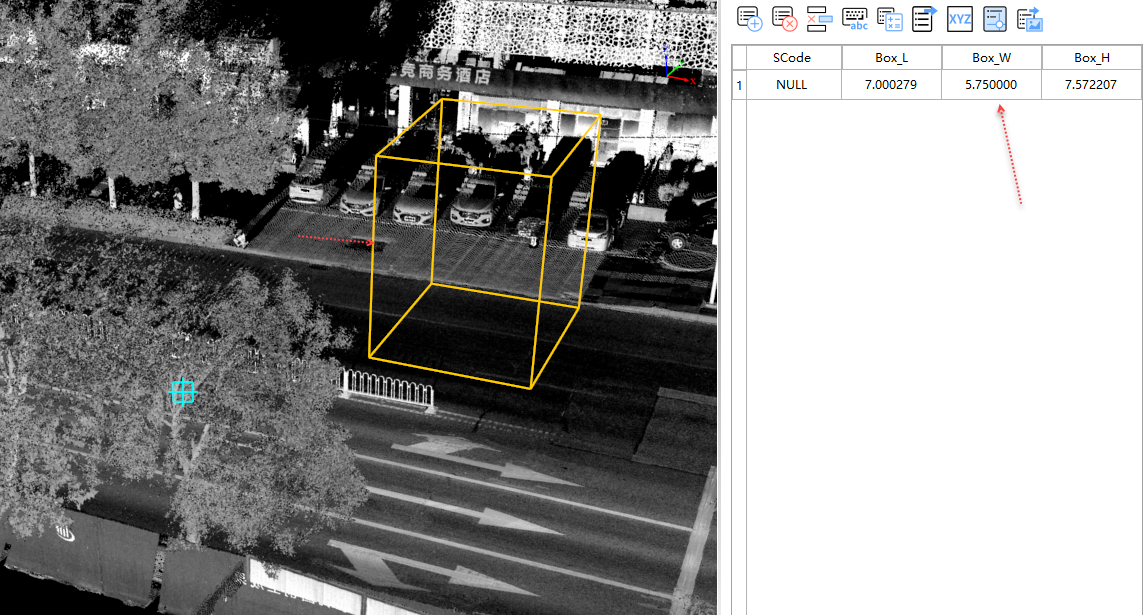
Final Vector Box Object
Note: The geometric type of the vector result must match the target layer (e.g., point-type vectors can only be added to point layers). For details, see Layer Settings.