Road Facility Detection-Batch processing of road facility recognition based on panoramic images
Note: This function is only valid for engineering data with panoramic images.
Steps
1.Click Road Facility Detection ![]() button and the parameter dialog box should pop up.
button and the parameter dialog box should pop up.
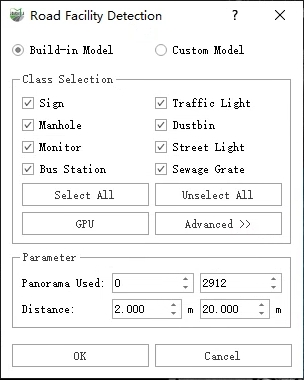
Parameter dialog box
Parameter description:
Category selection: Displays the extraction categories supported by the current function, and users can check/uncheck the extraction categories as needed.
The ticking options are proportional to the time-consuming, that is, the more the user checks, the longer the entire processing process will take. Please tick them according to the actual situation.
Select all/cancel all selections: Click the button to check all supported categories/uncheck all.
Pattern: CPU or Pattern: GPU: For details, please refer to Classify by Deeplearning to set the operation mode.
GPU mode requires computer hardware and software environment support, if the conditions are not met, even if the checkbox is checked, it will still run in CPU mode.
Use image: Used to determine the picture number used in this processing, the default starts from 0, and the ending with the last picture in the project.
Can be used in conjunction with the selection frame, fill in the start and end numbers of the image where the area of interest is located, and the precise start and end image numbers will greatly reduce useless calculations.
Distance: The distance between the target and the center of the camera, less than the shortest distance or greater than the maximum distance, will not be extracted, the default minimum distance is 2.0 meters, and the maximum distance is 20.0 meters.
The appropriate distance can help reduce incorrect extraction. It is recommended to use the default value.
More: Show/close the confidence setting window
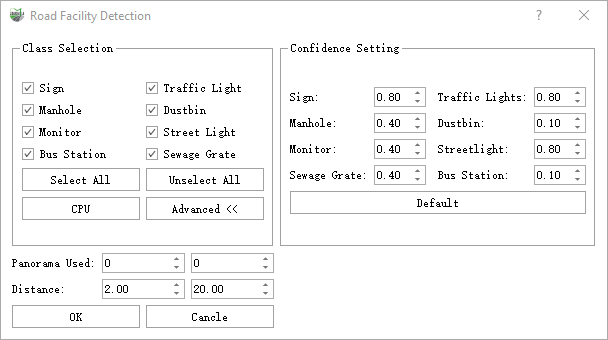
More dialogs
Confidence Setting: For the categories supported by the current function, set the corresponding confidence level separately. And the targets below the set confidence level will be ignored.
Default: This button is used to set the confidence level of all categories to the default value.
OK: After the parameters are set, click the OK button to start automatic detection.
Cancel: Exit function.
2.Click OK for automatic detection.
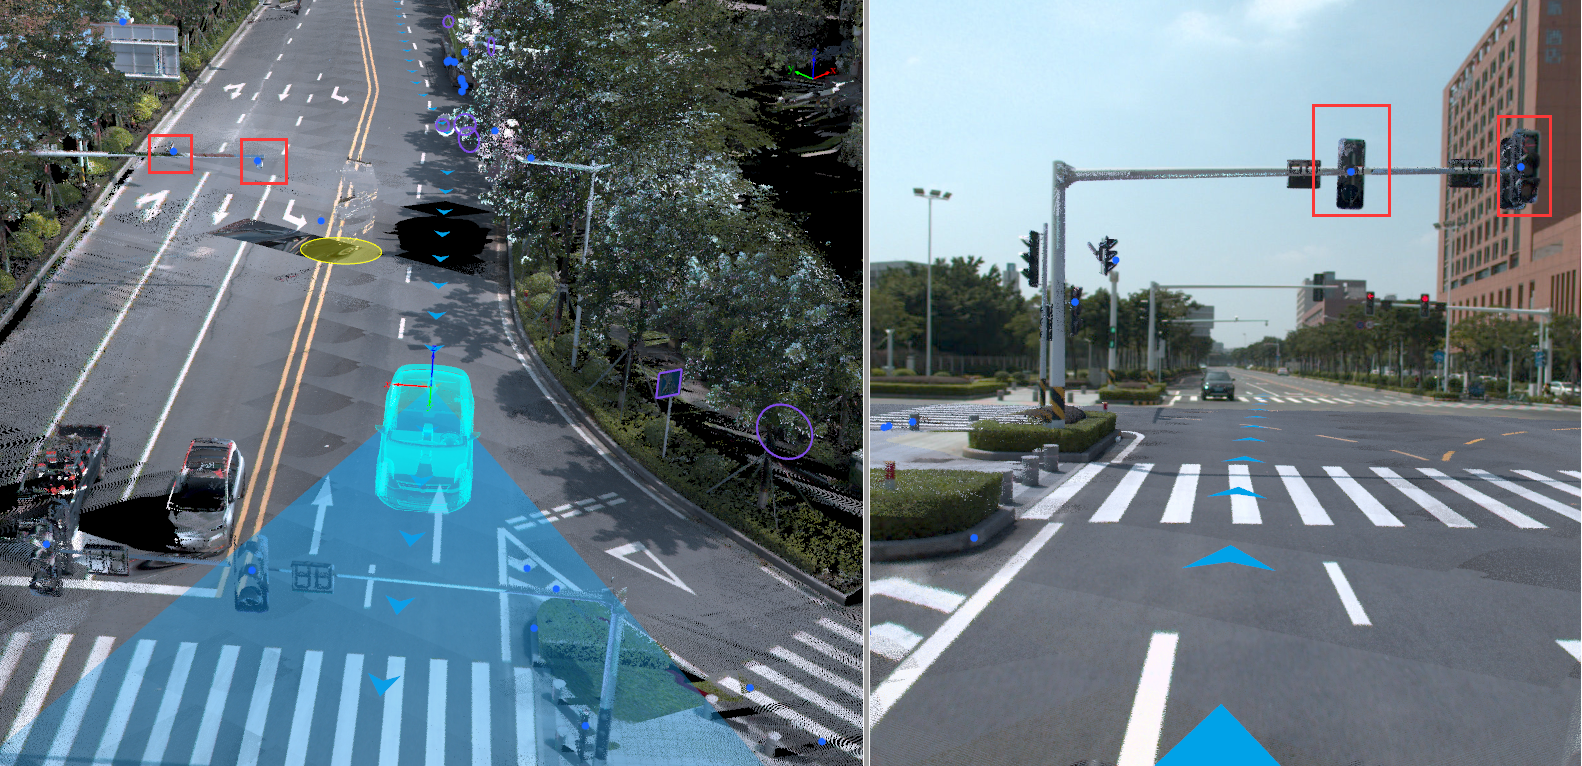
Detection results
Custom Model Mode
Description: Use a self-trained model for inference or perform back-projection on existing inference Json results to extract road facilities.
Differences from Built-in Models:
1.In Custom Model Mode, all results are presented in point vector format.
2.Custom Model Mode supports two types of images: planar images and panoramic images. This corresponds to either a self-trained model or types supported by Json. For example, if the self-trained model is a planar image model, only planar images are supported.
3.It is crucial to have a clear understanding of the image data type and camera number in the current project; selecting an incorrect image type or camera number may result in back-projection failure.
Model Mode
Description: Utilize the Road Facility Training ![]() feature, which employs a deep learning model generated through self-training for deep learning inference on the current project. The inference results are also presented in point vector format.
feature, which employs a deep learning model generated through self-training for deep learning inference on the current project. The inference results are also presented in point vector format.
Steps
1.In the dialog box, select the custom model.
2.Choose Model mode.
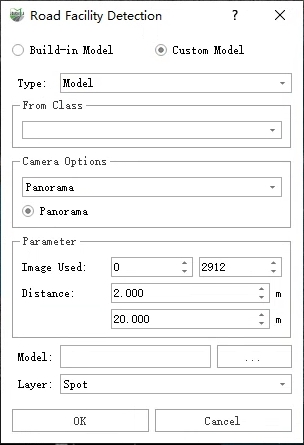
Model
Parameter Description
- Type: The custom model mode being used, currently set to Model mode.
- From Class: Set the point cloud category used for calculations.
- Camera Options: Select the camera for the images. Each mapping only supports data from one camera at a time. For example, if the image is a panoramic image, select panoramic here. If the image is from planar camera 1, choose the planar camera and select camera 1 from the drop down menu.
- Use Image: Choose the images that need to be inferred. The default option is all images, but this can be adjusted as needed.
- Distance: The distance from the camera center. Results that are too close or too far may lead to significant errors due to image resolution issues, or even incorrect results. Therefore, it's important to set a reasonable range to filter inference results; it is recommended to use the default parameters.
- Model: Select the deep learning model (.onnx file). By default, the corresponding .json file of the model is at the same level as the .onnx file, and the software automatically searches for it. Ensure the relative positions are not altered.

Example
- Layer: The layer where the inference results will be saved; all inference results are in point vector format.
Json Mode
Description: Utilize the Detect or Segment Target Using Trained Model ![]() feature found under the raster imagery page to produce inference result JSON files.
feature found under the raster imagery page to produce inference result JSON files.
Steps
1.In the dialog box, select the custom model.
2.Choose Json mode.
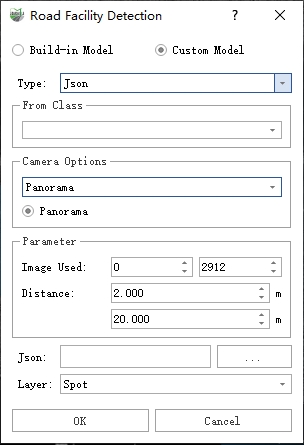
Json
Parameter Description:
- Json: Select the folder corresponding to the .Json file of the images.
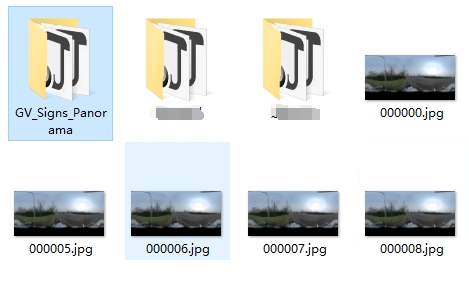
Example
- Other parameters refer to Model mode.