Urban Forestry Batch Visibility Analysis
Panoramic Mode
- After clicking the Batch Visibility Analysis
 button in Urban Forestry, the batch visibility analysis setting page will pop up. As shown in the figure:

Visibility Setting Window
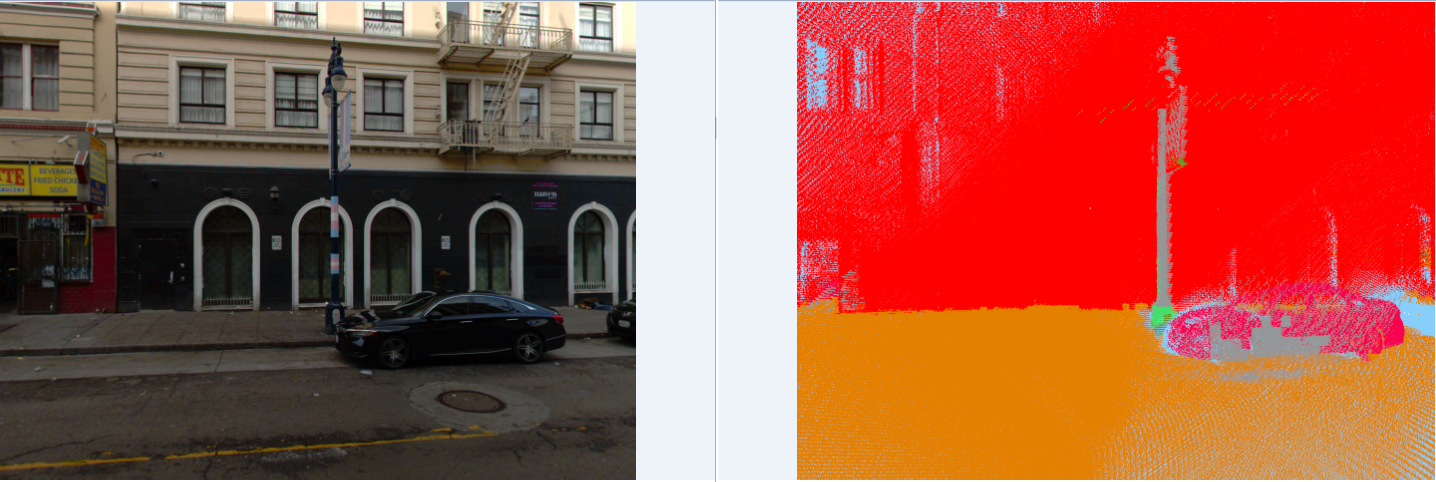
- In the above - shown setting page, first select the point layer for which batch visibility calculation is required. Then set the visible distance and observation point height. At the same time, select the point cloud plant category and building category. Finally, set the grid size for calculation and the point cloud thinning factor. After all settings are confirmed, click Calculate Visibility Area. A progress bar will appear in the lower - right corner of the interface, and the batch visibility analysis calculation will start. After the calculation is completed, the calculation results of each point will be written into the attribute table of that point. As shown in the figure:

Visibility Calculation Results
Viewport Mode
- After clicking the Batch Visibility Analysis button in Urban Forestry, the batch visibility analysis setting page will pop up. Click the frustum - of - view mode in the page, as shown in the figure:
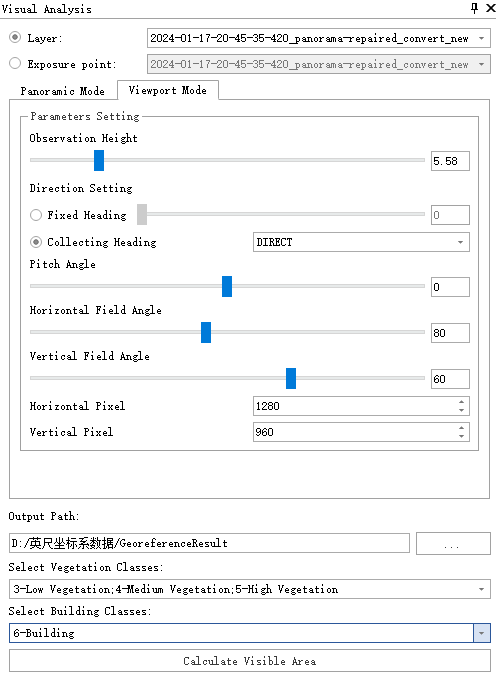
Visibility Setting Window
In the above - shown setting page, first select the point layer for which batch visibility calculation is required. If you want to calculate for exposure points, click to select Exposure Points in the setting window and select the exposure point file to be calculated.
Set the direction angle for the simulated shooting. As shown in the direction settings in the setup window above, if Fixed Direction is selected, all points will face the same direction for the simulated shooting. If Collection Direction is selected, during point layer operations, the value of the selected field in the layer will be used as the direction angle for the simulated shooting; during exposure point operations, the actual collected orientation of the current exposure point will be used for the simulated shooting.
Next, set the visible distance, observation point height, pitch angle, horizontal field of view, vertical field of view, and the pixel size of the output photo. Simultaneously, select the point cloud plant category and building category. After confirming all settings, click on "Calculate Viewshed." A progress bar will appear at the bottom right of the interface, and the batch processing for viewshed analysis and calculation will begin. If exposure point calculation is selected, a new point layer named after the exposure point will first be created based on the exposure point's location to save the calculation results.

Exposure Point Layer
During the calculation process, if a point layer is selected for calculation, the simulated point - cloud photos taken at each point will be saved. If exposure points are selected for calculation, both the point - cloud photos and the exposure - point photos simulated for each exposure point will be saved.
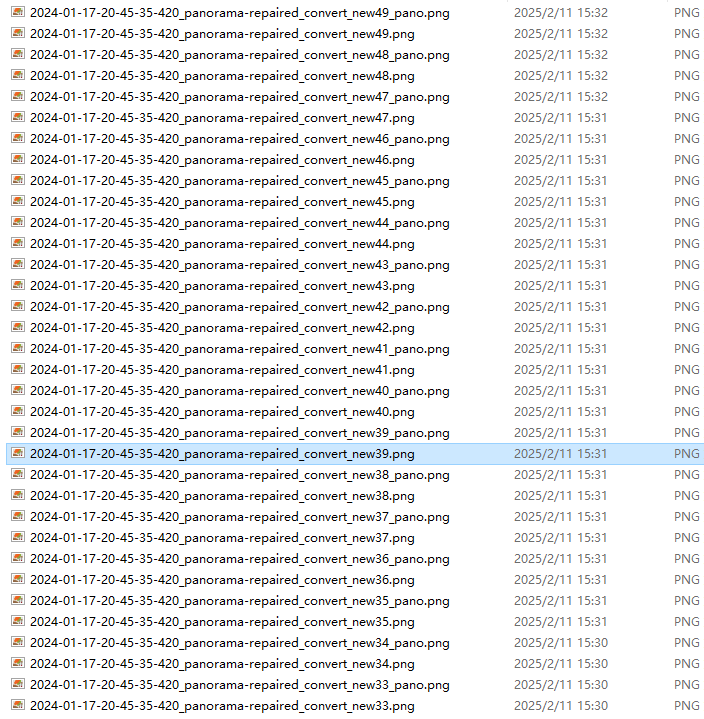
Output Photos Saving
Taking the calculation with exposure points as an example, here are two frames of photo results:
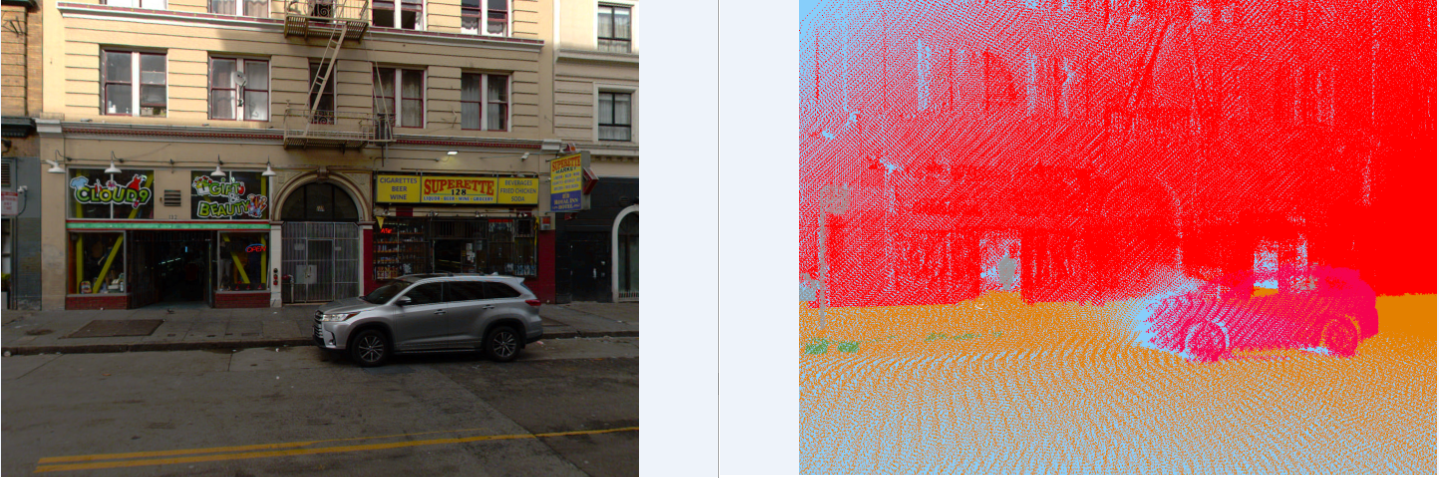
Result Preview
Result Preview
After the calculation is completed, similar to the panoramic mode, the calculation results will be saved in the selected layer or the layer created from the exposure points in the form of attributes.