Detect Dash Line
Note: This function is only effective for areas where the lane line and road surface have high recognition in point cloud intensity.
Steps
1.Click Detect Lane![]() button in the Road Shape panel.
button in the Road Shape panel.
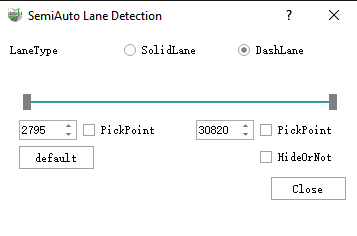
2.The Detection Settings dialog box will appear.
Dashed Lane Dialog

Dashed Lane Dialog
| Shortcut name | Function |
|---|---|
| Space | Interrupt growth |
| Enter | Confirm growth result |
| C | Toggles between automatic/manual drawing mode |
| B | Toggles between batch or one-by-one plotting in manual mode |
| H | switch off/on the top left corner prompt |
| Current model | Current model |
| Right mouse button | Rewind node (only works after interruption, not during growth) |
The lane dash detection function offers two modes, a semi-automatic mode, which automatically detects the lane by means of "Start + Length + Spacing", and a manual mode, which follows the manual drawing mode of the "Draw lane dash" function. Both modes can be switched between during the drawing process by means of C.
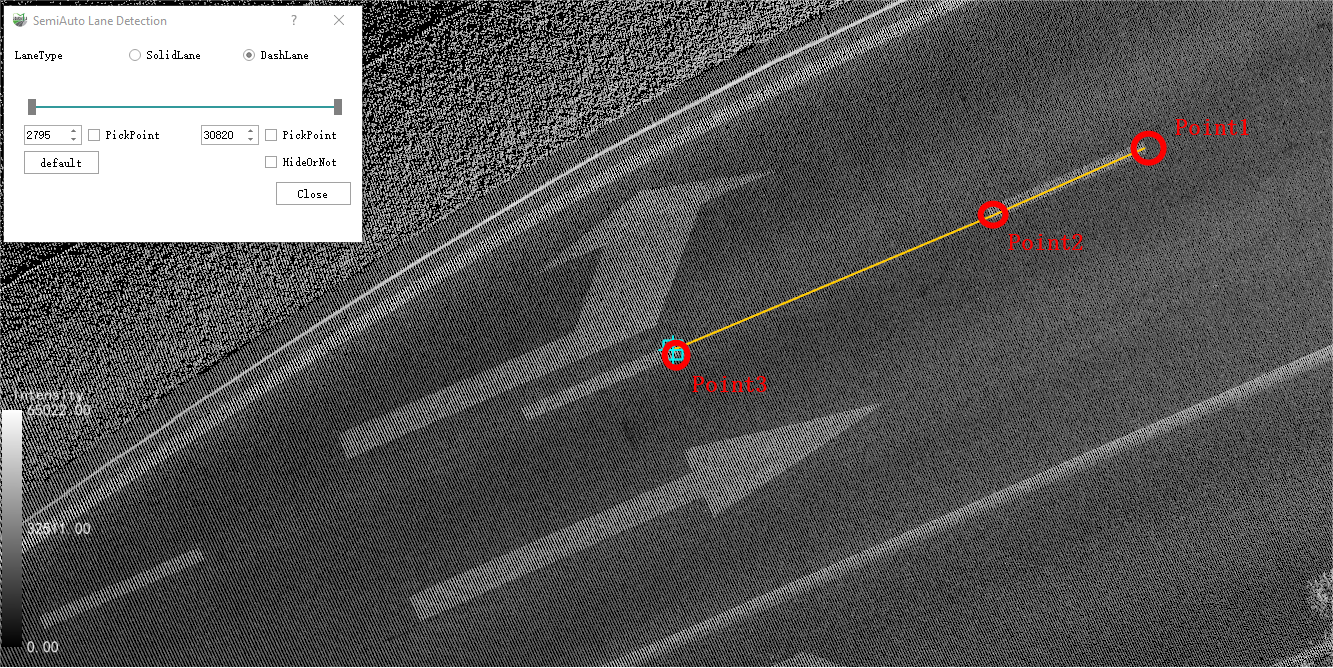
4.The initial drawing mode is "semi-automatic". Click Left on the mouse on a point on the lane line point cloud as the start point, and then left mouse click again to select another point on the lane line as the growth direction.
5.Automatic lane detection begins from Click the starting point, direction point.
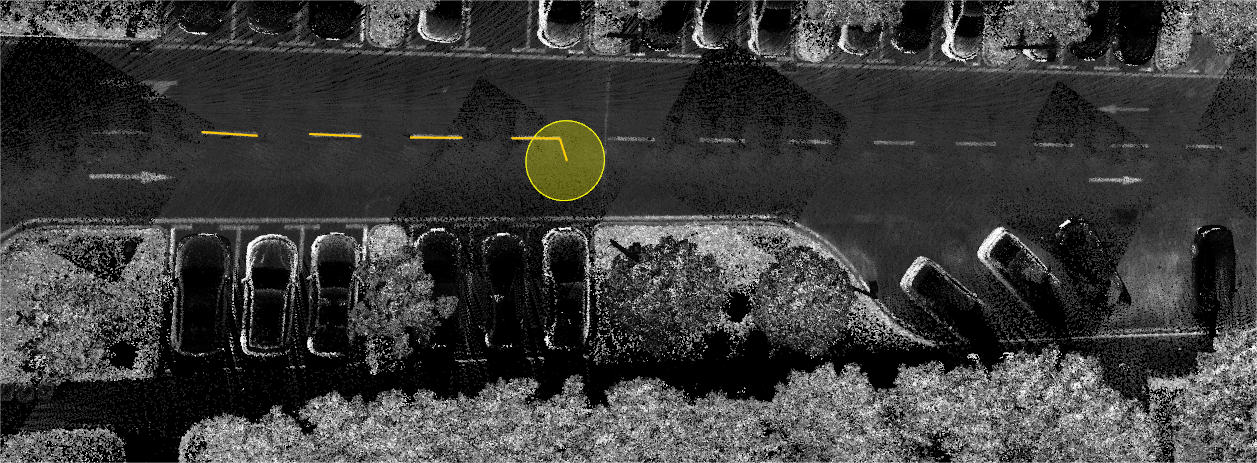
During the growth process, the center of the screen is automatically adjusted to the current growing point; at the same time, the point cloud can be viewed by angle adjusting, dragging, and zooming through left mouse button, right mouse button, and scroll wheel.
6.Use shortcut keys for real-time shape adjustment
- The program is automatically interrupted due to drastic changes in intensity, actual termination, actual interruption, etc.; Users can use the space to manually interrupt if the automatic growth is not correct growth.
- After interruption, Users can use right mouse button to go back (go back a dashed line) to adjust the shape.
- After interruption, Users can repeat operations 3 and 4, followed by automatic growth.
- If the point cloud is missing in a large area or the intensity contrast is very low due to occlusion etc. and the program cannot detect it automatically, you can switch to manual mode with C and then draw it manually by batch drawing or section by section (you can switch with the shortcut key B, for details refer to Lane Dash Lines Drawing). When finished, you can double-click to end the current mode or use C to switch to automatic mode.
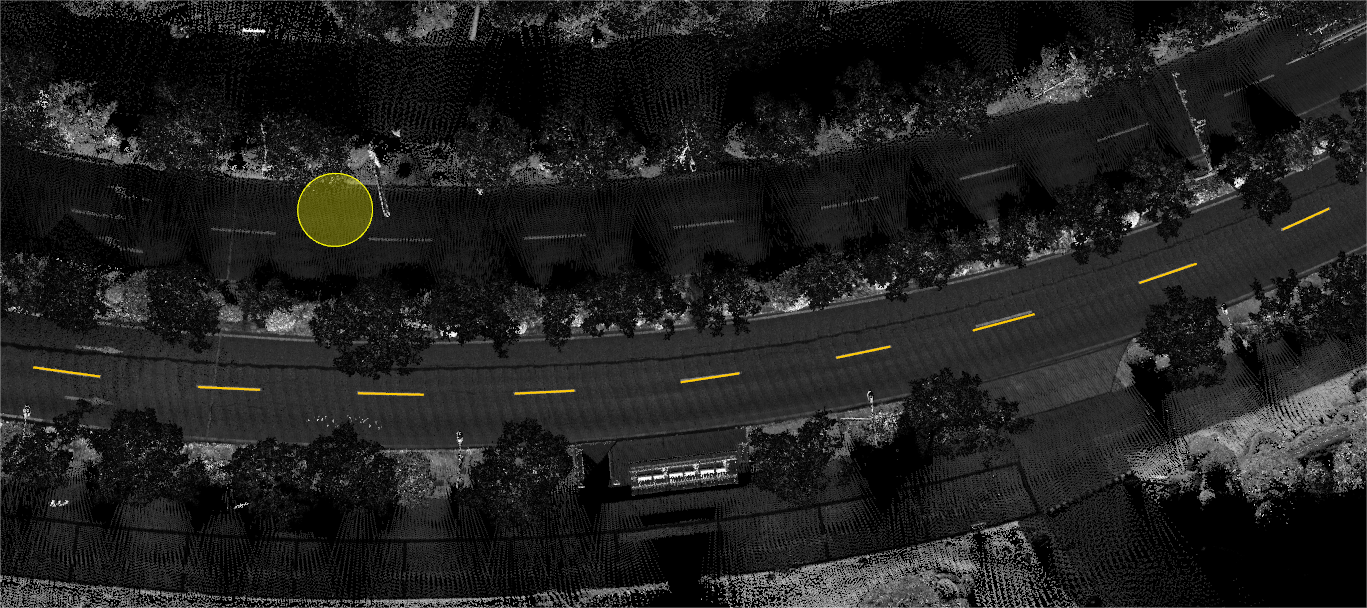
7.When the growth is completed and the shape is acceptable, press the Enter (Enter, confirm key) to complete the growth of the dotted line of the current lane, otherwise, the user can continue to right-click to go back and adjust the threshold again for growth.
Rendering
- Click the starting point and direction point

Click the starting point and direction point/p>
- Automatic or manual interruption during growth

Dashed line growth results
- Growth results

Dashed line growth results