Image Labeling
Interface Layout

The interface is mainly divided into three parts:
1.Labeling tools
2.Image list
3.Label list
Labeling Tools
From left to right: Previous, Next, Select, Create Rectangle, Edit Rectangle, Create Polygon, Edit Polygon, Click, Box, Box Batch,End Labeling.
1.Previous![]() , Next
, Next![]() : Used to switch images in the image list.
: Used to switch images in the image list.
2.Select![]() : Select the labeled vector.
: Select the labeled vector.
3.Create Rectangles![]() , Create Polygons
, Create Polygons![]() : Click the function button to enter the labeling state, use the mouse to draw the vector on the image, the rectangle is a regular rectangle and is automatically generated after drawing two points, the polygon needs to be double-clicked to end, after drawing, a type setting interface will pop up to set the type name for the drawn vector.
: Click the function button to enter the labeling state, use the mouse to draw the vector on the image, the rectangle is a regular rectangle and is automatically generated after drawing two points, the polygon needs to be double-clicked to end, after drawing, a type setting interface will pop up to set the type name for the drawn vector.
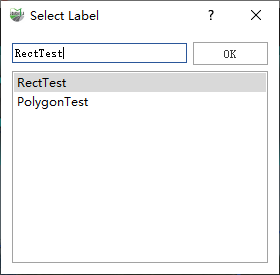
The rectangle will be displayed in the target detection category list, and the polygon will be displayed in the semantic segmentation type.
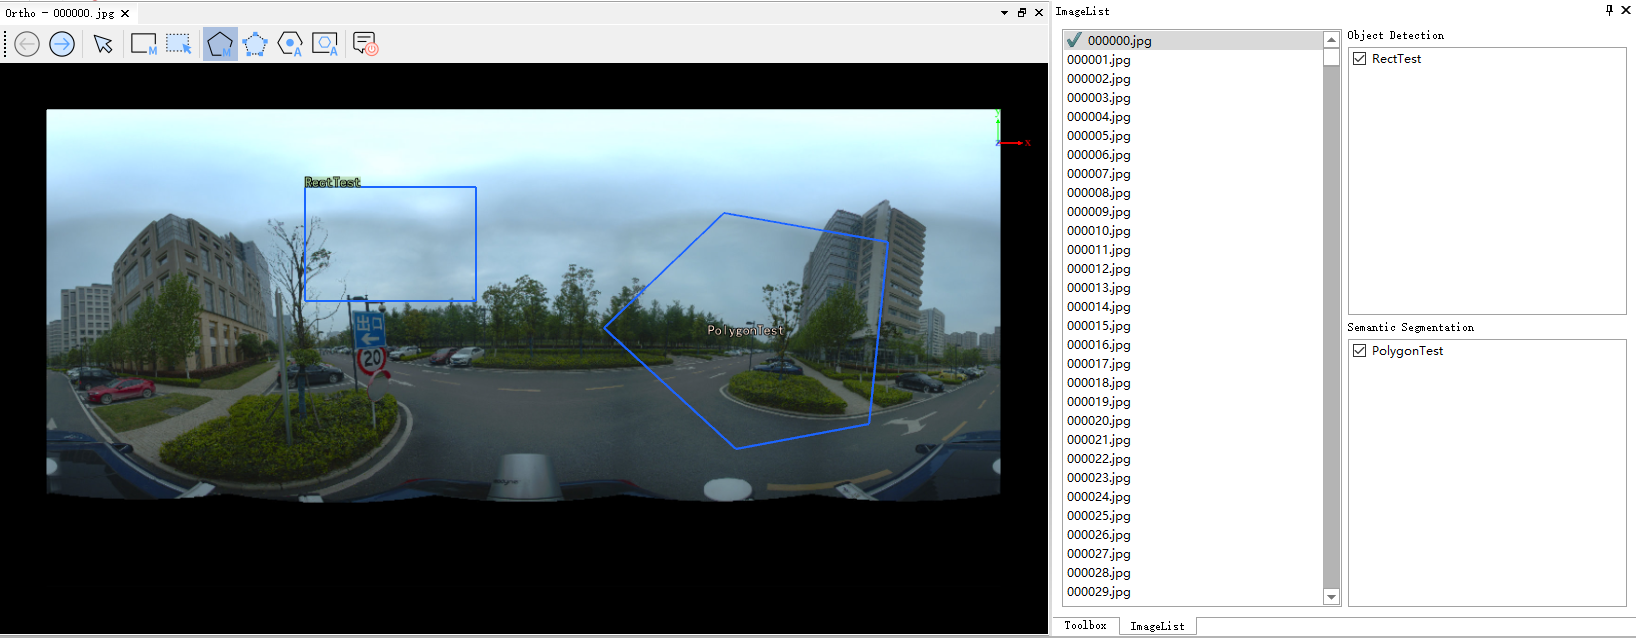
4.Edit Rectangle![]() , Edit Polygon
, Edit Polygon![]() : Click the button to enter the edit state, click the control points of the rectangle and polygon, and adjust the size of the rectangle or the shape of the polygon.
: Click the button to enter the edit state, click the control points of the rectangle and polygon, and adjust the size of the rectangle or the shape of the polygon.
5.Click/Box![]() , Box Prompt
, Box Prompt![]() : Use the software's built-in SAM model, click the corresponding area to automatically label the relevant area.
: Use the software's built-in SAM model, click the corresponding area to automatically label the relevant area.
Initializing the SAM model for the first time will take some time.

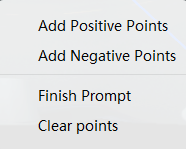
Click: After initialization is complete, right-click in the area to be labeled, and a menu will pop up. You can choose to add Add Positive Points or Add Negative Points multiple times. Positive prompt points are the desired area, and negative prompt points are the undesired area. When the selected area meets the requirements, click Finsih Prompt to pop up the type setting dialog and store it in the semantic segmentation group. If you want to discard this prompt, click Clear Points to discard it.
Box: Just use the left mouse button to click and frame the area. After framing, right-click, a menu will pop up, click Finsih Prompt to pop up the type setting dialog and store it in the semantic segmentation group. If you want to discard this prompt, click Clear Points to discard it.
Box Batch: Identical to Box Batch, except that this method first identifies the target within the selected area, then locates and labels all similar targets in the entire image.(Note: This function has requirements for the computer's performance configuration, and it requires downloading the model separately. When using this function for the first time, follow the prompts in the installation guide to download and place the model file in the designated directory.)

Image List
Used to display all images in the opened image list. The "√" symbol in front of the image name indicates that the image has been labeled.
Label List
The label list is divided into two types: target detection and semantic segmentation, used for different training methods.
Make Mask
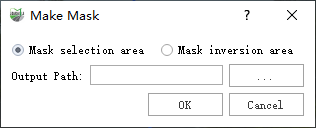
Click the Make Mask![]() button to generate a mask file based on the drawn vector. Mask Selected Area will set the selected vector part to black and the other parts to white. Mask Inverse Area will set the selected vector part to white and the other parts to black.
button to generate a mask file based on the drawn vector. Mask Selected Area will set the selected vector part to black and the other parts to white. Mask Inverse Area will set the selected vector part to white and the other parts to black.
Steps
1.Click the Start Labeling![]() button to enter the labeling mode, display the raster image window, and the functions can be accessed on the Raster page or in the Toolbox.
button to enter the labeling mode, display the raster image window, and the functions can be accessed on the Raster page or in the Toolbox.
2.If the current project has an image list, you can select the image list to be labeled according to the prompt window. Otherwise, click Open File![]() or Open Directory
or Open Directory![]() button to open the image list to be labeled.
button to open the image list to be labeled.

3.Use the labeling tools to start labeling the images.
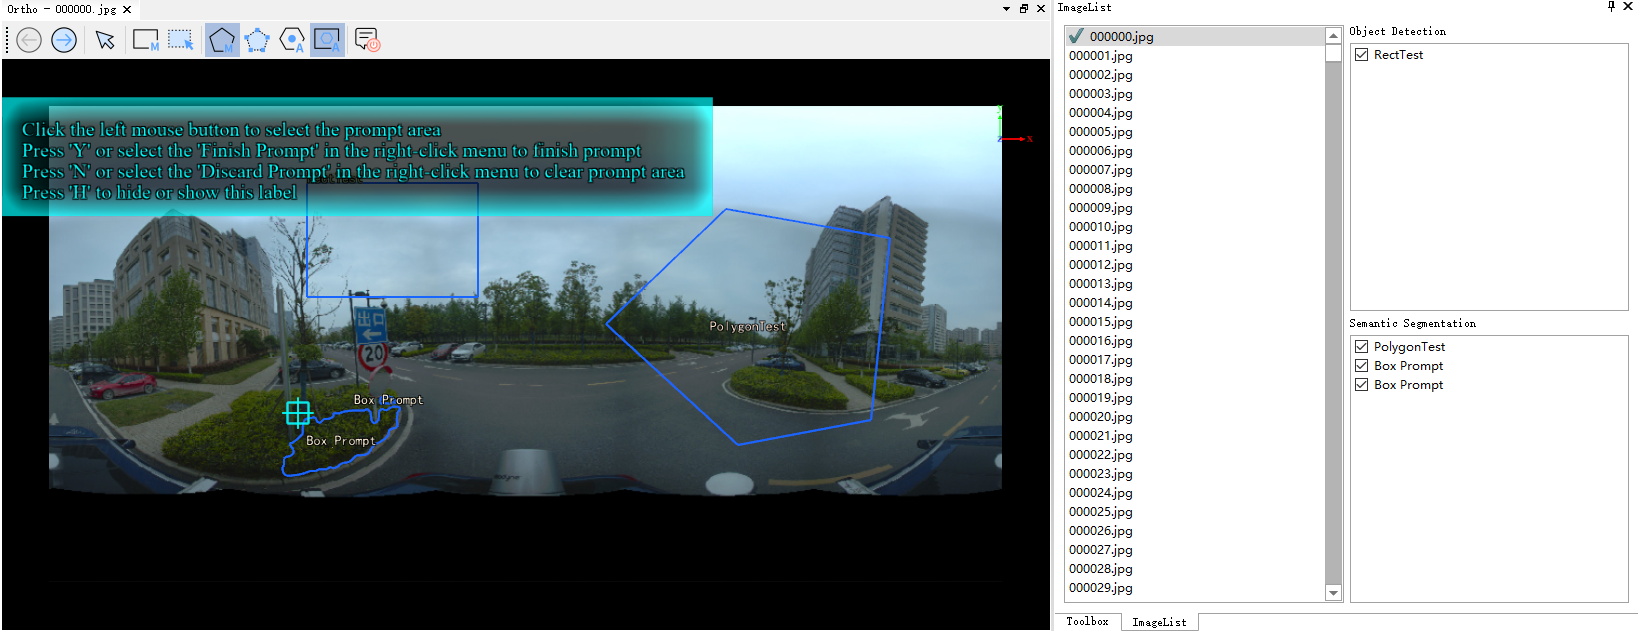
You can use Previous or Next to switch images, or double-click the image list to switch. If you need to delete a vector, right-click to select delete. If you need to modify the label, select the vector in the vector list and choose to edit the label to modify the vector label.
4.Labeling Complete
After labeling is completed, the file structure is as follows: .jpg are image files, .json are the image labeling results, and .ovr and aux.xml are rendered pyramid files.
