Road Facility Training
Steps
1.Prepare Road Facility Symbol Library
Collect a road facility symbol library, ensuring each symbol is a .png image with an alpha channel. Store symbols of the same category in one folder. As shown below:

2.Training
1) Click the Road Facility Training ![]() button to open the road facility training window.
button to open the road facility training window.
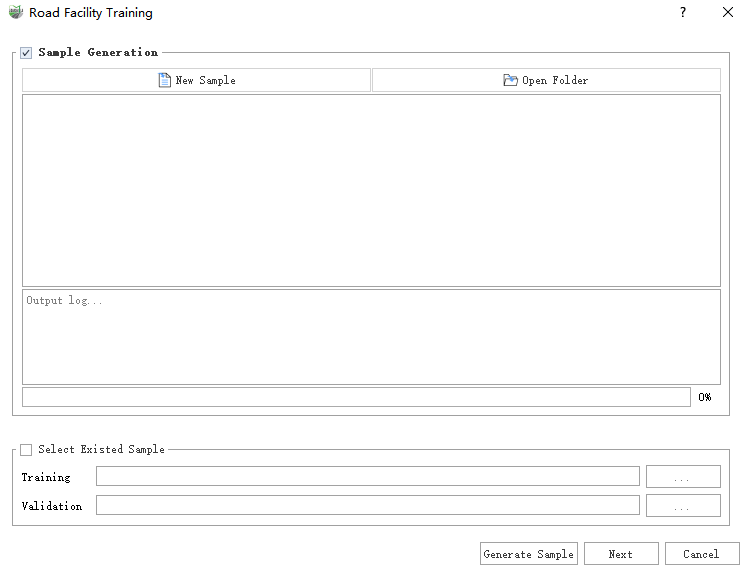
2) Choose to generate samples or use pre-generated samples for training.
(1) Generate Samples
Click New Sample to create categories, adding multiple symbols for each category. As shown below:
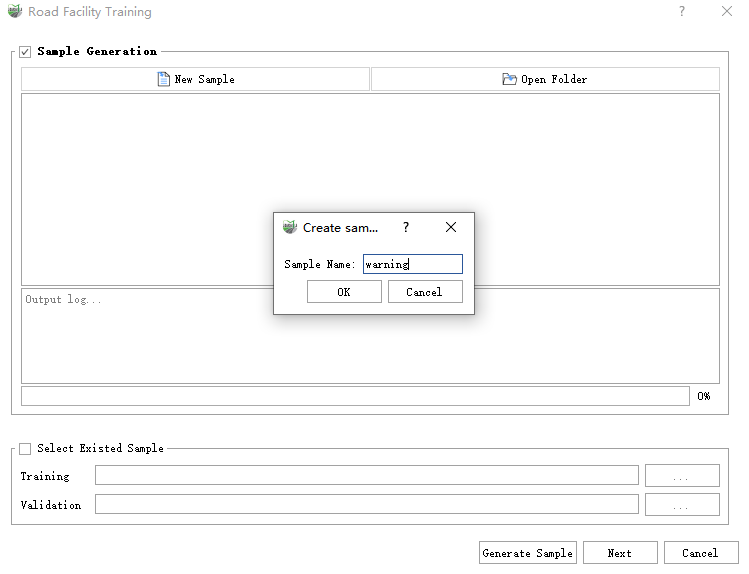
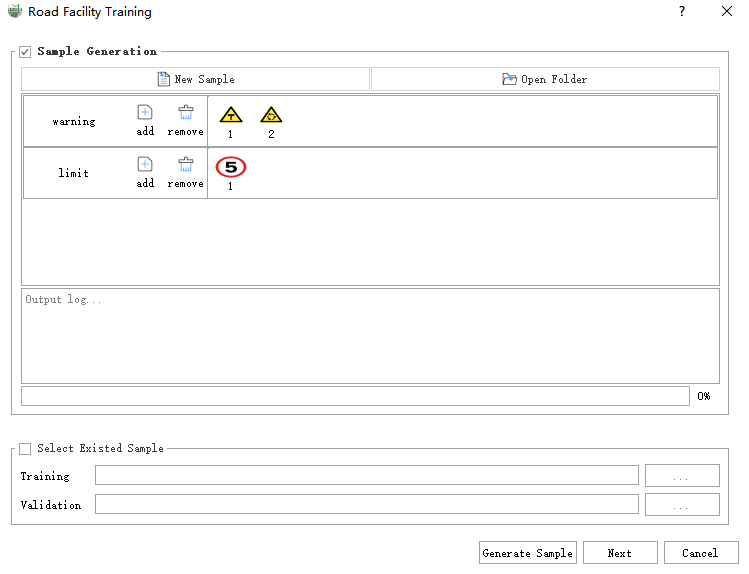
You can also click the open folder button to automatically load the symbol library based on the organized file structure.
File Structure:

Automatic Symbol Library Loading:
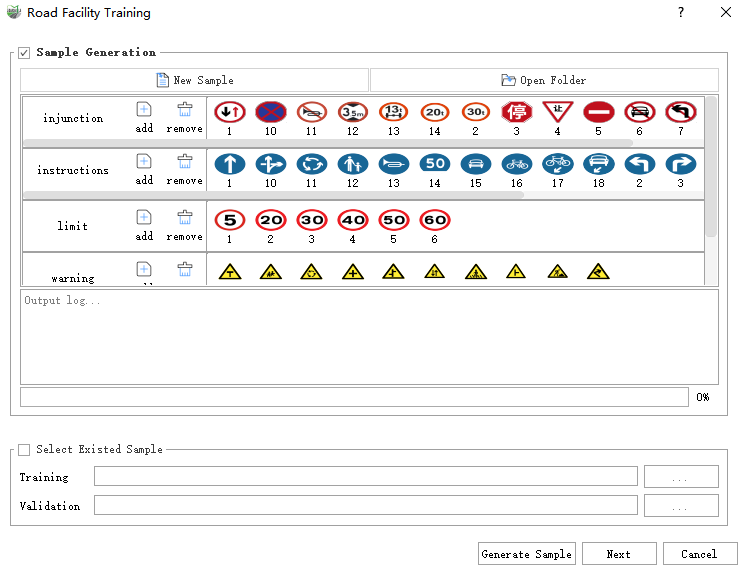
Click the Generate Samples button to start generating samples and wait for the process to complete.
(2) Use Existing Samples
Due to exceptions during the training process, you can select the samples generated by the last training, and select and verify the imagejson files of the data set respectively.
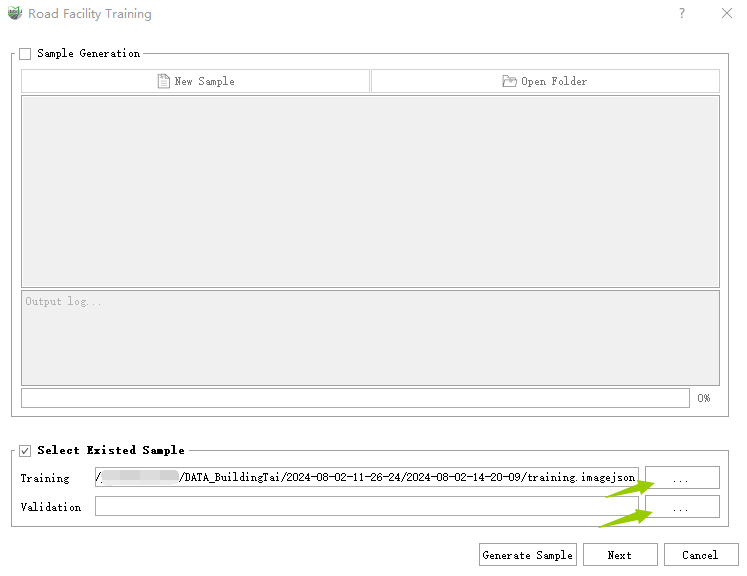
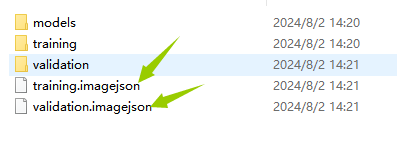
(3) Click Next Page to set training parameters, then click Start to start the training function. After training, you can judge the model convergence by changing the curve in the window. Refer to Image Deep Learning Training.
3.Inference
1) Click the Road Facility Detection ![]() button, and select Custom Model.
button, and select Custom Model.
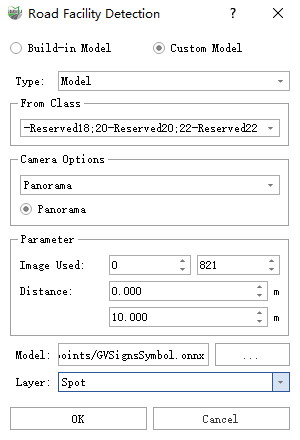
Parameter Explanation:
- Type: Choose between Json and Model. Select Model here.
- Source Category: Select the target point cloud category.
- Camera Options: Choose between panoramic or planar.
- Use Panoramic Image: Set the image range to be processed.
- Distance: Set the projection limit distance. Results beyond this range will be ignored.
- Model: Select the onnx model trained using the road facility training function.
- Layer: Choose the output vector layer.
After setting the parameters, click Confirm to start detection.
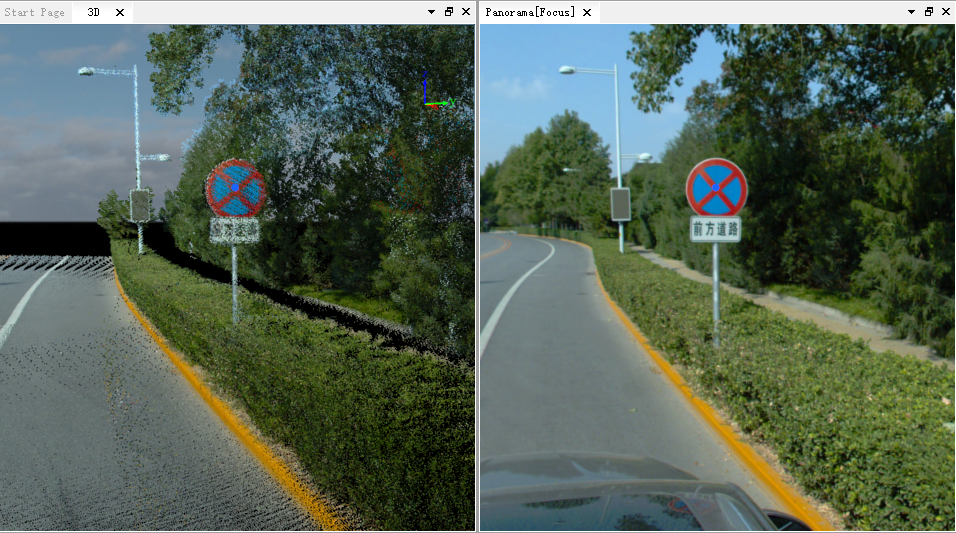
2) After the detection, you can view the vector images in the panorama window and point cloud window.
