New Project
Function Overview
Create a new image project to execute subsequent computational processes. The main operations include selecting a path, adding camera groups, POS operations, and setting the coordinate system.
Usage

Click the " New Project" button to open the new project location.
Select the path for the new project and click "Next" to enter the image loading page.
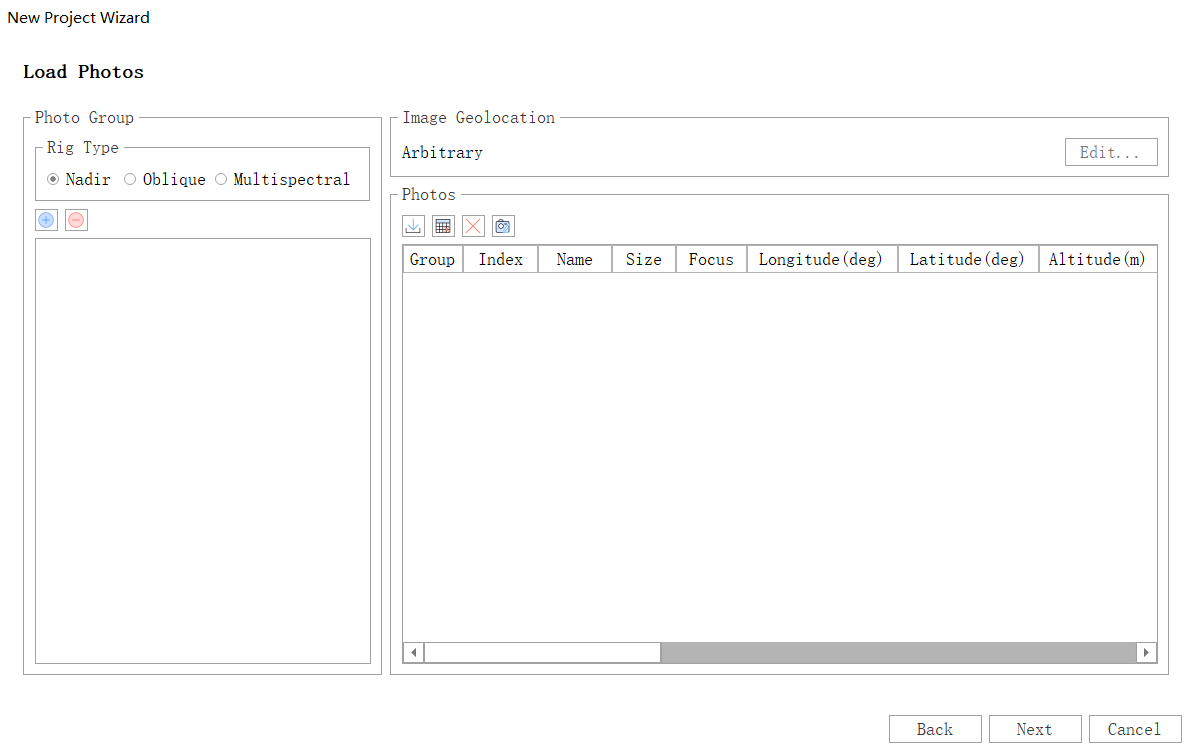
The image loading page requires the following steps. After completing the data and POS settings, click "Next" to select the output coordinate system.
- Select Rig Type: Choose the corresponding data type based on the input image data. Currently, nadir images, oblique images, and multispectral images are supported.
- Add Photo Group: Image data within each camera group uses a common set of camera parameters. Click the plus sign to add a group and select at least one image to add. Click the minus sign to delete an added group. After adding a group, right-click on the group and select "Add Image" to add more images to the group. At least five images need to be added to execute the algorithm process properly.
- Photo Operations: Image operations include POS operations, deleting images, and camera calibration.
- POS Operations: If the imported image data includes EXIF latitude and longitude information, POS information will be imported automatically. To import external POS files, click the "Import POS" button and select the POS file to import. Refer to the Import POS - Import by Filename section for specific operations. Click "Clear POS" to remove the imported POS. Imported POS data can be viewed in the image list.
- Delete Images: Select one or more images from the image list and click the "Delete Images" button to remove the added images from the camera group.
- Camera Calibration: Refer to the Camera Calibration page for specific operations. When the camera type is multispectral, the main band can be set here.
- POS Coordinate System: If there is no POS data, the coordinate system is set to a local coordinate system. If POS information is present, the corresponding coordinate system for the POS needs to be set. When data falls within the latitude and longitude range, the WGS84 coordinate system is recommended by default. To set manually, click the "Edit" button, select "More" in the coordinate system dropdown list, and choose the appropriate coordinate system in the pop-up dialog box.
Select the output coordinate system. This coordinate system is for the final output and can only be a projected coordinate system. If POS was not set during image import, it can only be set to a local coordinate system here. If the POS data coordinate system is WGS84, the corresponding UTM projected coordinate system will be recommended. To set manually, select "More" in the coordinate system dropdown list, and choose the appropriate coordinate system in the pop-up dialog box.
After confirming the settings, click "Finish" to complete the creation of the new project. The new project will be added to the software.