Options
Function Description: This feature includes software system settings, view settings, rendering, category priority settings, shortcuts, and measurement settings. Category priority determines the order of categories in cross-sections, and the order is reflected in the classification interface and category settings interface. Shortcuts allow for quick access to commonly used system functions.
Steps
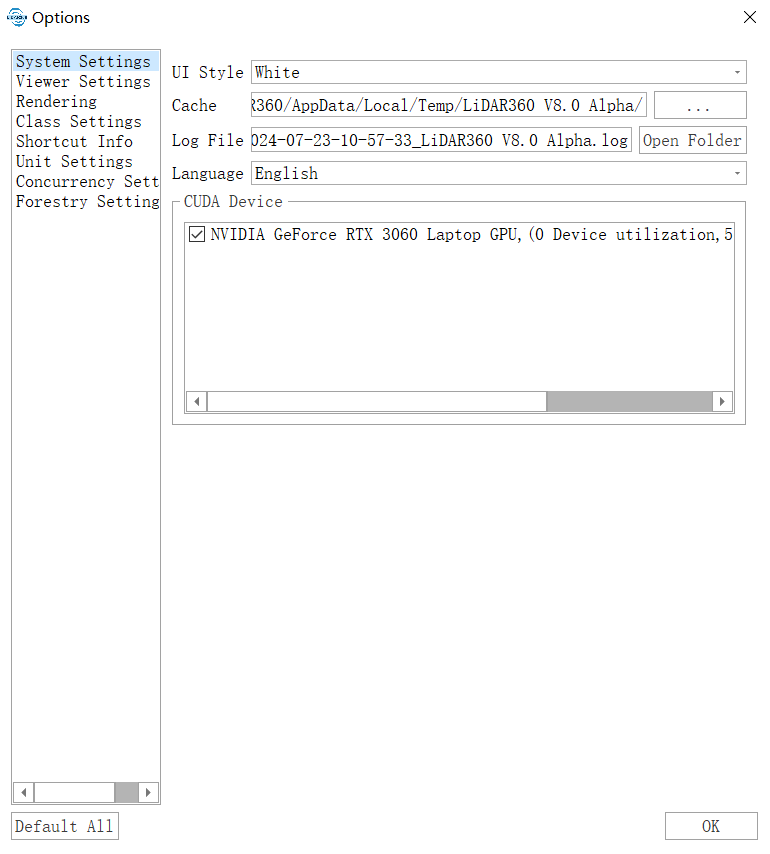
- Upon selecting this feature, the following interface will appear. System settings include interface theme and language settings. Users can choose from themes such as Landscape, Blue, White, and Dark Gray. Languages available are English, Chinese, French, Japanese, Korean, and Russian.
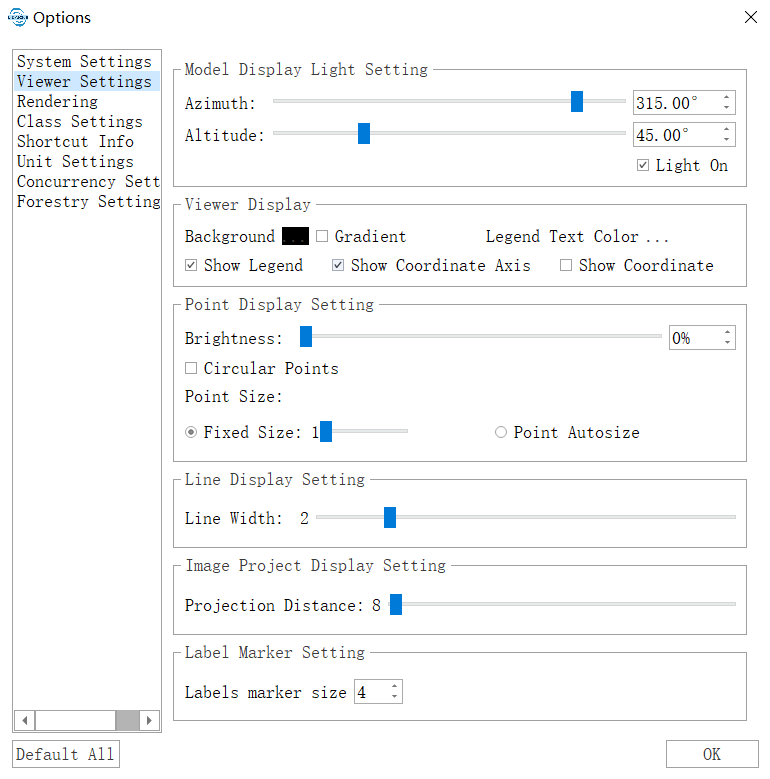
- The "Viewer Settings" option allows users to configure the display of models in all software views, including lighting settings, background color (enabling the "Gradient" option next to the background color allows for a gradient background effect), point display in point clouds, and label properties. Lighting settings apply only to model files (such as LiModel, LiTin, OSGB, etc.) and allow for changes to the light source position.
- The "Rendering" option includes real-time contour settings. Users can configure the contour base, contour interval, line width, primary and index contour colors, etc. The "Use shader rendering color strategy" checkbox determines whether to use shaders for rendering the color strategy of point clouds. The shader rendering color strategy allows the same point cloud to be displayed with different color strategies in different windows, utilizing programmable pipeline shader technology.
- The "Class Settings" option allows users to define default categories within the software.
- The "Shortcut Info" option enables users to customize keyboard shortcuts. Refer to Shortcuts for details on how to set them.
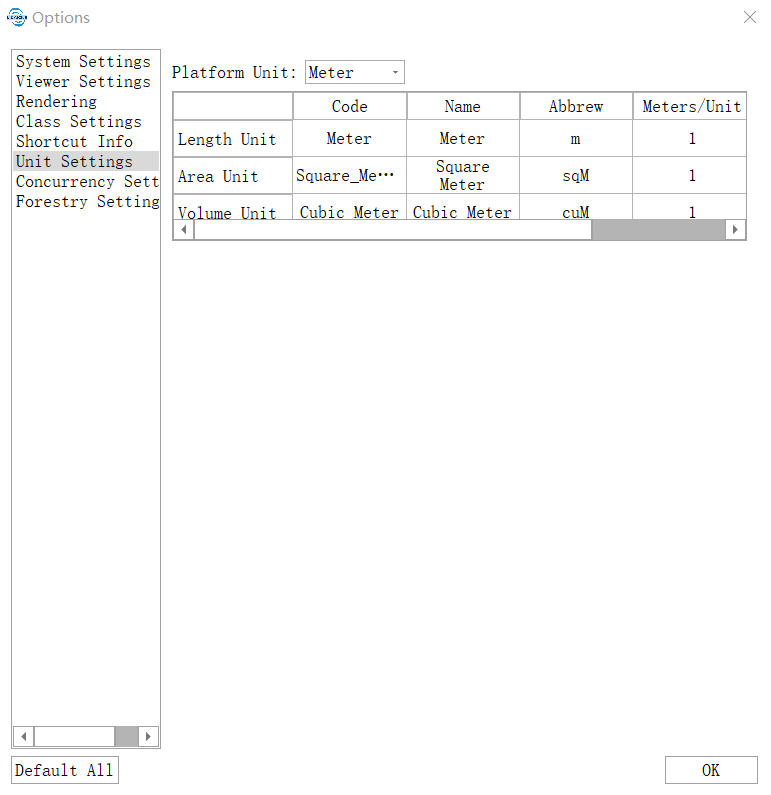
- The "Unit Settings" option changes the interface as shown below.
If the source and target units are the same, the measurement results will be displayed in the corresponding units. If the source and target units differ, the results will be multiplied by the scale factor between the units, and the displayed unit will be the actual target unit.
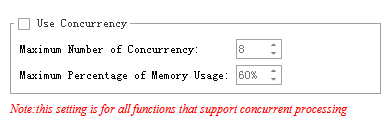
- Clicking the "Concurrency Settings" option changes the interface as shown below.
Here, users can configure the concurrency parameters used in certain computational processes. The "Use Concurrency" checkbox determines whether concurrency is enabled. Concurrency parameters can be applied to functions such as noise removal, noise filtering, and point cloud smoothing. "Maximum Concurrency Count" refers to the maximum number of threads used during computation, while "Maximum Memory Usage Ratio" specifies the maximum percentage of physical memory that can be used during concurrency.
Clicking the "Forestry Settings" option changes the interface as shown below.
This section allows users to configure the settings for individual tree segmentation, attribute statistics output, and tree models within the forestry module.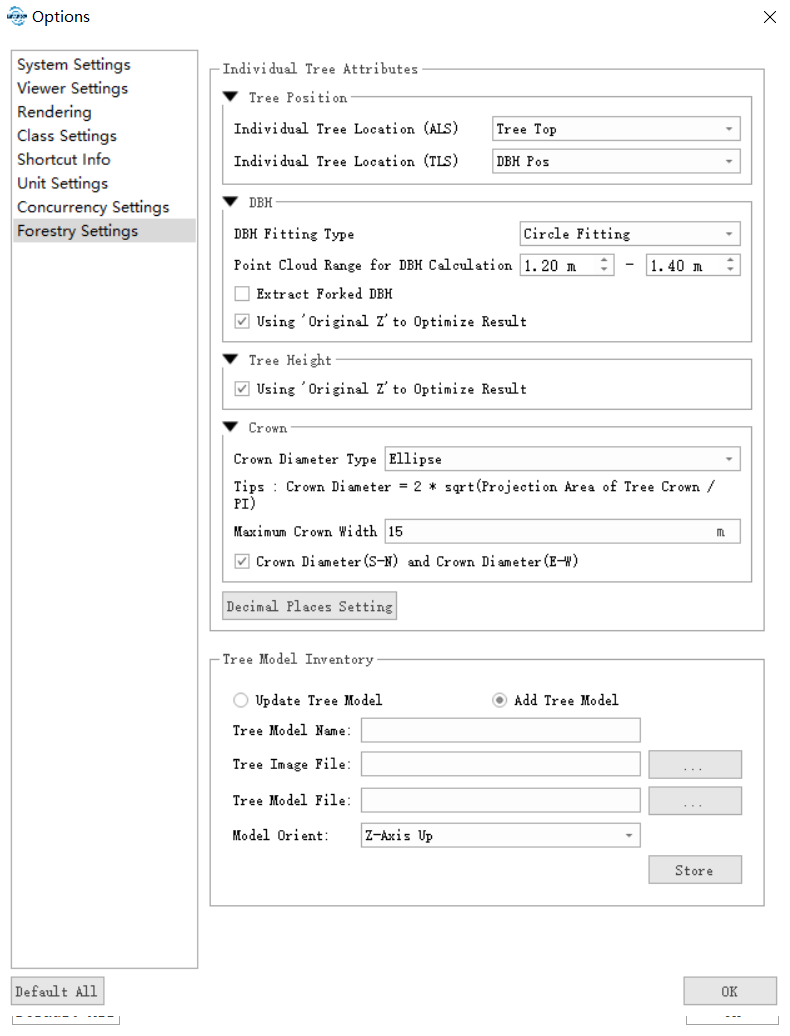
- Parameter Calculation Settings:
- Individual Tree Location (Airborne Forestry): Used to set the type of tree orientation used in the output results of airborne forestry individual tree segmentation or attribute statistics. Options include "Tree Top" and "Centroid."
- Individual Tree Location (Ground-based Forestry): Used to set the type of tree orientation used in the output results of ground-based forestry. Options include "Tree Top," "Centroid," and "Diameter at Breast Height (DBH) Position."
- Crown Diameter Calculation Method: Used to set the calculation method for "Crown Diameter" in the results. Options include "Average," "Derived from Fitted Circle," and "Derived from Fitted Ellipse."
- The "Average" crown diameter calculation formula is "Crown Diameter = (North-South Crown Diameter + East-West Crown Diameter) / 2." - The "Derived from Fitted Circle" calculation formula is "Crown Diameter = 2 * sqrt(Canopy Projection Area / π)." - The "Derived from Fitted Ellipse" calculation formula is "Crown Diameter = sqrt(North-South Crown Diameter * East-West Crown Diameter)."- Decimal Places for DBH Output: Used to set the number of decimal places retained for DBH values in the output results.
- Precision of Other Attributes: Used to set the number of decimal places retained for other attributes in the output results, excluding DBH.
- DBH Height Range: Used to set the height range of point clouds used to calculate DBH. Most countries use 1.3m (1.2~1.4), while Japan typically uses 1.2m.
- Maximum Crown Width (Default is 15m): The maximum crown width of all standing trees in a stand. This parameter is mainly used for individual tree segmentation and attribute statistics. If set too small, it may lead to over-segmentation; if set too large, it may reduce program efficiency.
- DBH Fitting Type (Default is Circular Fitting): Supports circular fitting, elliptical fitting, and cylindrical fitting.
- Additional Output Items: Used to determine whether to include "North-South Crown Diameter" and "East-West Crown Diameter" in the output results.
- Tree Model Settings:
- Tree Model: Select the tree model to update or delete. Choose "Add Custom Tree Model" to add a new tree model.
- Model Name: Set the name for the new tree model. This option appears when "Add Custom Tree Model" is selected in the tree model dropdown.
- Image File: Set the image file used for distant view display in this model. The tree will be displayed using a crossed pattern of this image file when viewed from a distance.
- Model File: Set the detailed model file used for close-up display. The tree will be displayed using this model when viewed up close. Note: The Y-axis direction of the model corresponds to the tree height direction, and the origin of the model is at the base of the tree.
- Remove: Remove the currently selected tree model.
- Add/Update: Add the currently set tree model. If a model with the same name exists, it will be updated.
- Parameter Calculation Settings:
- Click the "Restore Defaults" button to restore system defaults.
- The "P" keyboard shortcut can be used to adjust the light source position.