Edit Waypoint
Summary
Waypoint functions mainly include modifying waypoints, adding waypoints and deleting waypoints. The operation is mainly performed after the trajectory is generated.
Usage
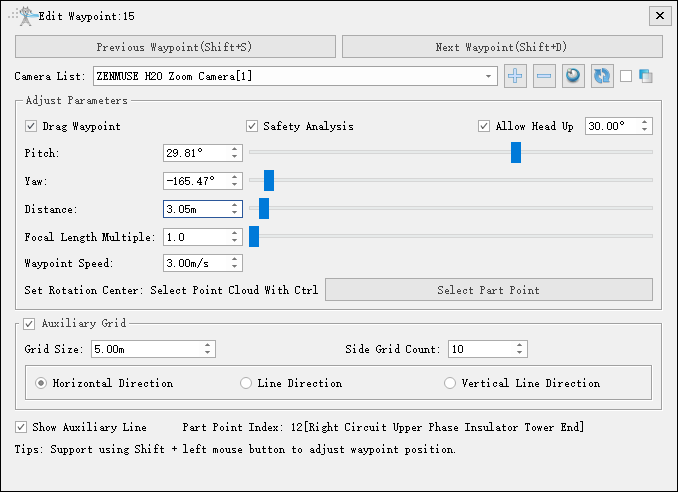
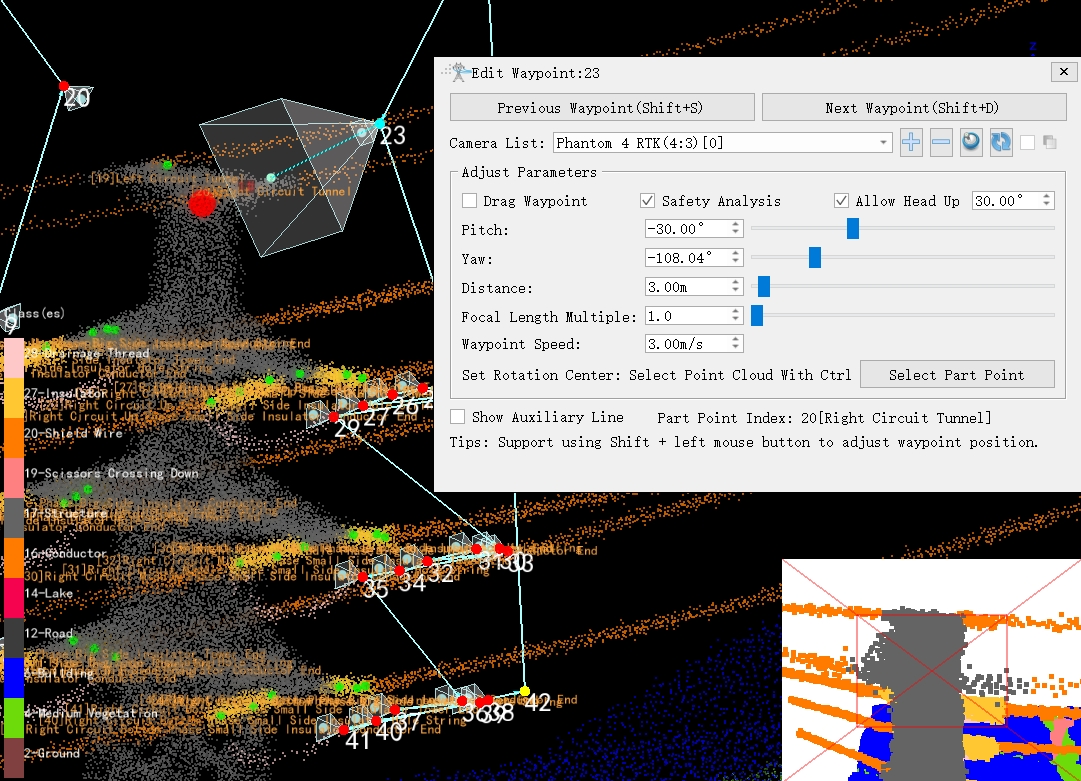
Use the "Fine inspection" module, after generating the trajectory, Click Waypoint > Edit, and the mouse turns into a cross state. Click on any waypoint at this time, and a dialog box for adjusting and editing waypoints pops up. You can edit the position of navigation point, the angle of taking photos, the number of taking photos, etc.


Settings
- Previous Waypoint/Next Waypoint: Quickly switch to the previous waypoint and the next waypoint for editing.
- Camera List: Switch the current camera and display the corresponding vertebrae. Cameras can be added and removed using the add/subtract button on the side. After adding a camera, the current camera will be set as the newly added camera. Other tools can be used to modify the camera.
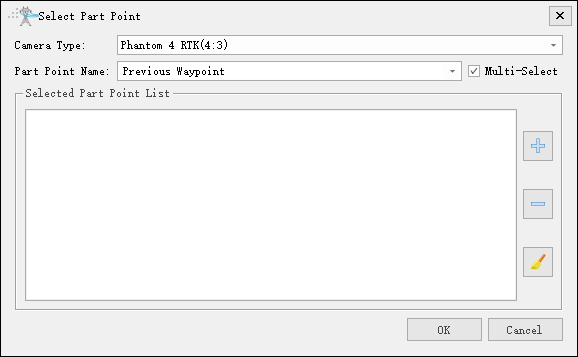
- Add Camera: Adding camera is divided into selecting camera types and selecting part point. Multiple part point can be selected to support shooting multiple part point at one waypoint.

- Person Perspective: Quickly locate the first-person view of the waypoint.
- Reset: After modifying the waypoint parameters, clicking the reset can restore the original parameters.
- Overlay Display: When multiple photos are taken at a waypoint, check the option to overlay and display the preview range.
- Adjust Parameters: Mainly adjust the parameter of waypoints.
- Drag Waypoint: Holding down the left mouse button, drag a point in the point cloud view to adjust its position.
- Safety Analysis: If checked, verify security
- Allow Head Up: If checked, set the maximum angle for the camera to look up. Do not exceed the maximum angle.
- Pitch/Yaw: Adjust the pitch angle and yaw angle by manually entering, clicking the up and down arrows, and dragging the slider.
- Distance: The distance from the waypoint to be photographed is the value from the waypoint to the component point, and the distance from the auxiliary waypoint is the value from the waypoint to the marked tower point.
- Focal Length Multiple: Set the focal length multiple.
- Waypoint Speed: Set the waypoint speed.
- Set Rotation Center: To re-select the rotation center of the navigation point, press Ctrl + left to select any point on the point cloud. If you want to specify the component point or the front and back navigation points, you can also use the select component point button.
- Auxiliary Grid: If check the "Drag Waypoint", this will display. Not selected by default, the auxiliary grid is displayed when selected.
- Grid Size(default value is "5.00m"): Side length of grid.
- Side Grid Count(default value is "10"): Number of side grids.
- Horizontal Grid: Display a grid that passes through the tower point and is parallel to the XY plane.
- Line Direction Grid: Display the grid passing through the tower point and parallel to the plane along the line.
- Vertical Line Direction Grid: Display the grid passing through the tower point and parallel to the horizontal line direction plane.
- Show Auxiliary Line: Selected by default.If selected, navigational guides are displayed. If unchecked, navigational guides are hidden.