Insulator Vectorization
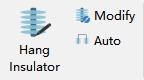
Insulator Vectorization Toolbar is as below, including Hang Insulator, Modify Insulator, Auto Hang Insulator.
Hang Insulator
Vectorize insulator. Click Hang Insulator button and a window will pop up. The operation steps are as below:
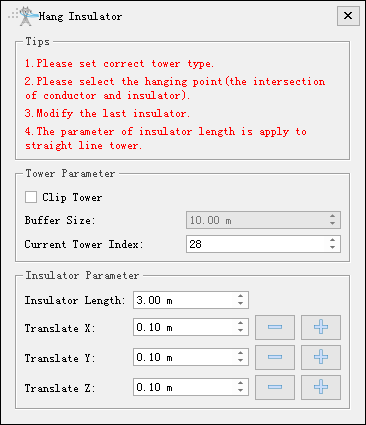
- Clip Tower: Uncheck by default. If check this function for editing convenience, then the point cloud file will be clipped into several separate files by tower mark and buffer size.
- Buffer Size (meter, 10 by default): The half length of the XY plane of the cutting bounding box is used to control the size of the cutting area.
- Current Tower Index: Index of tower being edited.
- Insulator Length (meter, 3 by default): Insulator length.
- Translate X (meter, 0.1 by default): Set translation distance along X-axis of the last drawn insulator.
- Translate Y (meter, 0.1 by default): Set translation distance along Y-axis of the last drawn insulator.
- Translate Z (meter, 0.1 by default): Set translation distance along Z-axis of the last drawn insulator.
- Set tower type and enter tower index corresponding to towers in viewer.
- Use length measurement tool to measure the length of insulator and set average length as insulator length.
- Left click to pick up hang point(point connecting insulator and power line). For tension tower, insulator is vectorized as point; for straight line tower, insulator is vectorized as line.
- Vectorize next insulator, or right click to exit insulator vectorization.
Modify Insulator
Edit position of selected insulator, the operation steps are as below:
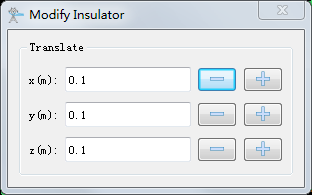
- Translate X (meter, 0.1 by default): Set translation distance along X-axis of the selected drawn insulator.
- Translate Y (meter, 0.1 by default): Set translation distance along Y-axis of the selected drawn insulator.
- Translate Z (meter, 0.1 by default): Set translation distance along Z-axis of the selected drawn insulator.
- Click Modify Insulator button, then click and select the insulator to be edited. Set edit parameters in the pop up window.
- Click the right mouse button to hide the dialog and continue to modify the next insulator.
- After the modification is completed, right-click again to exit the function.
Auto Hang Insulator
To automatically hang insulators, wires and insulators needed to be classified first.
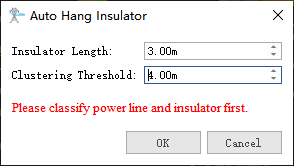
Note: For the distribution network point cloud data with a detected line voltage level of 10kV, only clustering threshold are required, and all insulators are vectorized are points.
Note: please add in corresponding tower file(*.LiTower) before using insulator vectorization tools.