Mark Tower
Summary
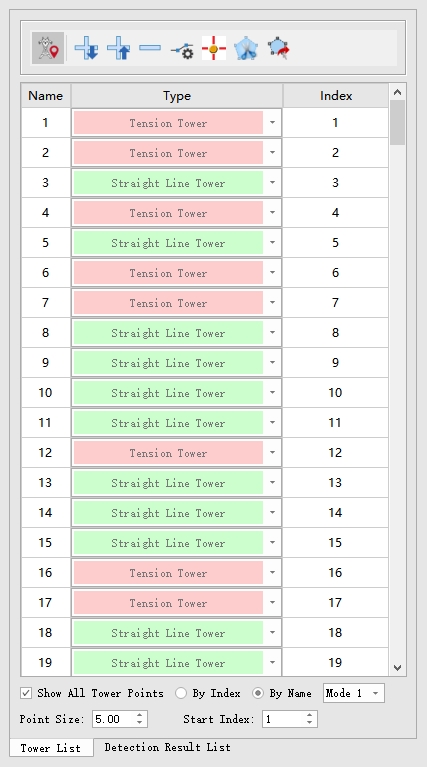
After clicking in the point cloud data and choosing the tower type, user can save the result into LiTower file. After adding the position information of the tower, the software will automatically generate the index and name information of the tower. Index is a number starting from the starting value and incrementing by 1. By default, name is the same as Index. Tower type includes "None Type", "Tension Tower" and "Straight Line Tower". Double-click the row for each tower to jump to that tower in the displaying window. By checking or unchecking the checkbox in front of "Show All Tower Points" to display or hiding the tower points in the window. Point size can be modified. By clicking the hot key "S" and "D" on the keyboard to move the edited tower record forward or backward.

- Show All Tower Point(checked by default): Display the tower names or indexes in the window. Uncheck this option to hide the all the tower names or indexes.
- By Index: Display the tower index.
- By Name: Display the tower name.
- Display Mode: In the 3D view of Mode 1, the size of the tower annotation changes with the zoom of the view, while in the 3D view of Mode 2, the size of the tower annotation remains fixed and unchanged.
- Point Size(meters)(default value is "5.0"): Set the red marker sphere and text font size of the tower.
- Start Index: The number of the first tower is set to 1 by default.
Mark Tower
Click this button to start to pick the tower points. Click again to exit this function and save the current tower information to the tower.LiTower file in the working directory.
Add Tower Backward
Add a tower record after currently selected record.
Add Tower Forward
Add a tower record before currently selected record.
Delete Tower
Delete the current selected tower record.
Modify Tower Position
Modify the position of the selected tower.
Tower Centralization
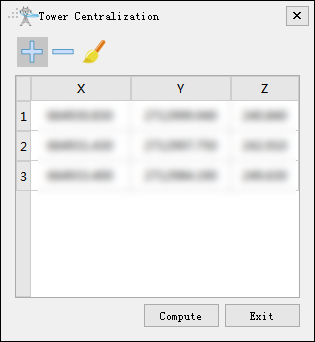
Click this button and the centralize tower window will popup. Click to select several points on the tower, and click calculate button to get the center point of the tower. Click the function button again to exit this function, and the tower information will be stored in the tower.LiTower file in the working directory.

Clip Point Cloud
Clip point cloud in the view to facilitate tower marking operations.
Cancel Clip
Cancel clipping point clouds in the view and restore the original point cloud view.
Batch Edit Tower Name
Right-click on the "Name" column in the tower list, and the popup selection menu is shown in the figure below, including "Add Prefix", "Adding Suffix", and "Batch Editing". It can be used to add prefix, suffix, or simultaneous edit the tower names.

Batch Edit Tower Type
Right-click on the "Type" column in the tower list, and the popup selection menu is shown in the figure below, including "Set As Straight Line Tower" and "Set As Tension Tower". User can modify the tower type as straight line tower or tension tower in batches.

Import Tower File
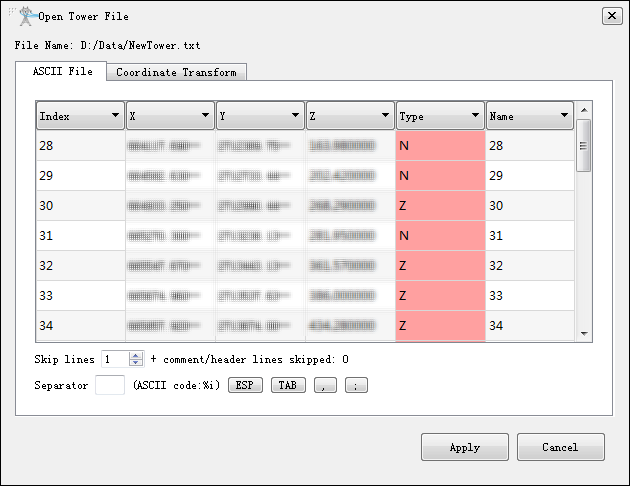
Input the tower file and renew the tower list in LiTower, txt, csv, and kml format. If the input file is in txt or csv format, user can follow the steps below to load the tower information.

- Adjust the data type for each column, and select the number of skipped rows and the type of separator.
- If the input data's coordinates are in latitude and longitude, user can check the "Transform" option in tab to convert the geographic coordinates into projected coordinates.
- Click "Apply" to import the tower file and renew the tower list.
Export Tower File
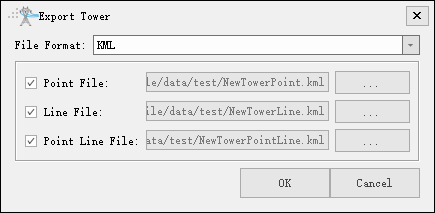
Export the information in the current tower list to LiTower, KML and CSV file.

- Select the export file format, including LiTower,KML and CSV format. User can choose the export types of point, line, point and line when selecting KML.
- Set the output path.
- Click "OK" to export the tower file.