Exercise 3. Measurements
All LiDAR360’s measurement tools are available from the following toolbar.

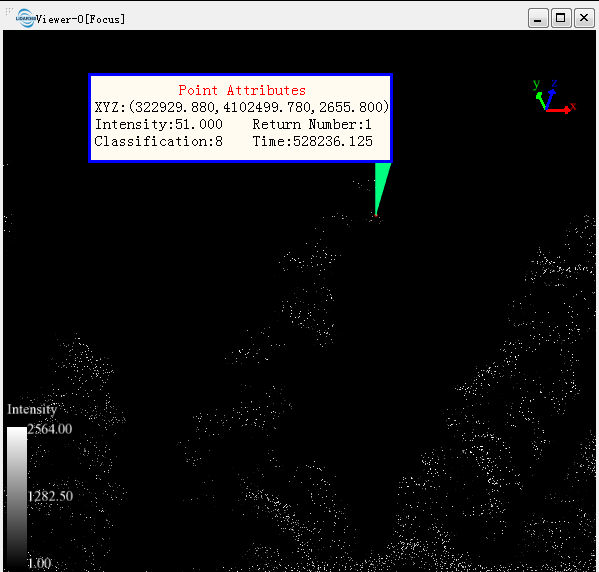
3.1 Point Selection
Use Pick Point tool ![]() to select a point. Examine the 3D- Coordinate, Intensity, Return Number, Classification, and Time attributes of the point in the resulting window.
to select a point. Examine the 3D- Coordinate, Intensity, Return Number, Classification, and Time attributes of the point in the resulting window.
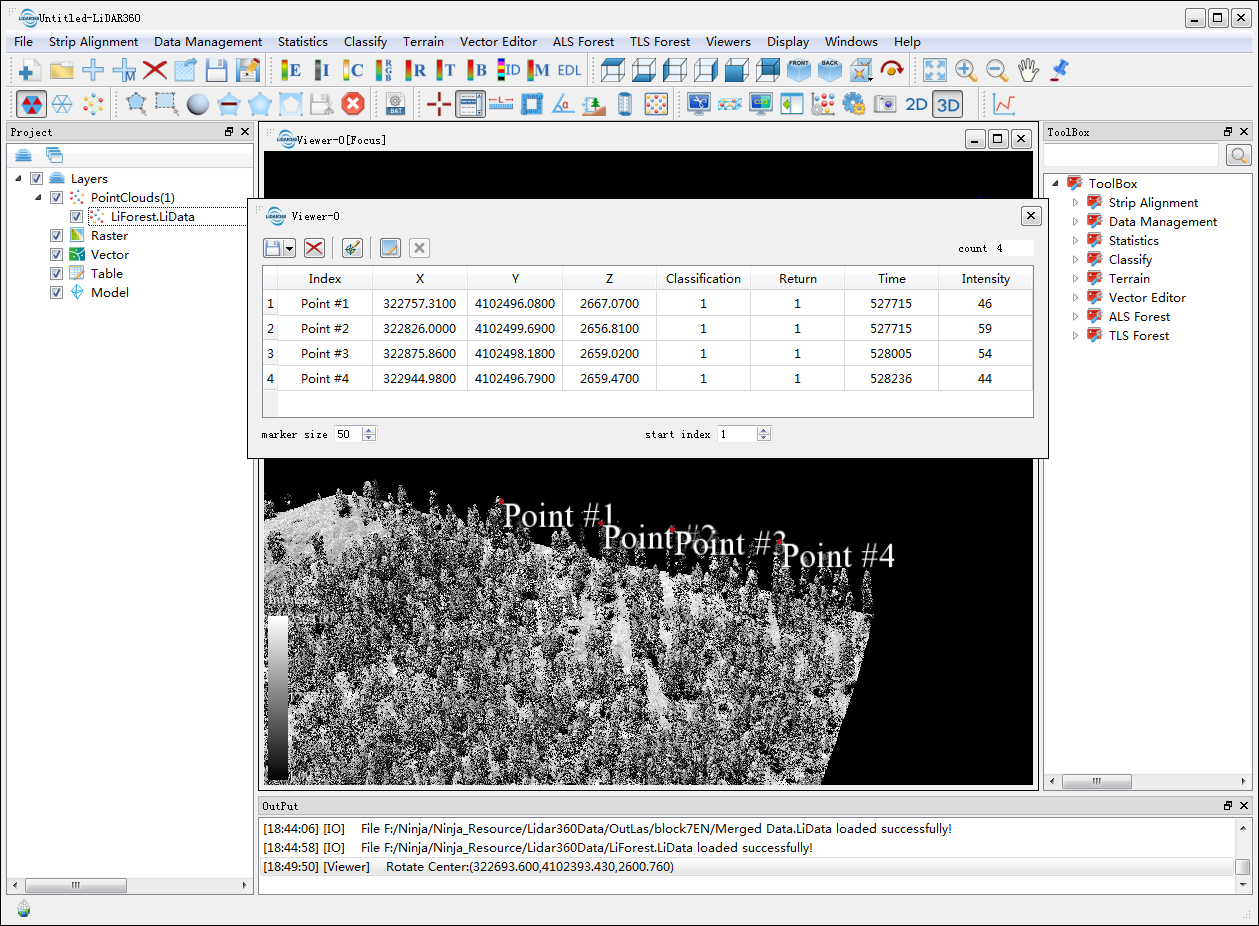
3.2 Multiple Point Selection
Click on the Multi Pick Point tool ![]() to pick multiple points. A Viewer window will pop up to show selected points.
Double click on a point in the Viewer window to fly to it.
to pick multiple points. A Viewer window will pop up to show selected points.
Double click on a point in the Viewer window to fly to it.
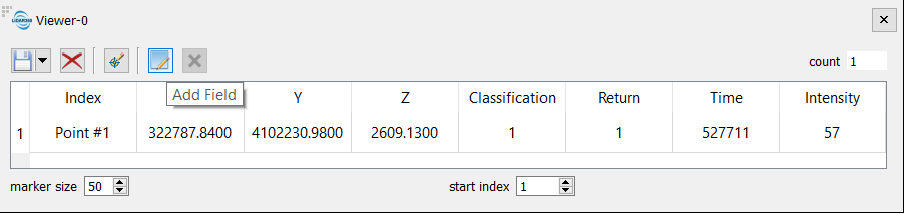
Use the Add Field tool ![]() to add custom fields to your data.
to add custom fields to your data.
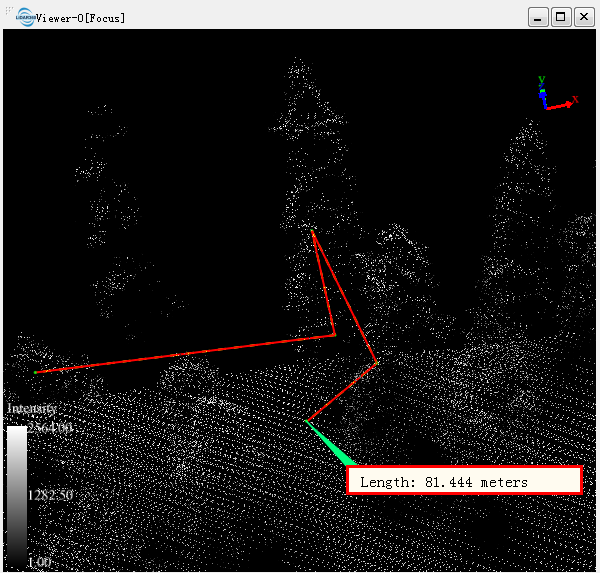
3.3 Distance Measurement
Click on the Length Measurement tool ![]() and then click on two or more data points to measure the total distance along the measured path. Double click to complete measurement.
and then click on two or more data points to measure the total distance along the measured path. Double click to complete measurement.
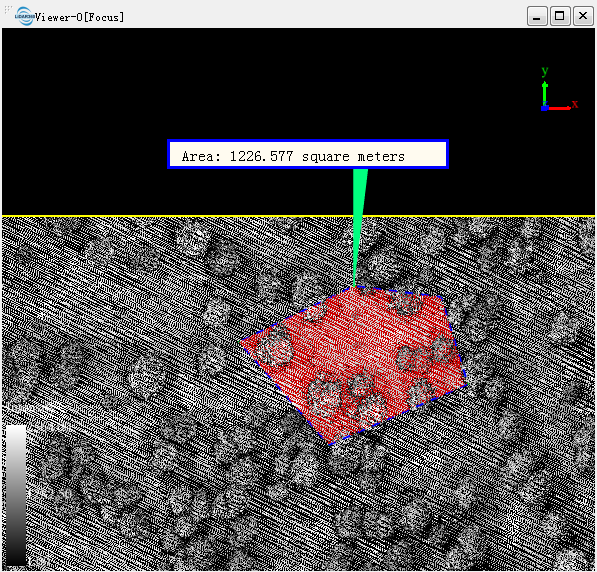
3.4 Area Measurement
Click on the Area Measurement tool ![]() to find the display switches to a top view, allowing you to define a measurement area in the 2D display by left clicking. The area measurement result will keep updating as you add vertices to the measurement polygon. Double click to complete the area measurement polygon.
to find the display switches to a top view, allowing you to define a measurement area in the 2D display by left clicking. The area measurement result will keep updating as you add vertices to the measurement polygon. Double click to complete the area measurement polygon.
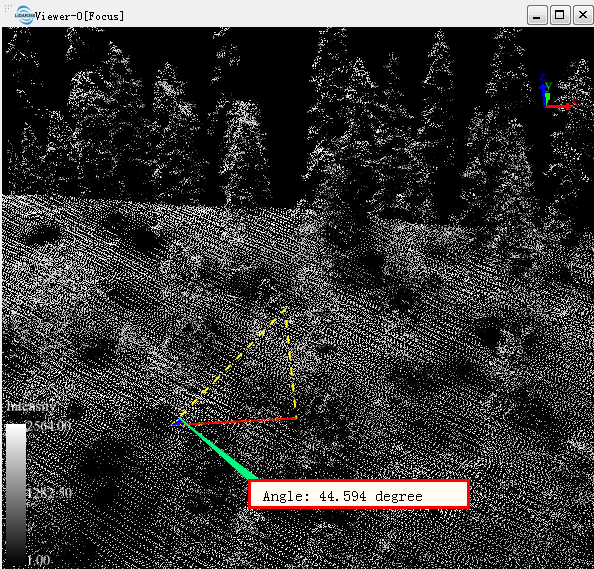
3.5 Angle Measurement
Use the Angle Measurement tool ![]() to measure angles between data points.
to measure angles between data points.
When in 2D view, left click on intended data points to define an angle to be measured, double click to complete. This measures the defined angle in a horizontal plane.

When in 3D view, click on two data points to measure the angle between them in a vertical plane.
3.6 Height Measurement
Height Measurement tool ![]() is only enabled in 3D view. Click on a data point to start, move around to other points to see the height measurement change, and then double click on an end point to complete the measurement.
is only enabled in 3D view. Click on a data point to start, move around to other points to see the height measurement change, and then double click on an end point to complete the measurement.
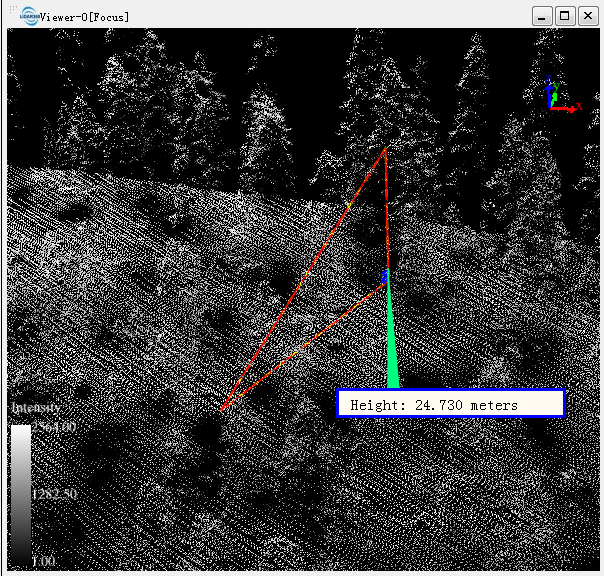
Try rotating or moving the point cloud loaded into the Viewer of [Focus] if the measurement text box is blocking a point to be included in the taking of a height measurement.
3.7 Volume Measurement
Click on Volume Measurement tool ![]() , then click on intended data points to define a measurement boundary. Double clicking to complete the area and this will bring up the Volume Measurement window. Set measurement parameters as needed and then click Compute to see the results.
, then click on intended data points to define a measurement boundary. Double clicking to complete the area and this will bring up the Volume Measurement window. Set measurement parameters as needed and then click Compute to see the results.
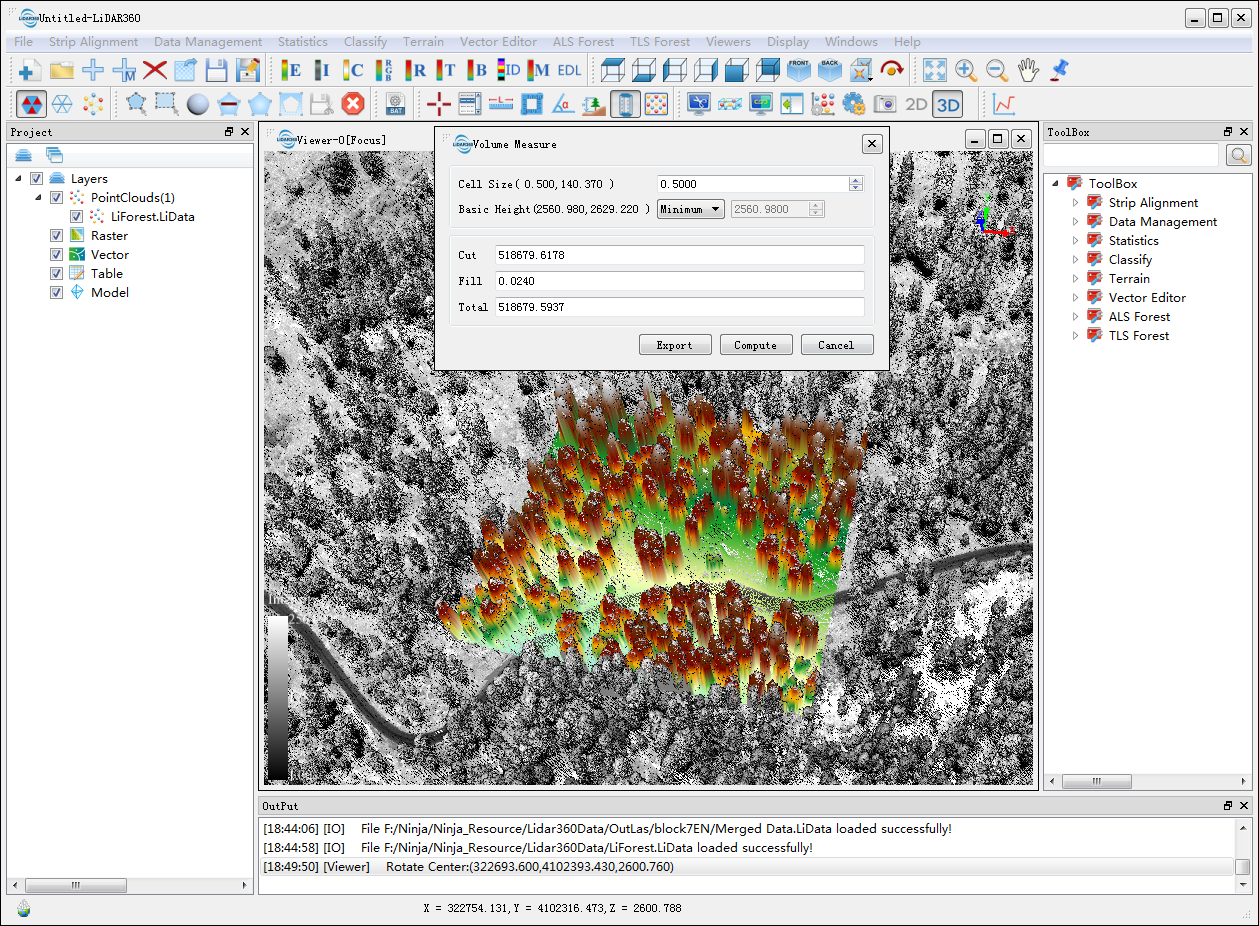
Working in a top view with View Mode set to Orthogonal Projection may make it easier to define a boundary.
The reference plane of volume calculation is defined together by your specified boundary and height. The resulting Cut and Fill volumes are relative to the reference plane.
3.8 Density Measurement
Click on the Density Measurement tool ![]() , the display will switch to a 2D View and the Density Measurement window will appear. Set the Width value to 25, and then click on the center of the intended area to make a measurement in a 25 x 25 square window.
, the display will switch to a 2D View and the Density Measurement window will appear. Set the Width value to 25, and then click on the center of the intended area to make a measurement in a 25 x 25 square window.
