How to: Process a Sub-session of A Scan Project in LiBackpack-Desktop
In LiBackpack-Desktop post-processing, it is necessary to only process a sub-session of a scan under circumstances including but not limited to these: a small session of the point cloud is incorrect due to SLAM failure, lost laser data, or other reasons and needs to be deleted from the overall point cloud (Image 1); an area is scanned more than once and the point cloud becomes ‘fuzzy’ due to less satisfied point cloud matching. This article illustrates the steps to select a sub-session of a LiBackpack scan project to process in LiBackpack-Desktop using these two parameters – Start Scan Frame ID and End Scan Frame ID. The Start Scan Frame ID and End Scan Frame ID define the session of point cloud that will be processed in LiBackpack-Desktop.
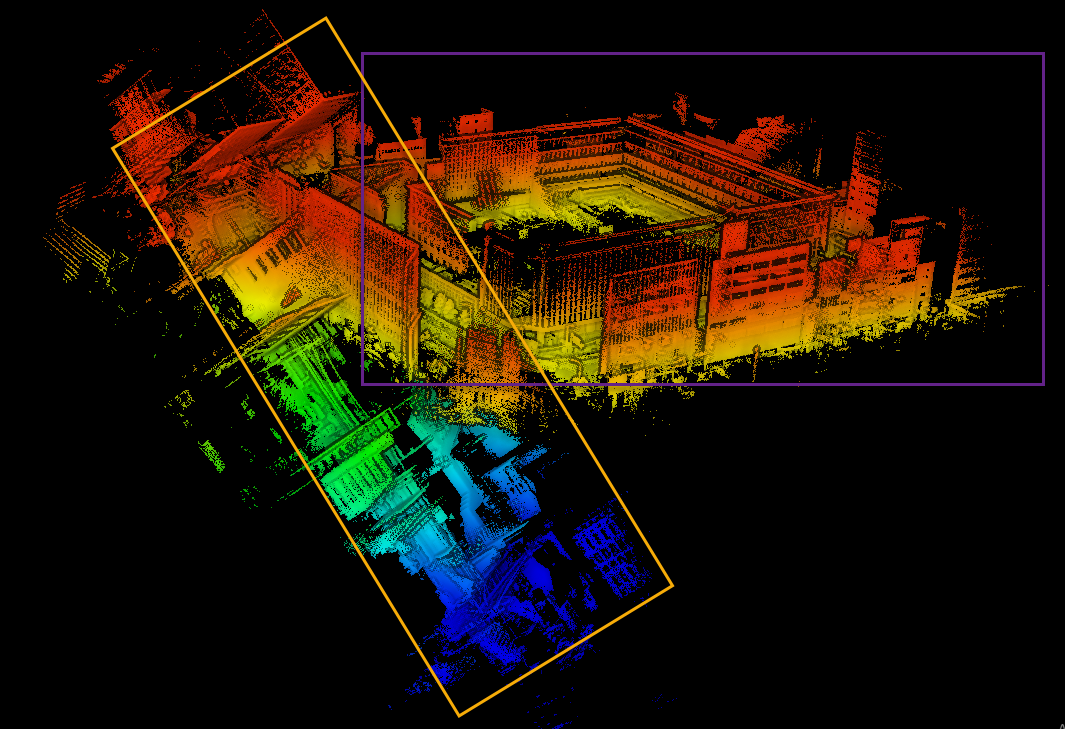
Session 1 (purple, 1st floor of the building) and session 2 (yellow, 2nd floor of the building) in this point cloud are both correct independently. But SLAM failed at the location where they connect due to missing laser data, and therefore causes session 2 to drift. Therefore, the 1st session and the 2nd session can be processed separately and stitched together afterward to re-generate the overall point cloud.
Step 1: Process the entire project
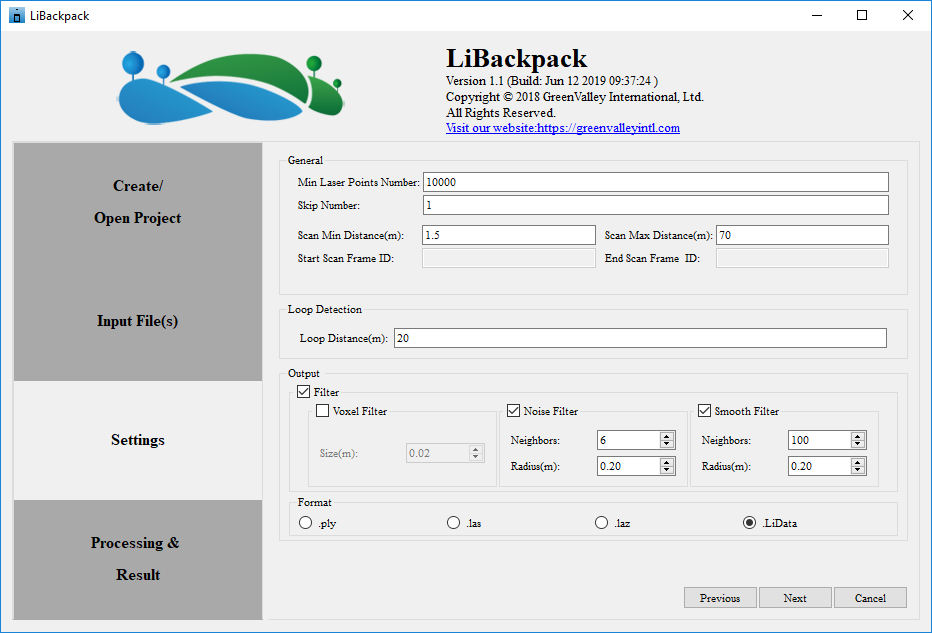
Errors are usually not identified until the entire project is processed and the output point cloud is looked at. The first time processing a scan project, Start Scan Frame ID and End Scan Frame ID are by default grayed out, which means the entire scan will be processed.
Step 2: Identify the start and end frame ID of the sub-session to process
After LiBackpack-Desktop finishes processing in Step 1, look at the output point cloud in LiDAR360 and identify if reprocess is necessary. If yes, find the *_result_trajectory.txt file in the project folder, and drag and drop it to LiDAR360 to open:
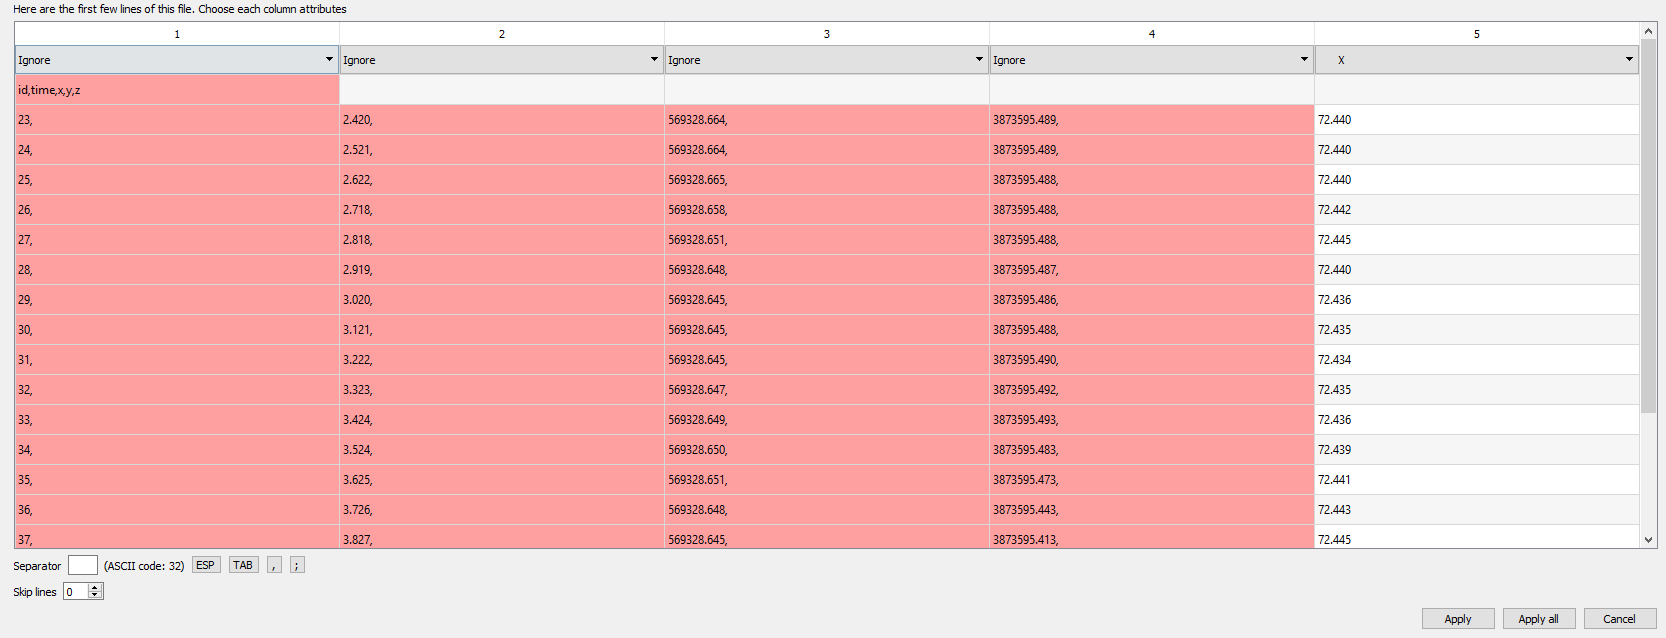
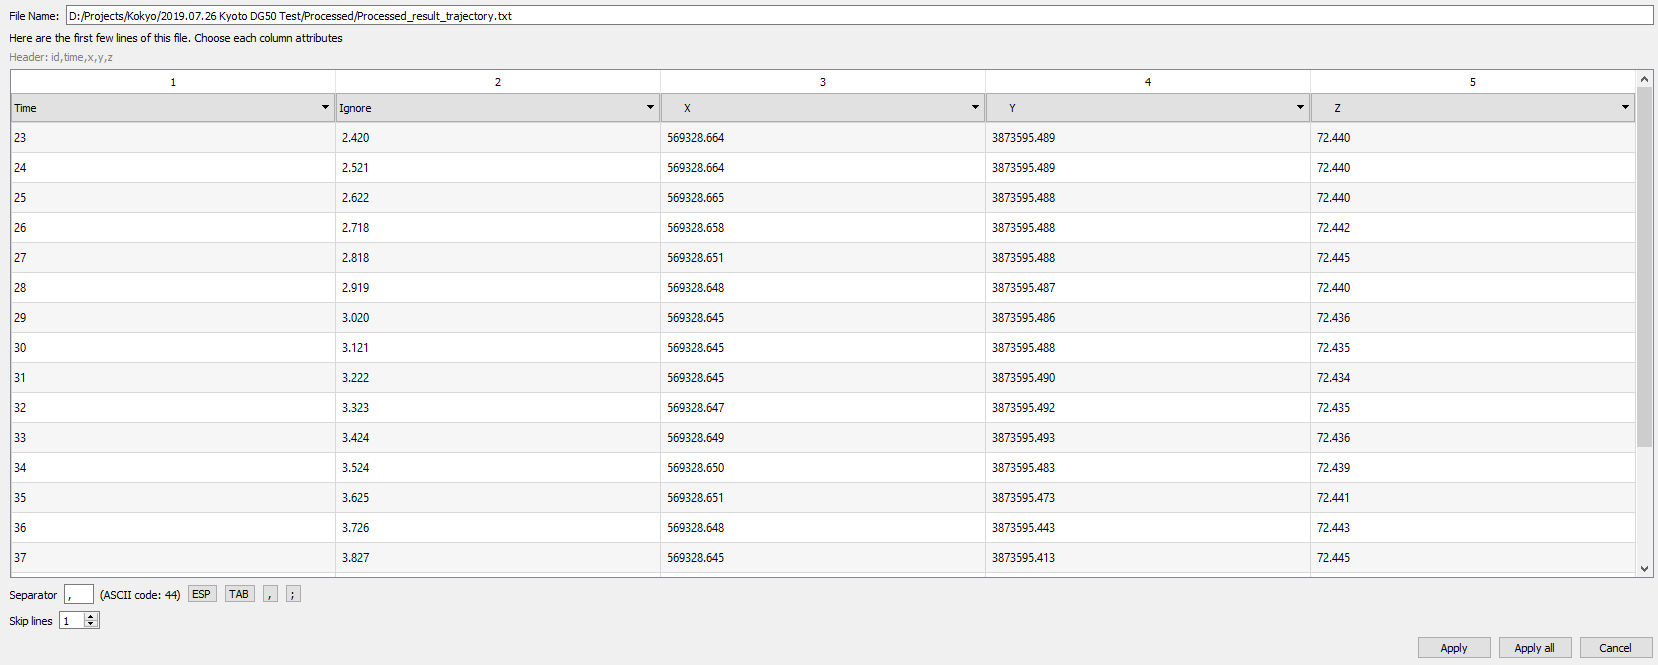
In the pop-up above, set Separator to be ‘,’, Skip lines to be ‘1’, the header of columns to be: ‘Time’, ‘Ignore’, ‘X’, ‘Y’, ‘Z’. Click ‘Apply’ to add.
The scanning trajectory will be displayed as line of points in LiDAR360. Each point represents the location of one scan frame. Use the Pick Point tool in LiDAR360 to identify the attribute of the frame at which you want to split the point cloud. For example:
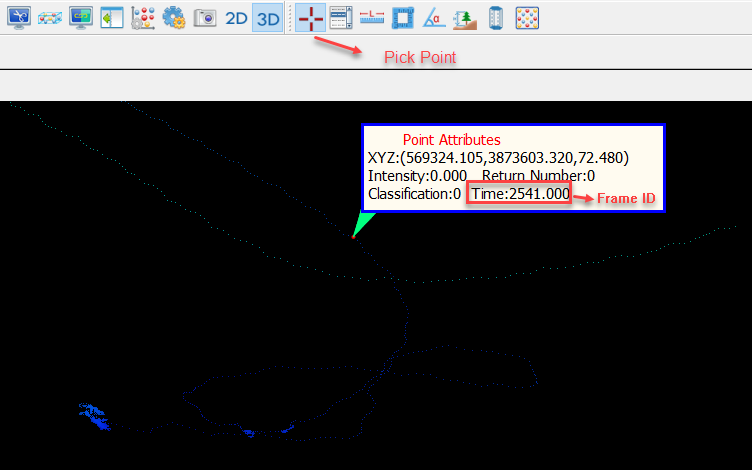
If it is a session in the middle of the scan that you want to process, you would need to identify the start frame ID and the end frame ID.
Step 3: Re-process the project
Launch LiBackpack-Desktop again if you have closed it. In Project Directory, select the previous project folder.
Note: To avoid overwriting the results from the previous run, please copy the _result.LiData point cloud dataset and the _result_trajectory.txt to another folder.
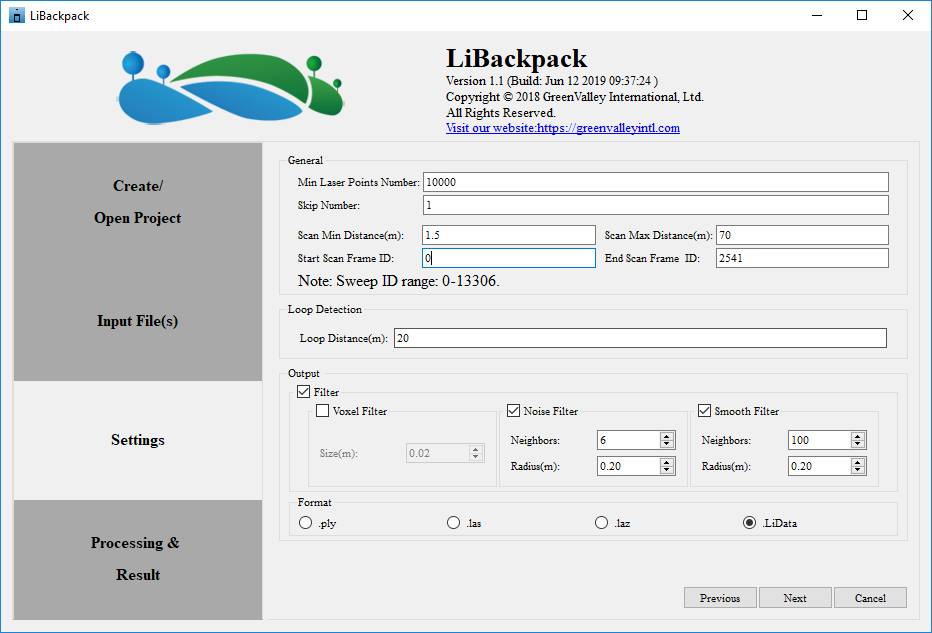
In Settings, enter the Start Scan Frame ID and the End Scan Frame ID identified in Step 2. In the example below, the frames between the start of the scan and frame 2541 will be processed. Start the process again.
Step 4: Stitch sessions together in LiFuser
As in the example in Image 1, if the purpose of re-processing two sub-sessions is to delete a small part in-between to fix data drifting issue, the two sub-sessions need to be stitched together afterward. The Registration tool in LiFuser can be used to stitch point clouds with overlaps together. Please refer to the Registration chapter in LiFuser User Guide for detailed guides.