The tutorial describes the detailed workflow for 3D fusion modeling using point cloud data and panoramic images, applicable only to LiGrip series H300 and H120. After generating point cloud data, trajectory file, image pose file, and panoramic images using GreenValley software, you can follow this tutorial to proceed with 3D modeling.
1. Preparations
1.1. Software
▪ Photoshop
▪ Metashape
1.2. Data
▪ Point cloud data
▪ Panoramic images
▪ Trajectory file (xx_result_trajectory.txt)
▪ Pose file of images (imglist.txt)
2. Steps
2.1. Export Point Cloud Data in LAS Format
First, convert the point cloud data to LAS format.
2.2. Create Mask Files
Open the Img folder in the SLAM project folder, select an image and import it into Photoshop software. Use Polygonal Lasso Tool to select and fill the device and person areas with black, and fill the remaining areas with white. Then export the file as Mask.jpg.
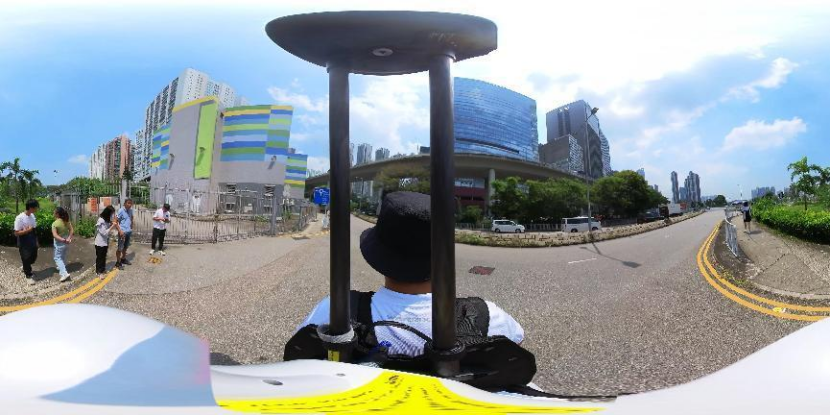
Figure 1 Select a panoramic image

Figure 2 Create the mask file
2.3. Prepare Pose File of Images
Make a copy of imglist.txt in the SLAM project folder and open it with Notepad, click Edit > Replace, enter Img// in the Find what field, click Replace All, save the copied file and rename it. In this example, name it "imglist - Model.txt". The filePath column has changed before and after the replacement.

Figure 3 Before the replacement

Figure 4 After the replacement
2.4. Add Photos
Open Metashape software, Click Workflow > Add Photos, select all the photos in the Img folder.
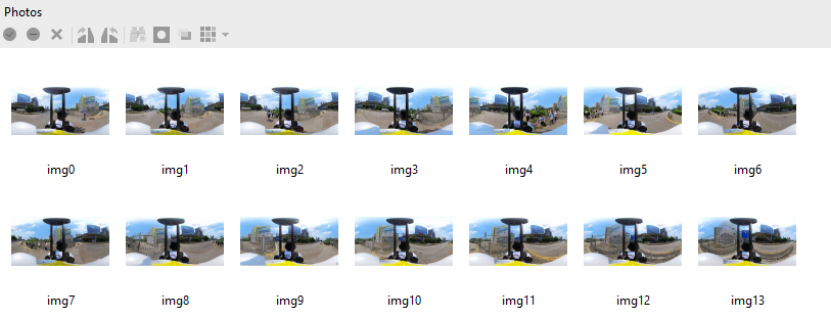
Figure 5 Add photos
2.5. Import Pose File of Images
In Metashape software, click File > Import > Import Reference, select image - Model.txt created in step 2.3 (Prepare Pose File of Images), define coordinate system, delimiter, columns, and starting line, and click OK.
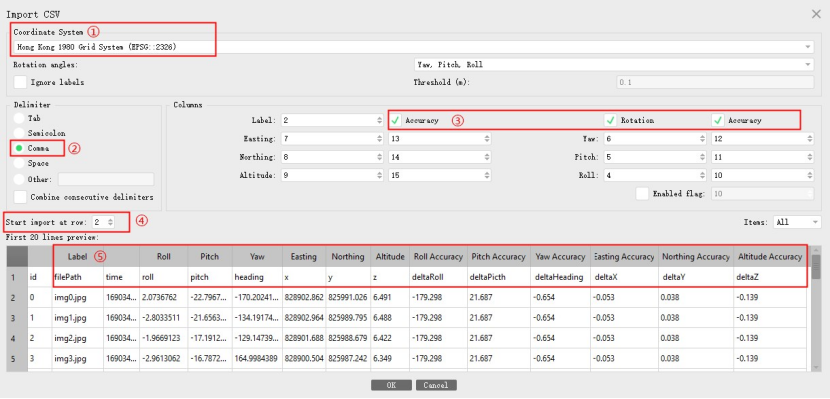
Figure 6 Define settings
After successful import, locate Reference, click Settings, modify the Camera accuracy (m) value to 0.1, and click OK.
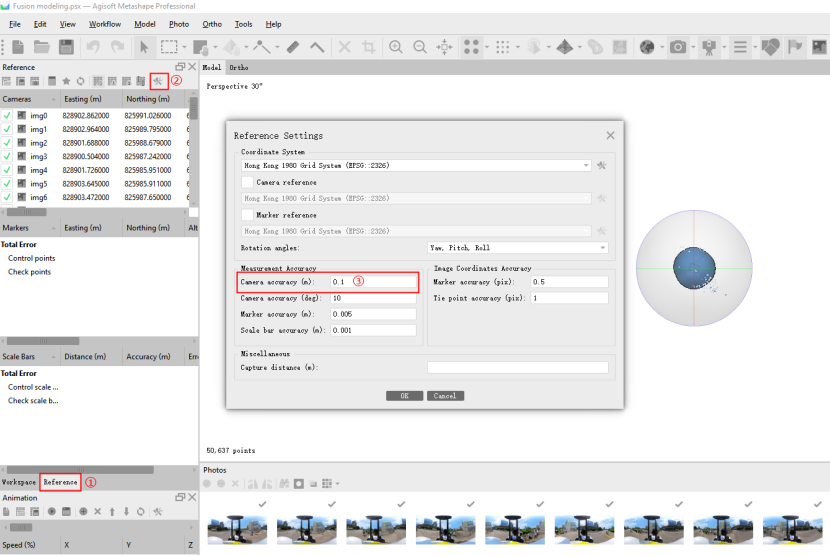

Figure 7 Modify Camera accuracy (m) value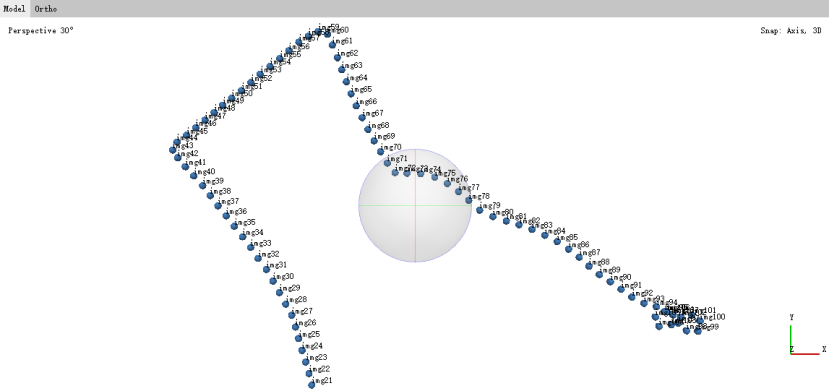
Figure 8 Import Reference
2.6. Camera Calibration
In Metashape software, click Tools > Camera Calibration, select Spherical as Camera type, and then click OK.
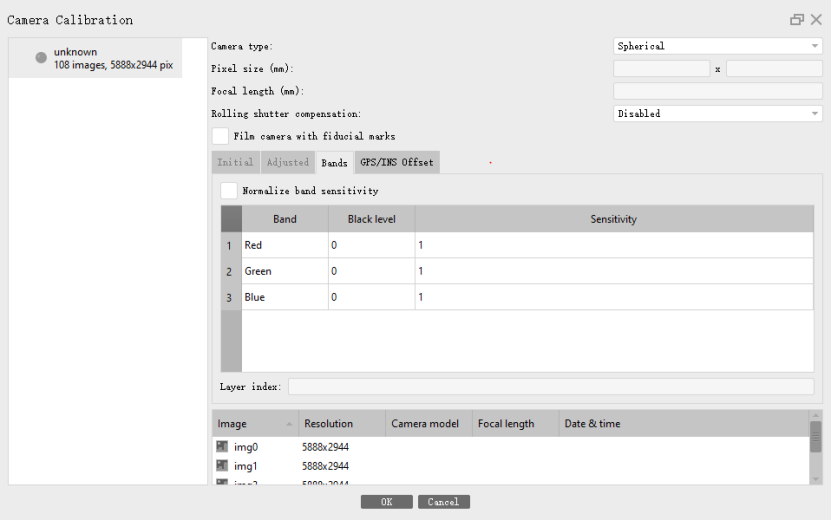
Figure 9 Select Spherical as Camera type
2.7. Import Masks
In Metashape software, click File > Import > Import Masks, select From File as Method, and enter {filename}.jpg as Filename template, then click OK and select the Mask folder created in step 2.2 (Make mask files).
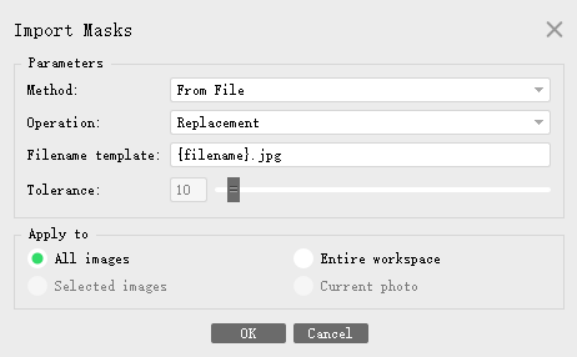
Figure 10 Import Masks
Click Show Masks button to see the effect of mask files.
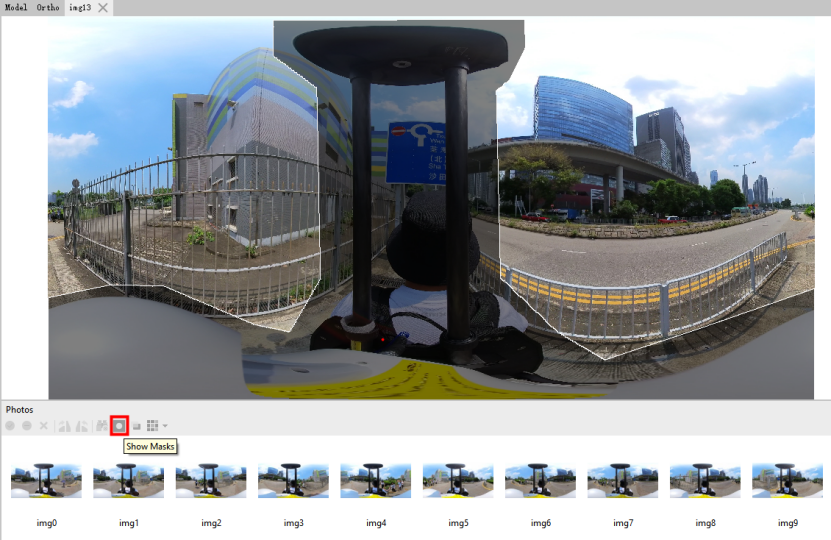
Figure 11 Show Masks
2.8. Align Photos
In Metashape software, click Workflow > Align Photos, apply mask to Key points in the drop-down menu of Advanced options and then click OK.
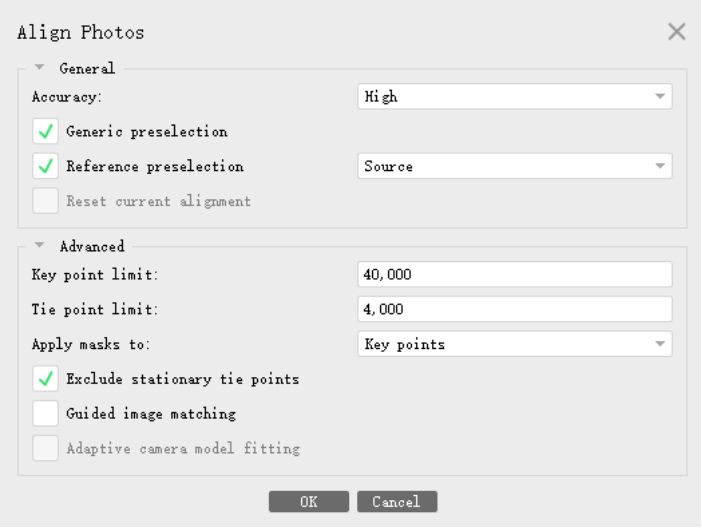
Figure 12 Align Photos
After alignment, each photo has a check mark in the upper right corner.
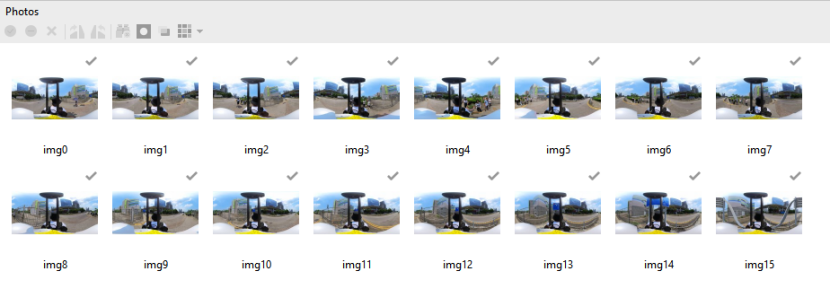
Figure 13 After alignment
2.9. Import Trajectory
In Metashape software, click File > Import > Import Trajectory, select xx_result_trajectory.txt file in the SLAM project folder, define coordinate system, delimiter, columns, and starting line.
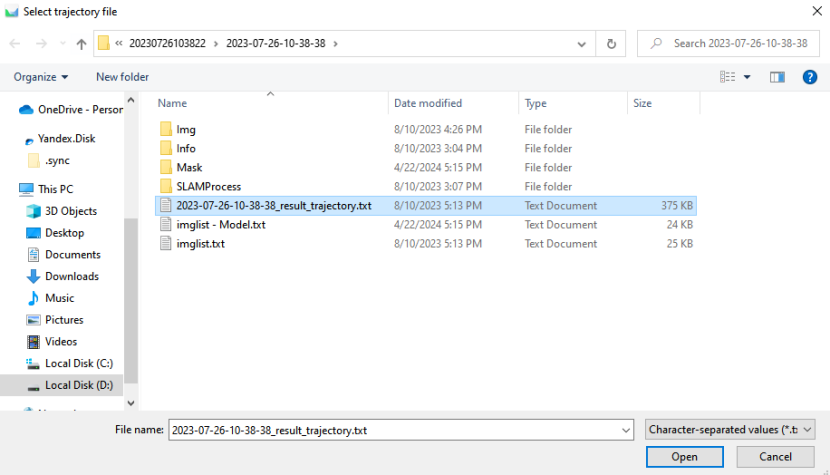
Figure 14 Select trajectory file
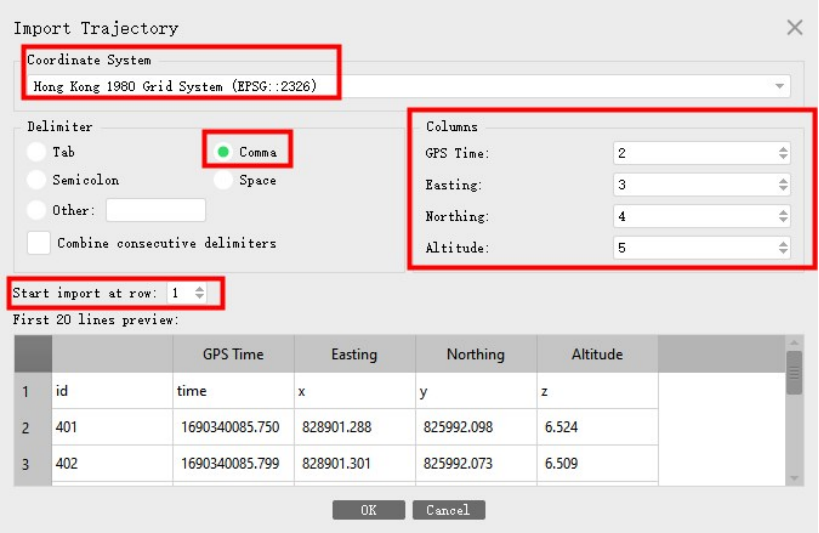
Figure 15 Import Trajectory
2.10. Import Point Cloud
In Metashape software, click File > Import > Import Point Cloud, select the las file, define the coordinate system, and click OK.
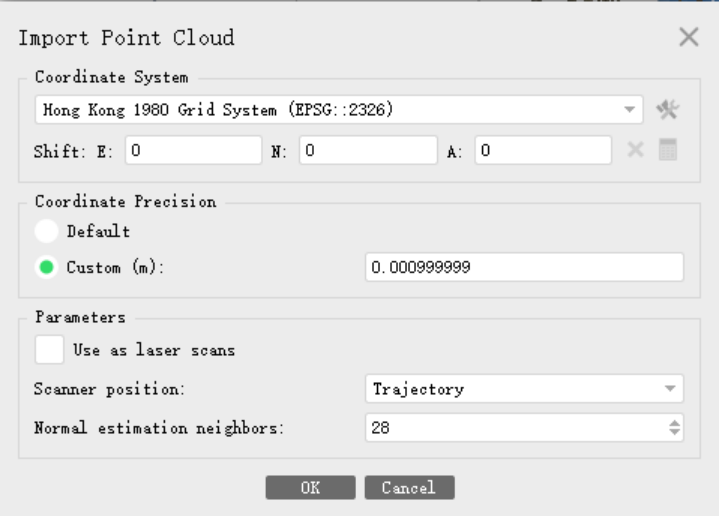
Figure 16 Import Point Cloud
2.11. Build Tiled Model
Before building the model, save the current project as PSX format in Metashape software, then click Workflow > Build Tiled model, select Point cloud as Source data, set Tile size to 2048, and click OK.
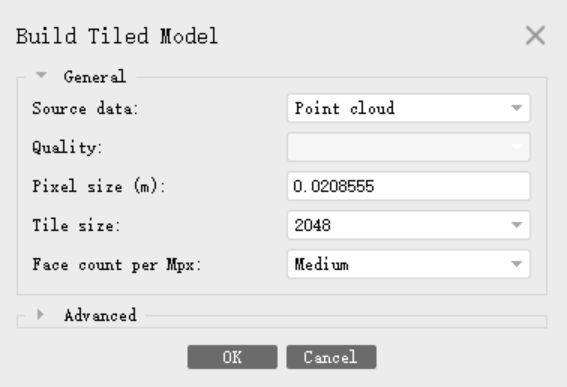
Figure 17 Build Tiled model
2.12. Check Model
Double-click on the Tilt model in the left workspace of Metashape software to check the model effect.
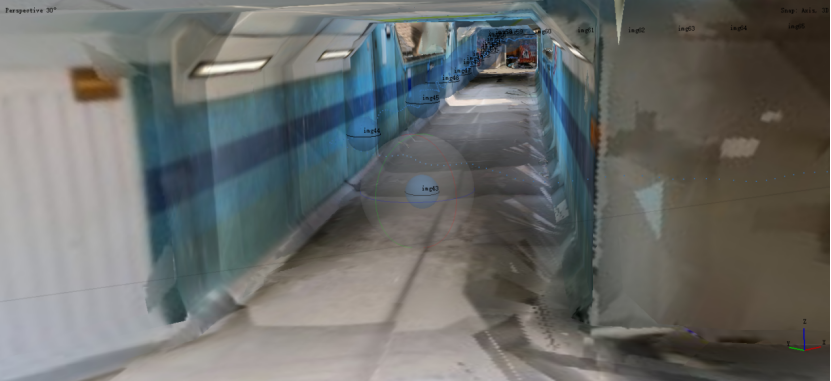
Figure 18 Sample model
