How to: Get More Ground Points in the ‘Classify Ground Points’ Function?
Classifying ground points with high density is necessary for generating high-resolution DEM and contours in high accuracy. The amount of ground points classified by ‘Classify Ground Points’ tool in LiDAR360 using default parameter settings might not be enough due to the variations in slope, vegetation coverage and so on. Here, we introduce how to adjust the parameter settings of ‘Classify Ground Points’ tool to get more ground points in the classification result.
The algorithm of ‘Classify Ground Points’ first generates a sparse triangulated irregular network (TIN) through seed points, and then iteratively densifies the seed points layer-by-layer until all ground points have been classified. The major parameters that can affect the amount of ground points being classified and can be adjusted to achieve the goal of getting more ground points include Max Building Size, Iteration Angle, Iteration Distance, and Stop Triangulation When Edge Length Less Than (a certain number).
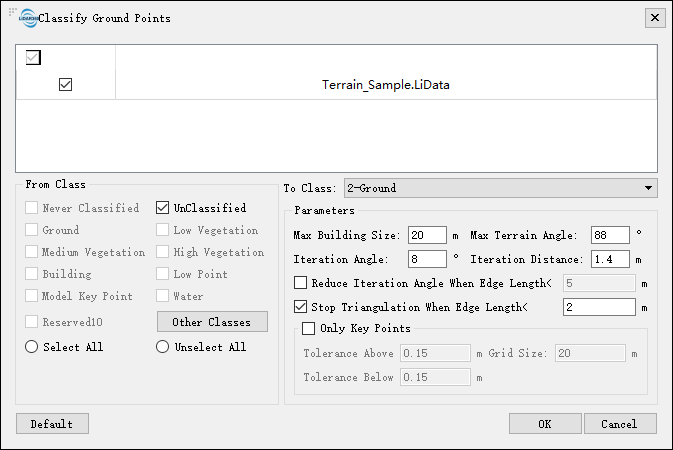
Figure 1. Settings for Classify Ground Points
Max. Building Size does not only influence the correctness of excluding building from ground points, but also influences the number of initial seed points. The smaller this value is, the more seed ground points there will be. As a result, the more likely you will get more ground points in the result. This value should be adjusted to the maximum length of the largest building in the point cloud. If there is no building in the area, this parameter can be set to 1 meter.
2. Iteration Angle and Iteration DistanceThese two parameters are related to the ground points filtering. As shown in the following figure, V1, V2, and V3 are the vertexes of the triangulated network. To determine whether point P is a ground point, the algorithm will calculate the distance d from point P to plane V1V2V3 and the angle α1, α2, and α3. If d is smaller than the iteration distance and the maximum value in α1, α2, and α3 is smaller than the iteration angle, P will be defined as a ground point. Thus, if users enter a larger integration angle and iteration distance, the amount of ground points can be obtained will increase.
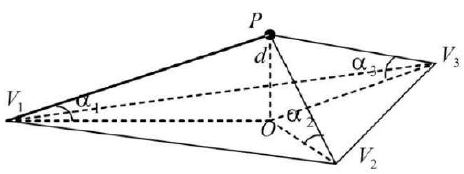
Figure 2. Iteration Angle and Iteration Distance
If the scanning area is mountainous (e.g. undulating topography), the increases in these two parameters will decrease omission in the result. But if these two parameters increase excessively, commission will increase as well. Users need to find a balance to determine these two parameters.
3. Stop Triangulation When Edge Length <Adjusting this parameter is one of the most effective method to increase the amount of ground points. If this option is checked, this parameter will define the ending condition for densifying ground points. The algorithm will stop building new triangulated network only when the edge of the triangle is less than the defined value or when no more points can be added to the current network. The smaller this parameter is, the more iterations the algorithm will run. As a result, the more ground points you will get in the result, and in the meantime the longer the processing time is.
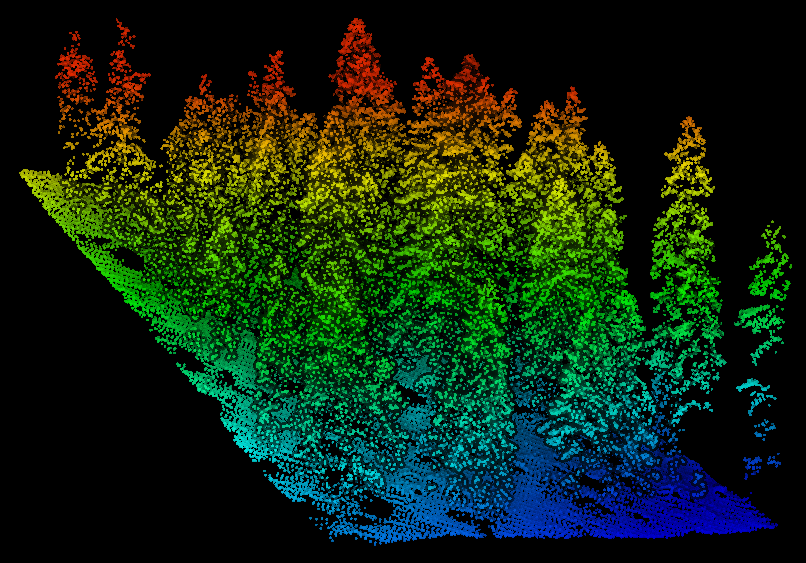
Figure 3. Study Area
Here is a comparison of the amount of ground points classified using default parameters and when one parameter is adjusted while the others are kept unchanged. The 80m*75m study plot was clipped from a mountainous point cloud. There are 107,823 points in total. And the result is shown in the following table:
| Number of Ground Points | Rate of Increase | |
| All Default* | 13591 | N/A |
| Max. Building Size 1 m |
14001 | 3.0% |
| Iteration Angle and Iteration Distance 20° and 2 meters |
16976 | 24.9% |
| Stop Triangulation When Edge Length < 0.5 meters |
19542 | 43.8% |